2 Days in Arches National Park: The Only Itinerary You’ll Need
Thinking about visiting Arches National Park, but not sure if two days is enough? I’ve got good news… it totally is. And I’m going to walk you through exactly how to make the most of it.
I’ve explored Arches and the surrounding Moab area three different times now, and I’ve covered just about every trail and viewpoint in the park. It’s small but packed with jaw-dropping scenery, and after a few visits, I’ve figured out the best way to see all the highlights without wasting time.
This Arches National Park Itinerary is perfect if it’s your first time here or you’re just trying to hit the must-sees in a short amount of time.
I’ll show you the exact itinerary to follow, what to pack, when to arrive, and how to avoid the crowds. You’ll get a mix of big-name sights and quiet, off-the-beaten-path stops.

Quick Guide To Planning Arches National Park
Short on time? Here’s a quick mini guide to help plan your adventure:
Requires Timed Entry:
Between 7 am and 4 pm daily, April 1 through October 31.
Best Time To Visit:
My personal favorite is February (no reservation, no crowds, most affordable!).
Where to Stay:
Arches National Park is located close to the small town of Moab in Utah, which is where you’ll find accommodations:
– Spring Hill Suites (Closest to Park)
– Red Cliffs Lodge (Best Views!)
– Hoodoo Moab (Luxury)
– Moab Rustic Inn (Budget)
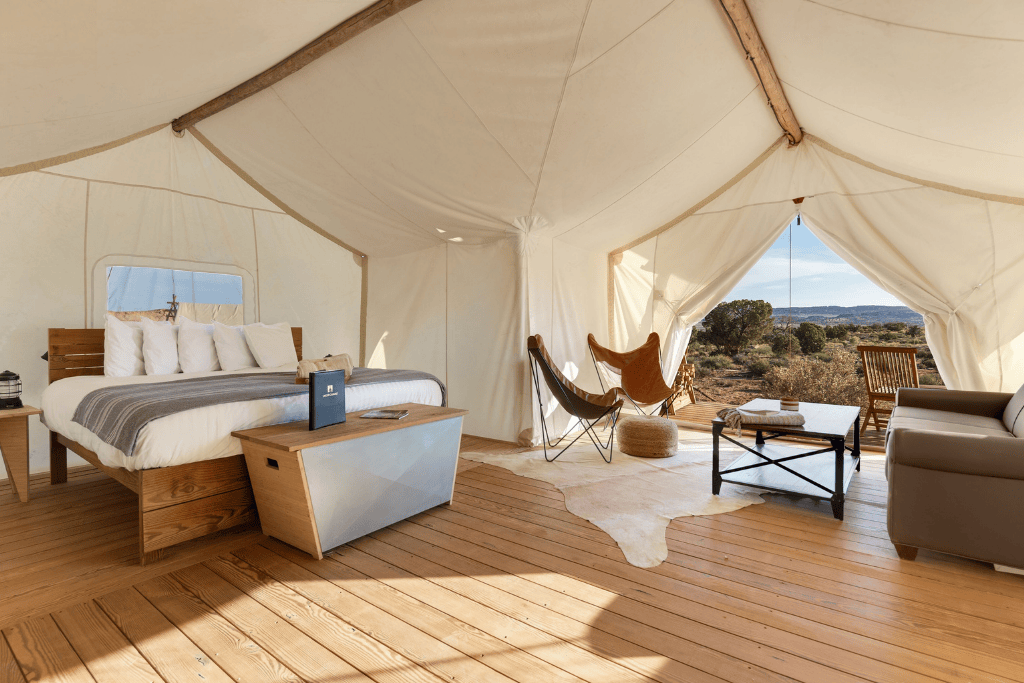
– Under Canvas Moab (Unique)
Camping:
Favorite Campgrounds: Kings Bottom or Goose Island
Best Things to Do:
– Drive Arches Scenic Drive
– Self-Guided Driving Audio Tour
– Go on a 4×4 Backcountry Tour
– Sunset at Delicate Arch
– Hike Devils Garden Loop Trail
Map Of This Arches National Park Itinerary
How to use this map: Tap the tab in the top left corner to check out the map layers. Click on any icon to get more details.
To save it for later, just click the star next to the map’s title to add it to your Google Maps account. To find it again, open Google Maps on your phone or computer, click the menu, then “saved,” then select Maps, and you’ll see this one in your list.

Your Perfect Two-Day Arches National Park Itinerary
Here’s how to fit the best sights into just two days without feeling rushed. This is based off of many trips, what worked (and what didn’t), and how I’d do it again.
Day 1: Windows & Turret Arch, Double Arch, Sand Dune & Broken Arch, Skyline Arch Trail, Delicate Arch
You’re going to hit some of the most iconic arches today. Plan on an early start, bring snacks, and don’t forget your water bottle.
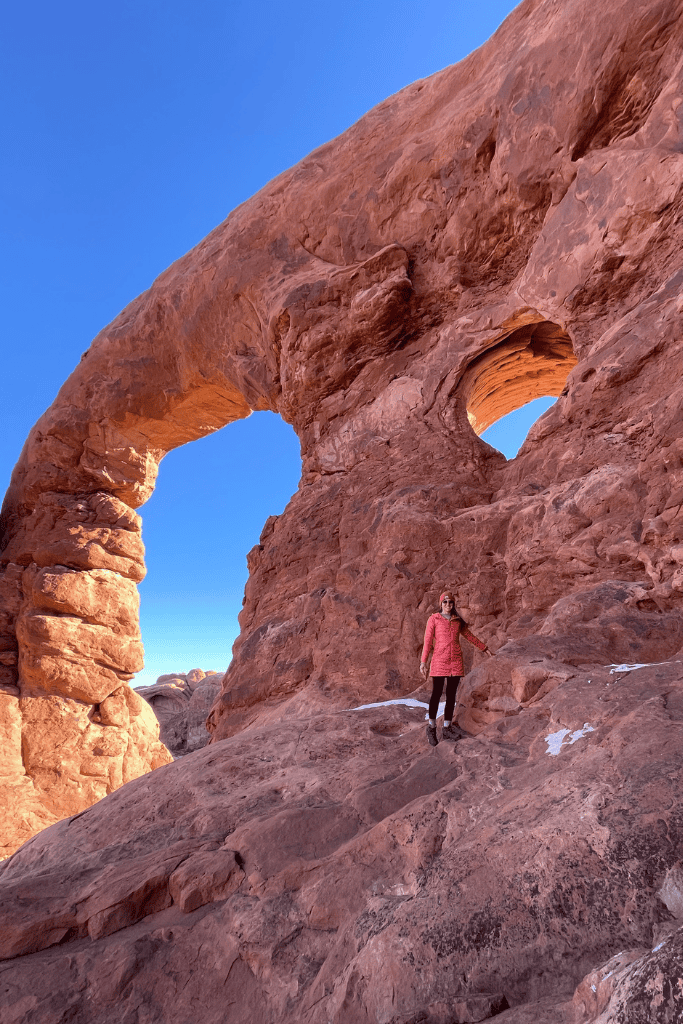
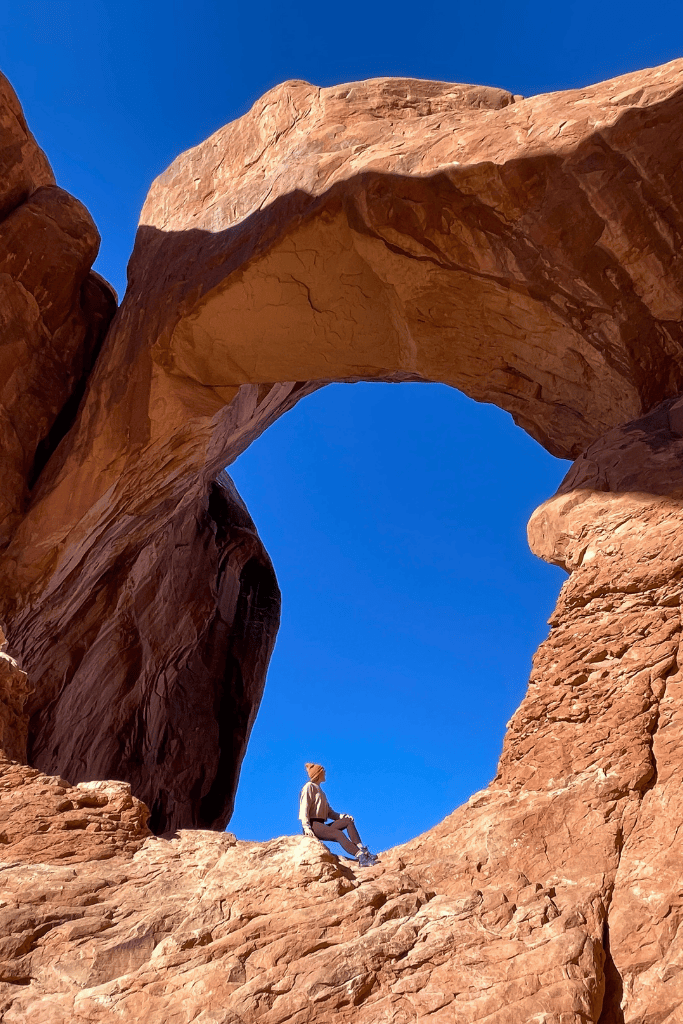
Watch the Sunrise from Windows & Turret Arch
During the summer, sunrise is around 6 am. So today will be an early start!
If you’re visiting during peak season and don’t want to be up that early, still try to get to the park before 7 am to beat the long line of cars. In February, I got there at 7 am and had no problem, but this is not the case during the summer.
Take the scenic road, then turn right onto Windows Road until it ends at a big parking lot. This is where you’ll find the North and South Windows and the Turret Arch. It’s a short loop trail, just 0.7 miles, and is easy to follow.
I spent about an hour here just exploring, taking photos, and soaking up the peaceful morning light. The red rock glows at sunrise, and having it mostly to myself was incredible.
Details:
- Driving Time: 25 minutes from park entrance
- Difficulty: Easy walking trails with some steps
- Time Allotted: 1 hour
Kate’s Tip: Climb behind the North Window for a cool photo of Turret Arch framed through it.
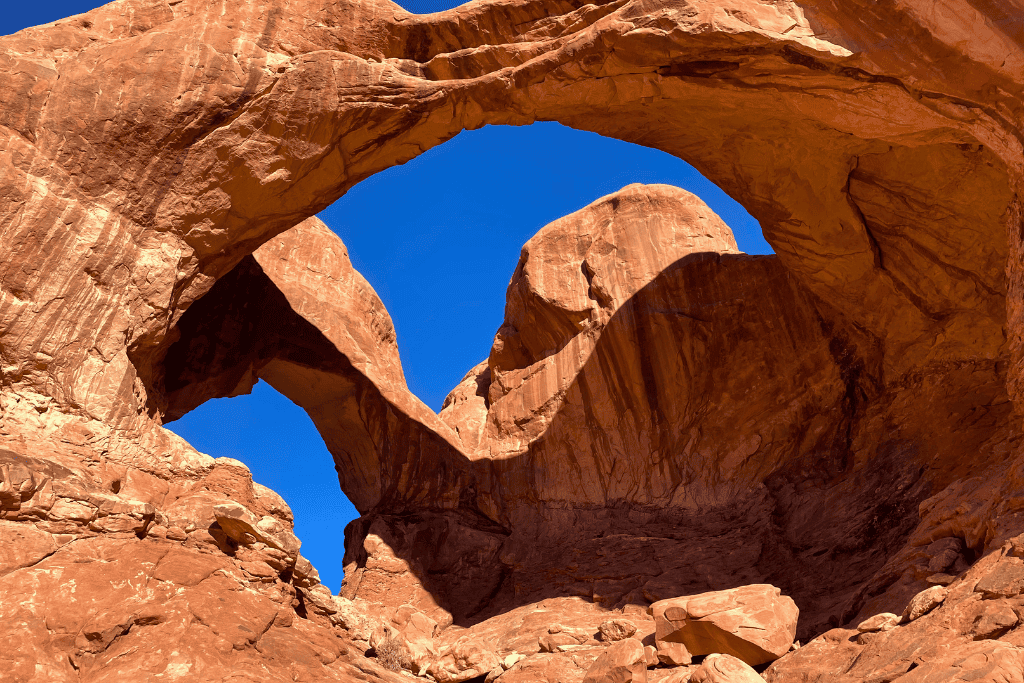
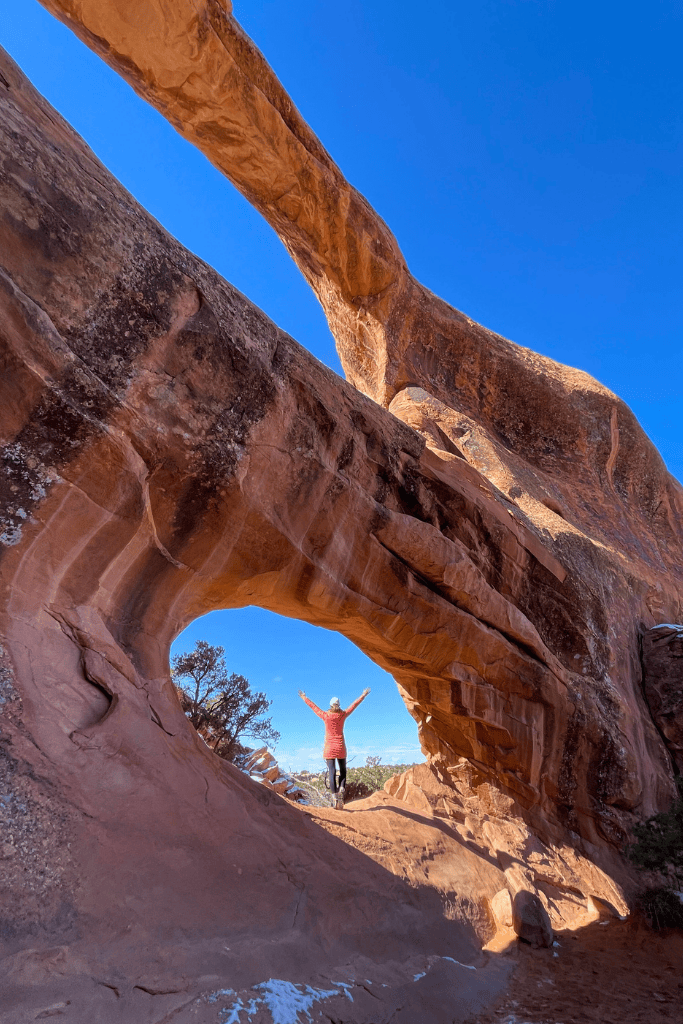
Cross the Lot to Double Arch
You don’t even have to move your car for this one. Just walk across to the parking lot to the other side, where the Double Arch trail begins.
This arch is one of the most popular and, honestly, one of my favorites in the park! When I visited in February, I actually got to have this arch all to myself for about 45 minutes! It was absolutely incredible!

The trail to the base of the arch is a relatively flat and easy 0.6-mile walk, but the highlight of this arch is climbing up and sitting under the giant arches and getting a bird ‘s-eye view of the park.
If you don’t feel comfortable doing a little scrambling or climbing, you can still really enjoy this massive arch from the path below.
You don’t need a lot of time to visit this arch (about 30 minutes), but I couldn’t pass up the solitude, so I lingered here for about an hour.
Details:
- Driving Time: None, same lot as Windows & Turret Arch
- Difficulty: Easy, flat dirt path
- Time Allotted: 1 hour
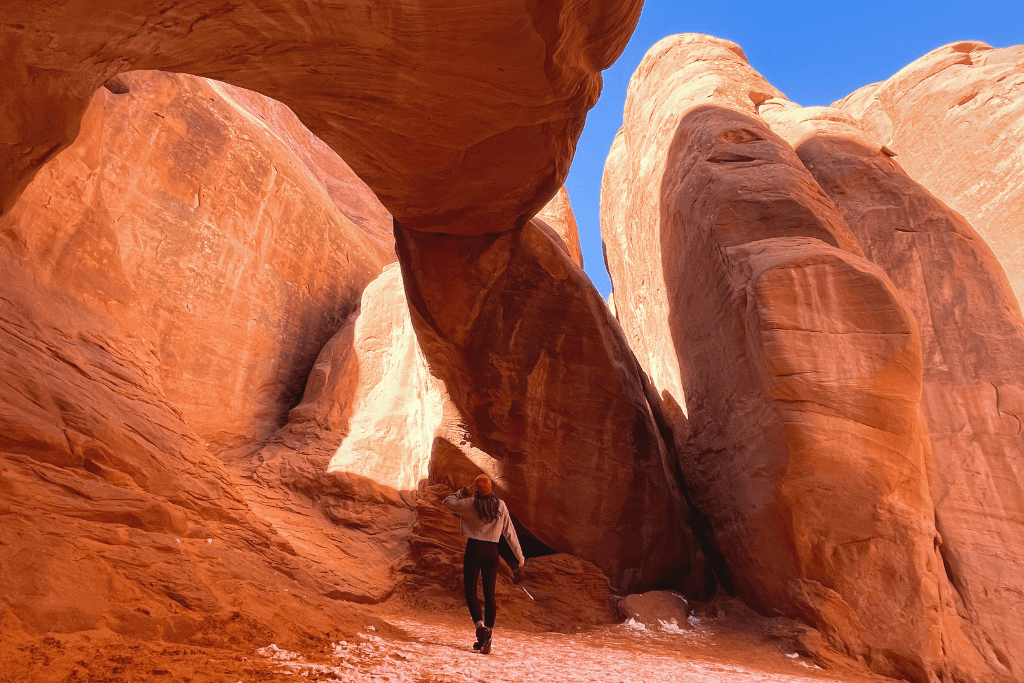
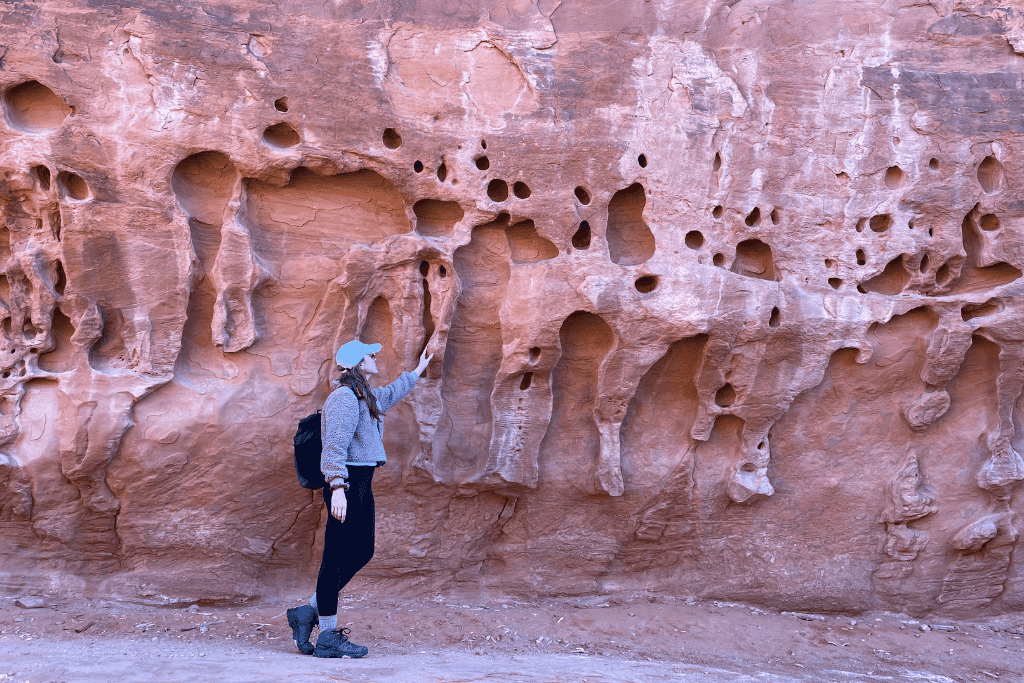
Explore the Sand Dune Arch & Its Fins
Your next stop is one of my favorite hidden gems… Sand Dune Arch!
What makes this arch so unique is that it’s tucked away between towering sandstone fins. You have to squeeze through narrow gaps to reach it.

I loved the deep, soft red sand surrounding it. Just be mindful of your camera gear. Tripods don’t always stay put in that deep sand (ask me how I know!).
There’s a designated parking lot right off the main road, and the walk to the arch is an easy 0.4-mile round trip.
Details:
- Driving Time: 16 minutes from Double Arch
- Difficulty: Easy, but deep sand
- Time Allotted: 30 minutes
Kate’s Tip: Combine this arch with the Broken Arch Trail for a fun, longer hike!
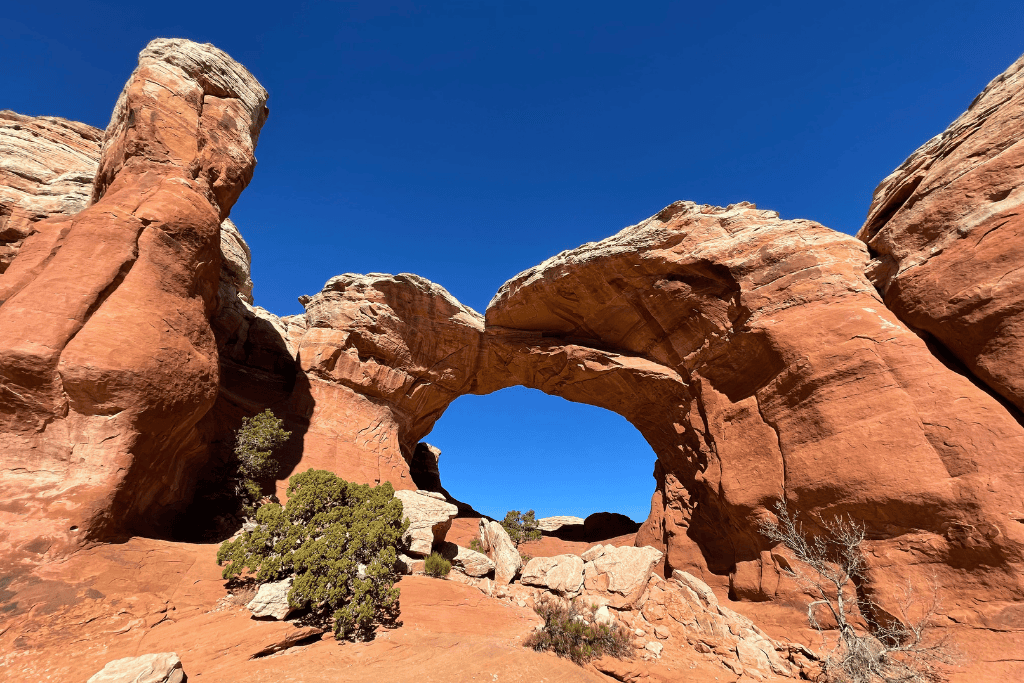
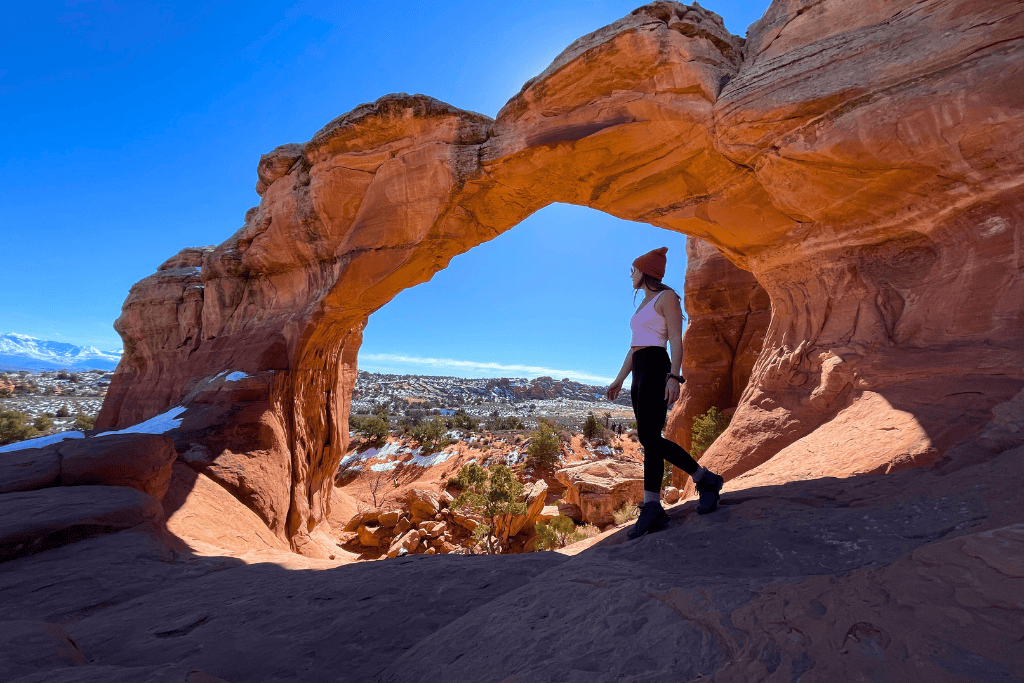
Broken Arch Loop Trail
This hike starts from the same parking lot and trailhead as Sand Dune Arch.
It’s a flat and easy 1.8-mile trail with incredible views. The biggest challenge you’ll have is the lack of shade, so plan accordingly, especially if you’re visiting in summer. When I did this trail in February, the sun was still intense!

Be sure to climb up and through to the back side of Broken Arch, where the views are really spectacular.
You can even continue another 0.5 miles to Tapestry Arch from here if you have the energy! I chose not too but I’d like to do the full loop the next time I go back.
Details:
- Driving Time: None, same parking lot as Sand Dune Arch
- Difficulty: Easy, but no shade
- Time Allotted: 1 hour
Kate’s Tip: Don’t miss the bonus hike to Tapestry Arch from Broken Arch. You’ll find the trail from the back side of Broken Arch.
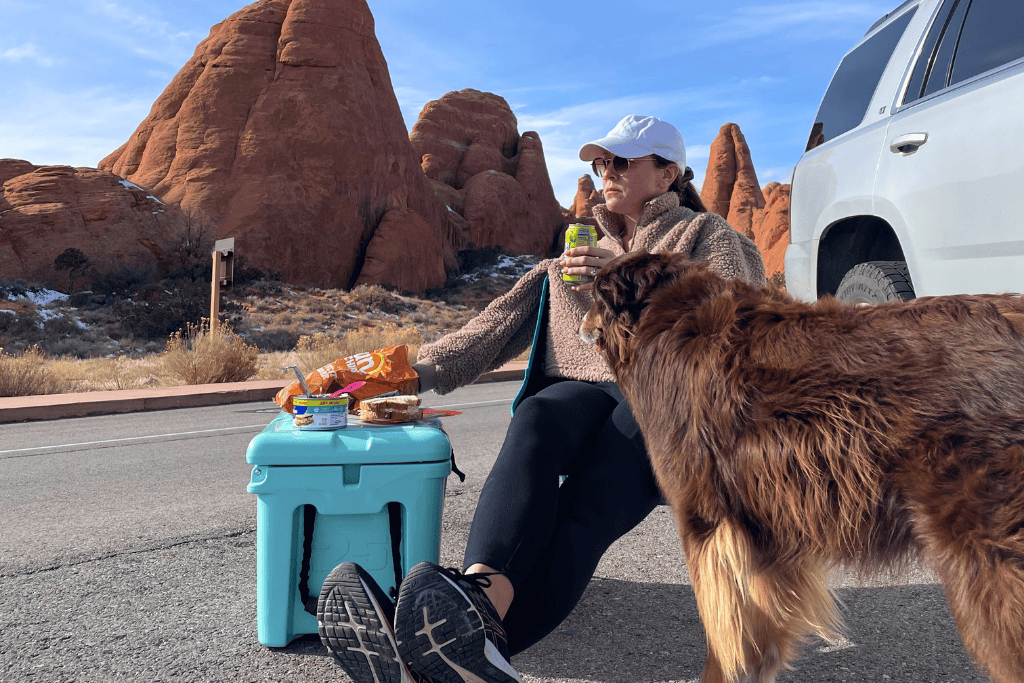
Lunch Break
By now, you’re probably ready for a break. This is the perfect time for a picnic lunch!
There are no restaurants or food services inside Arches National Park, and driving back to Moab means waiting in line again at the entrance. I recommend packing a cooler with snacks and lunch.
I ate mine right from the Sand Dune Arch parking lot, sitting in my packable camp chair with a view of the red rocks. But honestly, any quiet scenic spot will do.
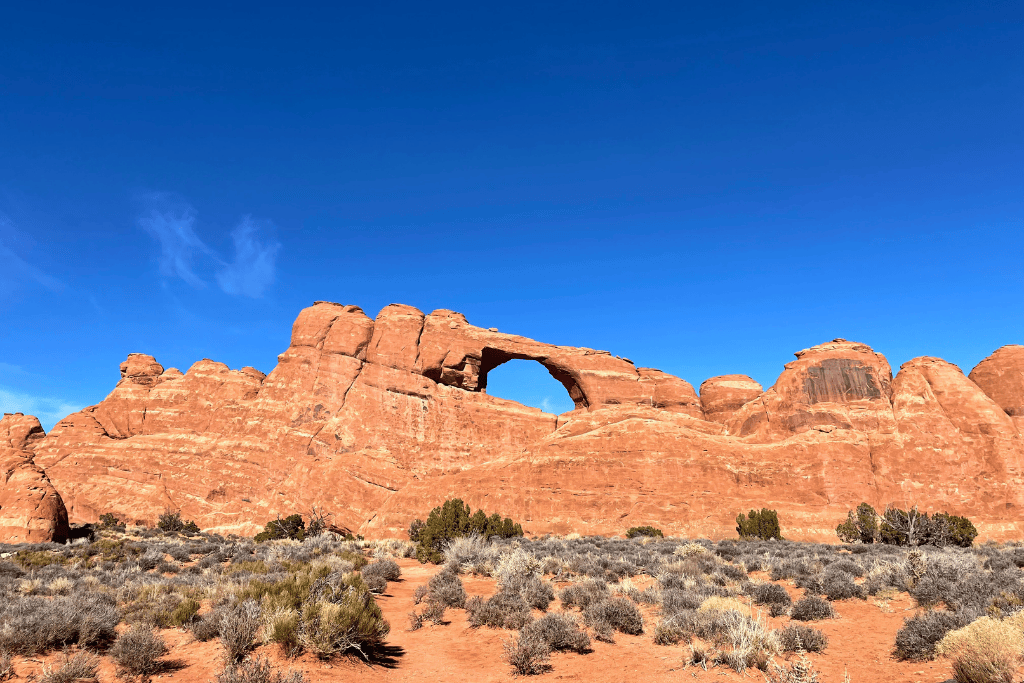
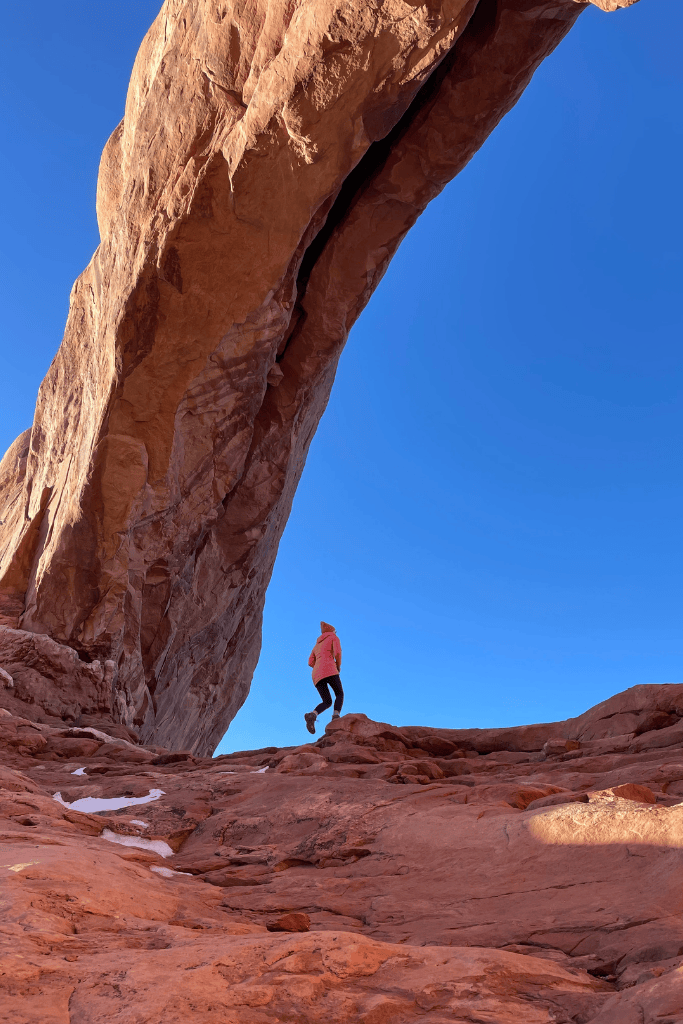
Walk the Skyline Arch Trail
This little bonus arch is quick and easy, and worth a stop.
The small parking lot is just a minute up the road from Sand Dune Arch. You’ll spot Skyline Arch perched high on a rock wall, visible even from the road. But I recommend getting out and walking the short 0.4-mile trail.
The narrow rock fins at the base of the arch are fun to explore, and I spent about 30 minutes wandering around here.
Details:
- Driving Time: 1 minute from Broken Arch Trailhead
- Difficulty: Easy
- Time Allotted: 30 minutes
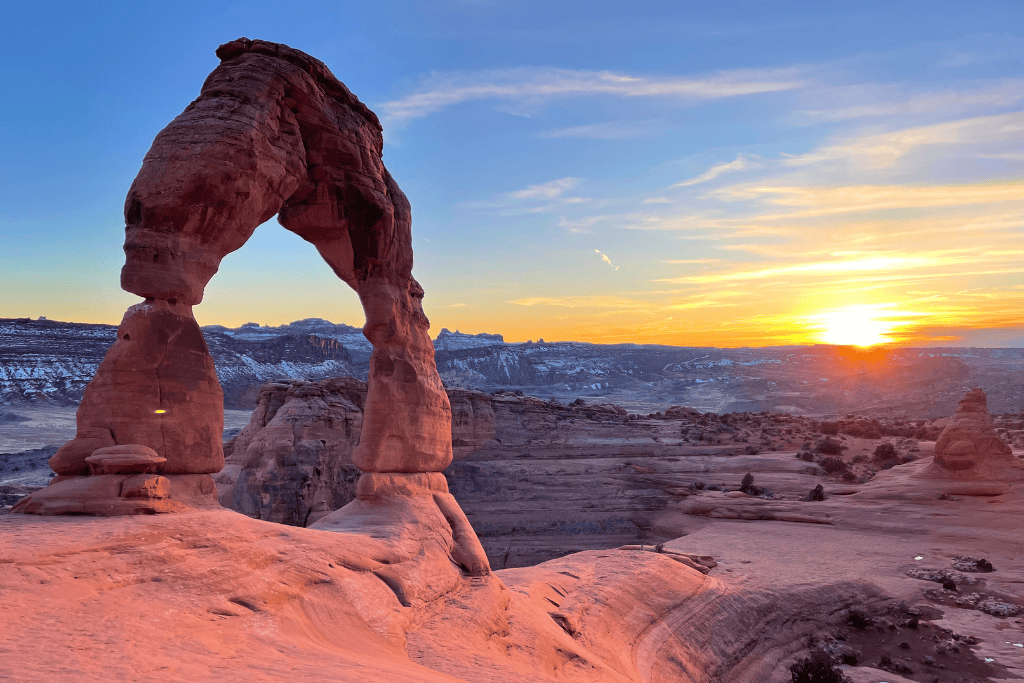
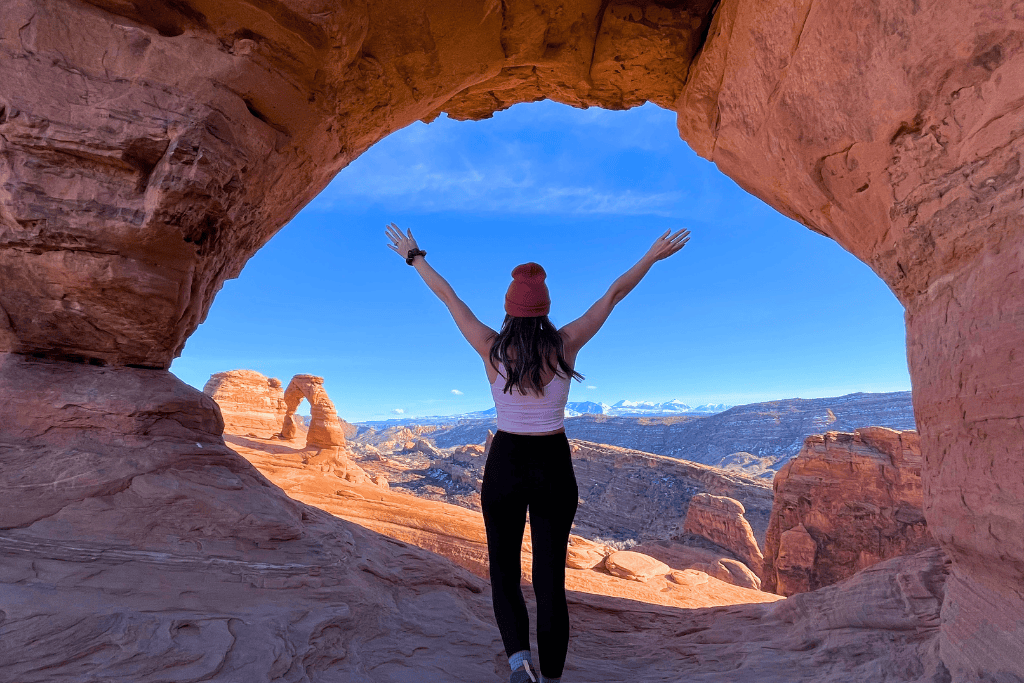
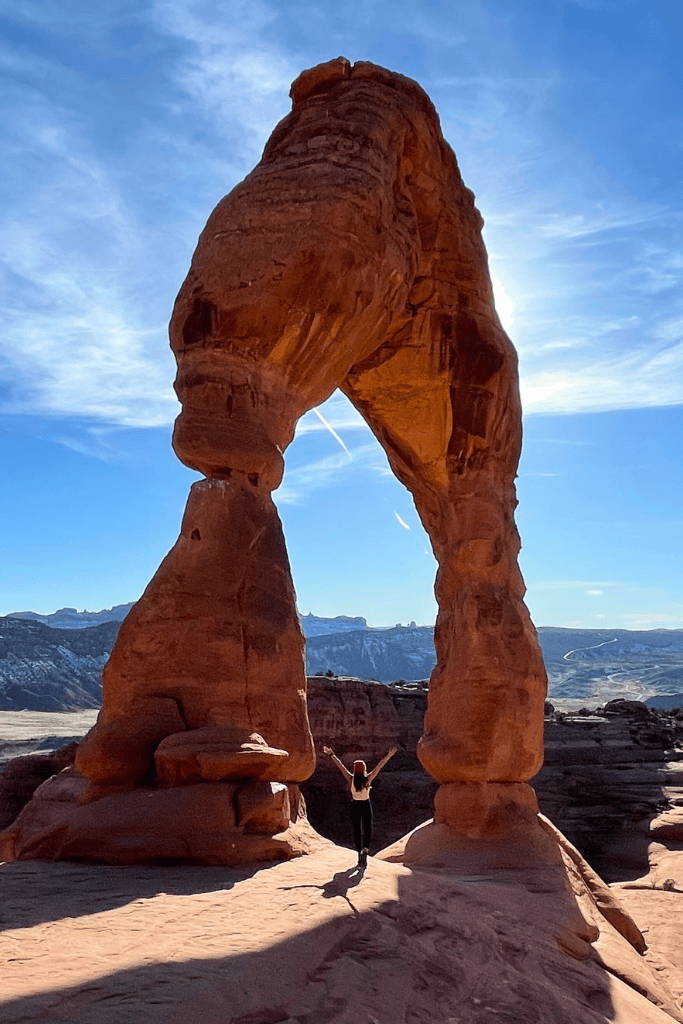
Hike to Delicate Arch for Sunset
The perfect way to wrap up Day 1 is with the park’s most iconic arch… Delicate Arch. This is the most popular arch in the park, so expect crowds and plan ahead.
I recommend arriving at the trailhead (Wolf Ranch Parking Lot) at least 2 hours before sunset to get a parking spot.
In February, I arrived at 3:30 pm for a 5:30 pm sunset and had no problem getting a parking spot, but in the summer, this will not be the case! In the summer, sunsets are much later (8-9 pm), so plan accordingly.
The 3-mile round trip trail is moderately difficult and mostly uphill. It’s not well-marked in parts, especially when hiking over slickrock, so watch for cairns and markers. But chances are you’ll just follow the crowd.
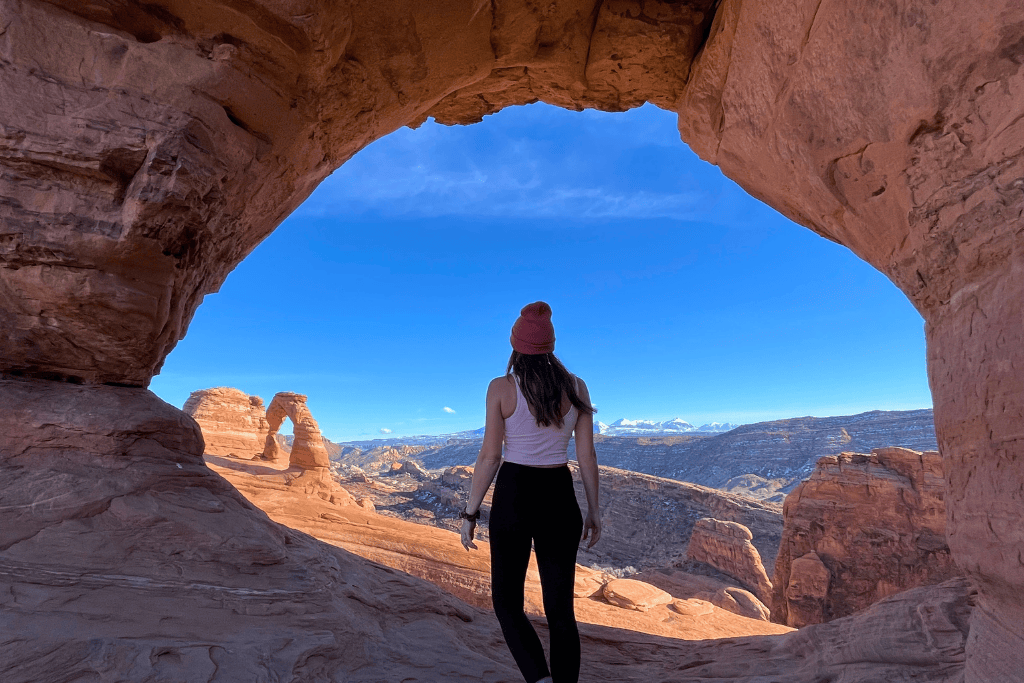
It took me 3 hours total, including time for photos and the hike back.
Details:
- Driving Time: 12 minutes from Skyline Arch
- Difficulty: Moderate and mostly uphill
- Time Allotted: 2-3 hours
Kate’s Tip: If you stay for sunset, pack a headlamp. I didn’t stay until full dark and was still hiking back in the dark.
Head Back to Moab for Dinner
After a full day of hiking and exploring, you’ll be ready for a hearty dinner. I always crave BBQ after a big day outside, and The Blu Pig in Moab really hits the spot. They have huge portions and a casual vibe.
Day 2: Arches Scenic Drive, Hike Devils Garden Loop, Balancing Rock, Park Avenue
Day 2 is a mix of a scenic drive, one of the best hikes in the park, and a few last iconic stops before you head out.
Pack plenty of water and snacks, and wear good hiking shoes for this one.
Drive Arches Scenic Drive
I recommend getting into the park right around sunrise again. The light in the morning is beautiful, and the roads are quiet. Plus, you want to get to the Devils Garden parking lot before it fills up.
The full scenic drive takes about 30 minutes without stopping. But you’ll definitely want to stop for a few quick photos along the way, just don’t take too long if you’re trying to snag parking.
Details:
- Distance: 35 miles round trip
- Time to Drive: 30 minutes one way without stops
- Time Allotted: 1 hour
Hike the Devils Garden Loop Trail
This is hands down the best hike in the park. If you can, try to get to the trailhead by 8 am during peak season. Later than that, and parking becomes a real challenge.
The full loop is 7.8 miles and takes about 4 to 5 hours. It’s definitely challenging in spots, especially the Primitive Trail section, which will have you doing some route finding and rock scrambling.
I’ll be honest, I got lost a few times and had to backtrack to pick up the trail again. So, just make sure you are paying attention and have a trail map downloaded!
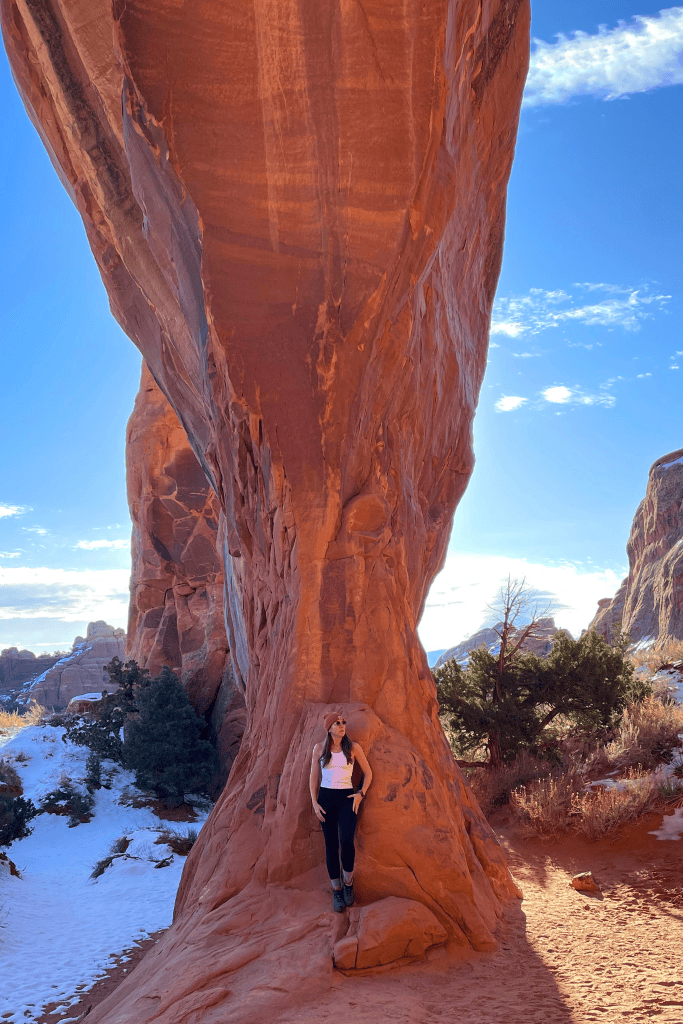
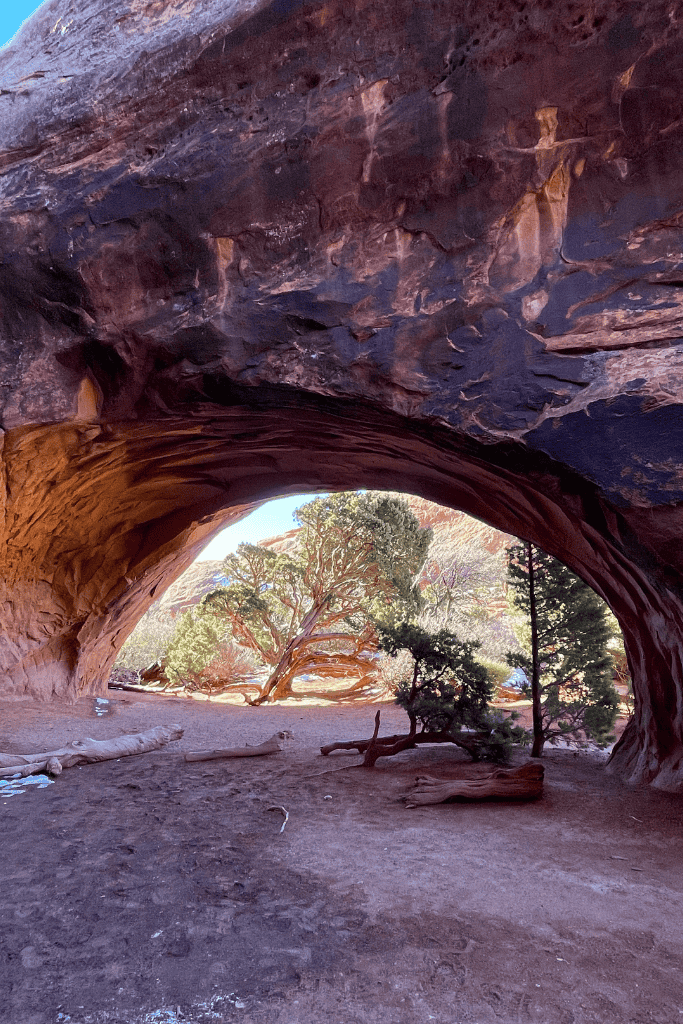
You’ll see eight arches if you do the full loop, including Landscape Arch, Tunnel Arch, Pine Tree Arch, Double O Arch, Navajo Arch, Wall Arch, and Private Arch. But you don’t have to do the whole thing to have an amazing time.
Here are two shorter hike options:
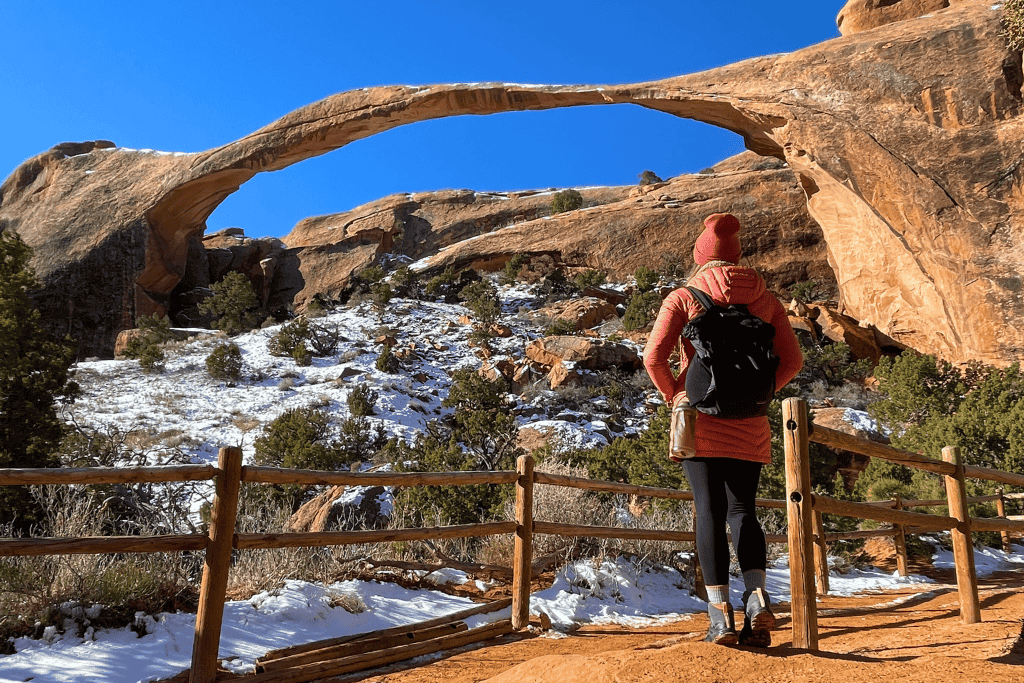
Option 1: Hike out and back to Landscape Arch (1.6 miles round trip). The trail is flat and easy.
Option 2: Hike out and back to Double O Arch (4 miles round trip). A little more climbing and scrambling, but this section is so fun and easy to follow.
Kate’s Tip: If you’re not up for the full loop, at least go as far as Double O Arch. It’s my favorite one on the trail, and the section after Landscape Arch is where things start to get really good.
Details:
- Trail Difficulty: Easy to strenuous, depending on your route
- Time Needed: 1 to 5 hours, depending on how far you go
Lunch Break
After the hike, you’ll probably be starving. There are a few picnic tables near the trailhead, or you can just chill at your car like I did. I had sandwiches packed in a cooler and devoured them the second I got back.

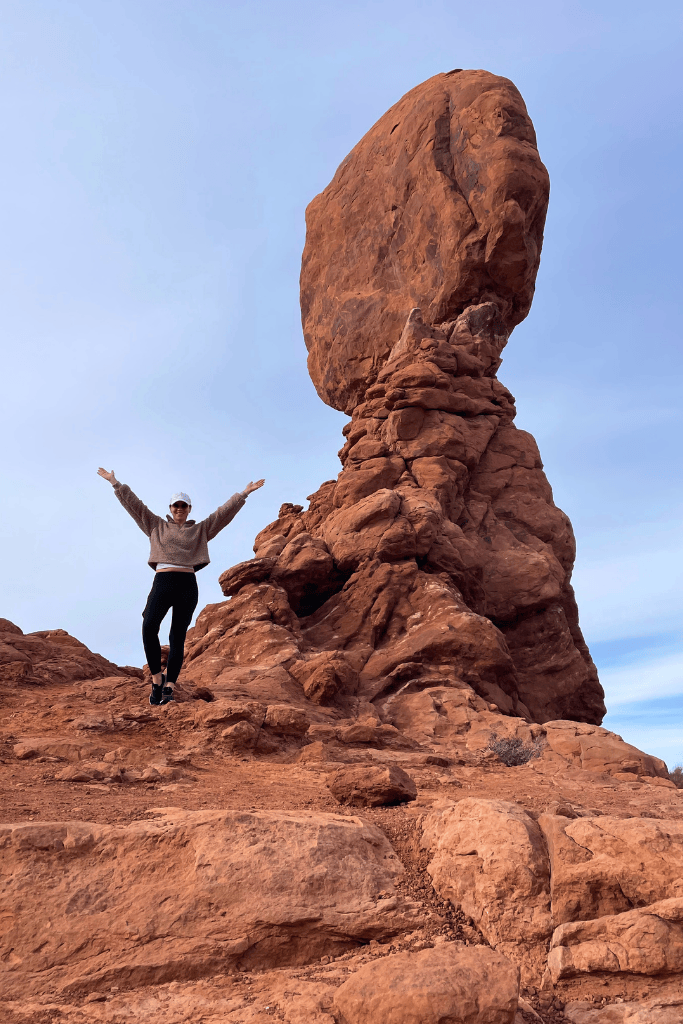
Balancing Rock Loop Trail
As you drive back down the Scenic Drive, take your time and stop at viewpoints you missed earlier. Balanced Rock is one of the last major features in the park you haven’t seen yet, and it’s worth a quick visit.
There’s a short 0.3-mile loop trail around the rock, or you can just pull over for a quick photo if you’re short on time.
Details:
- Driving Time: 17 minutes from Devils Garden Trailhead
- Difficulty: Easy, flat
- Time Allotted: 15 minutes
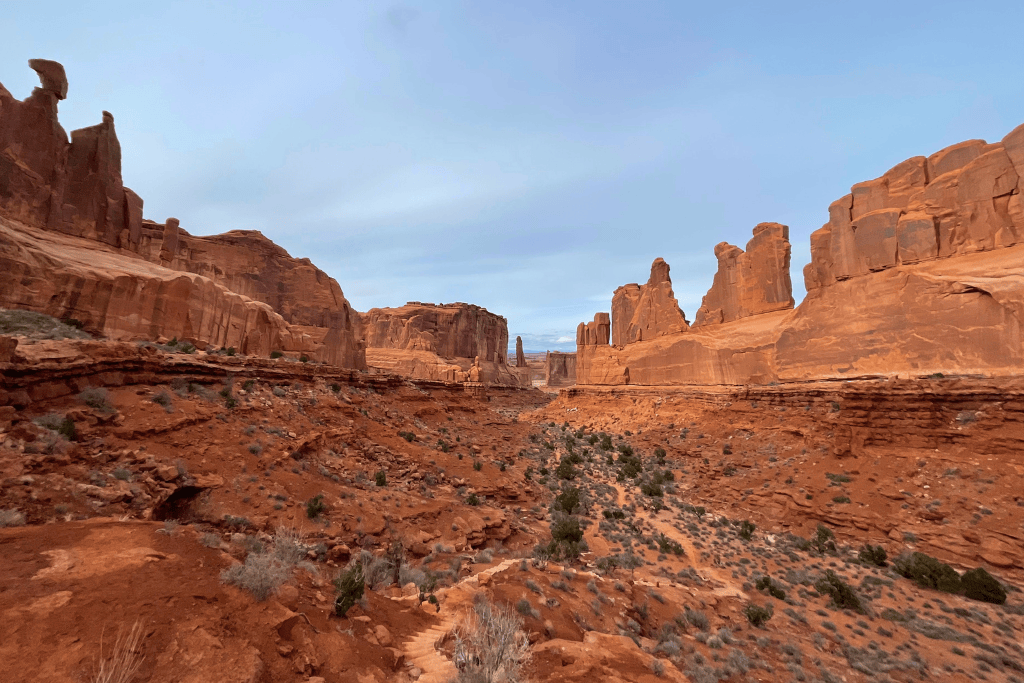
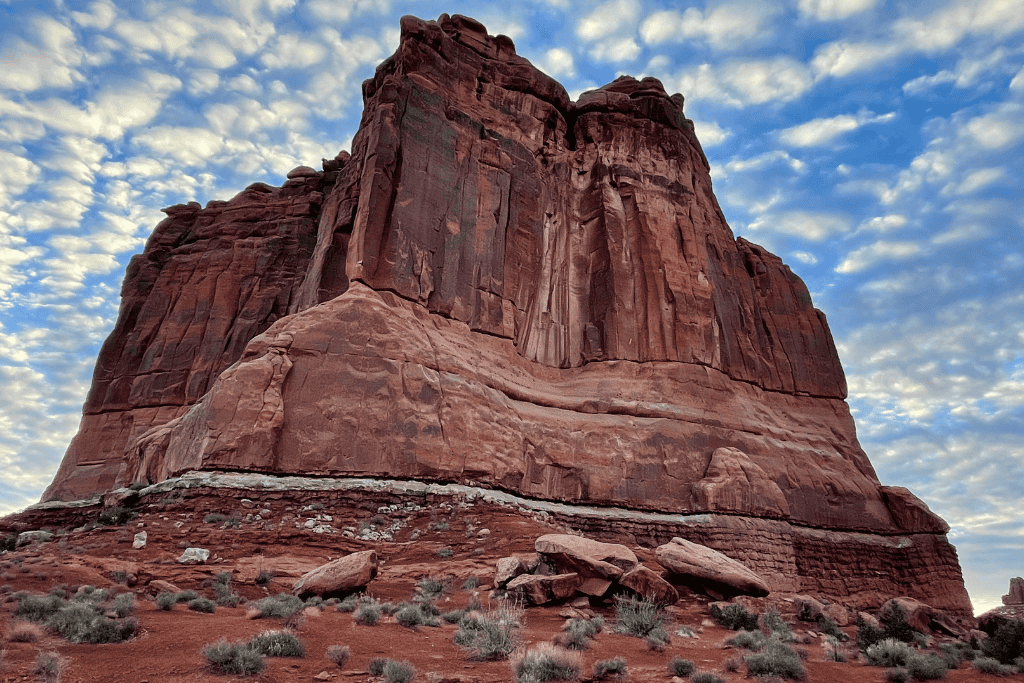
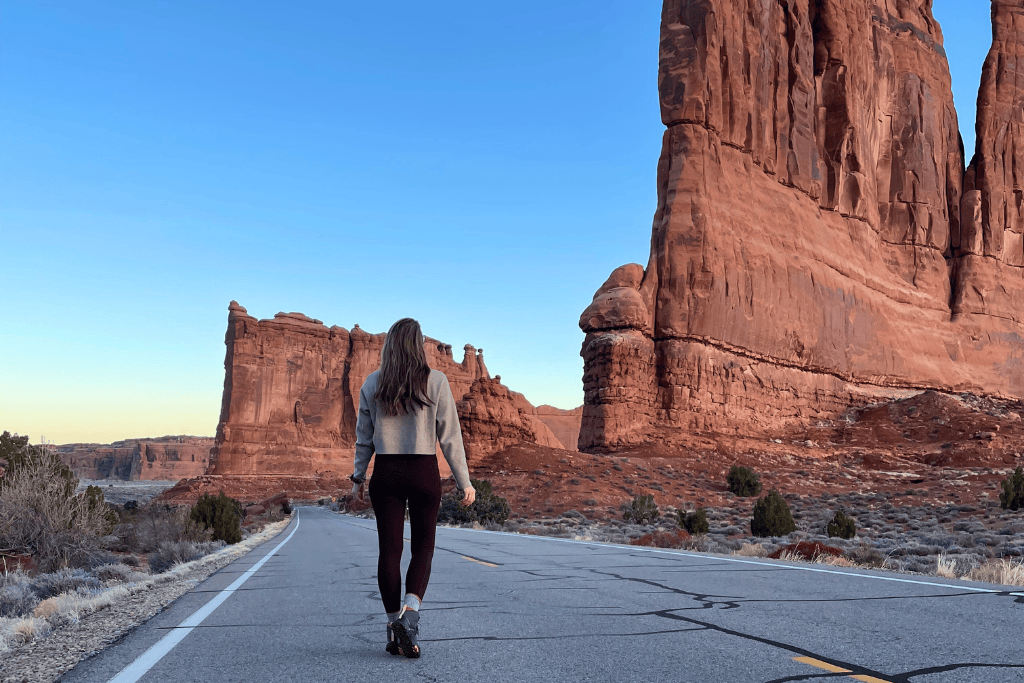
Hike Park Avenue Before Sunset
This was one of my favorite trails in the park. The views from the parking lot are awesome, but if you have the energy, I highly recommend walking down into the canyon.
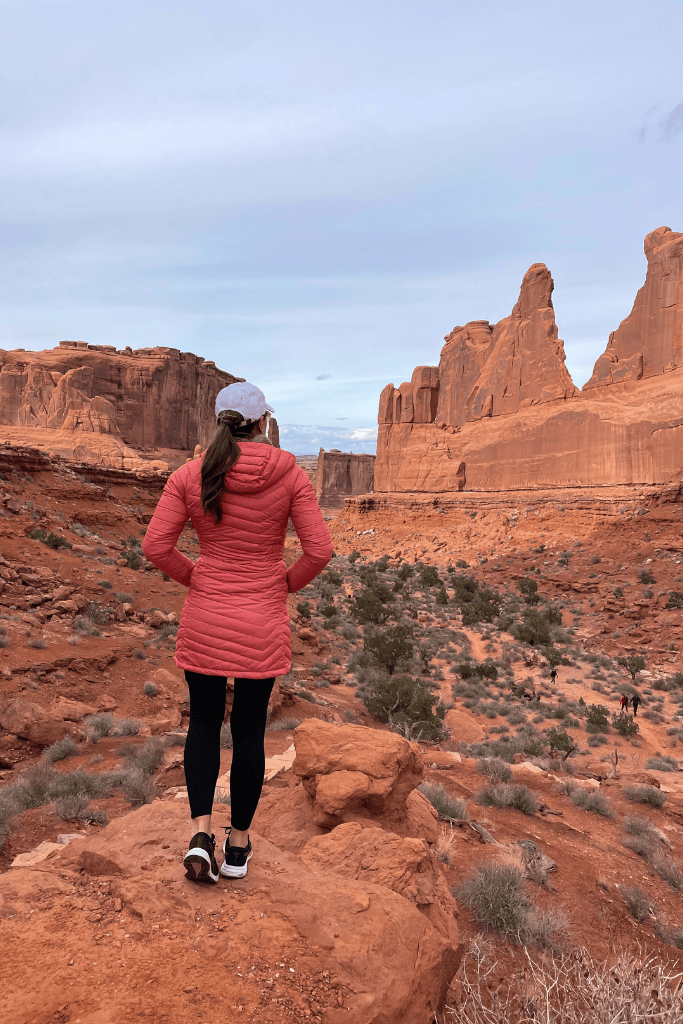
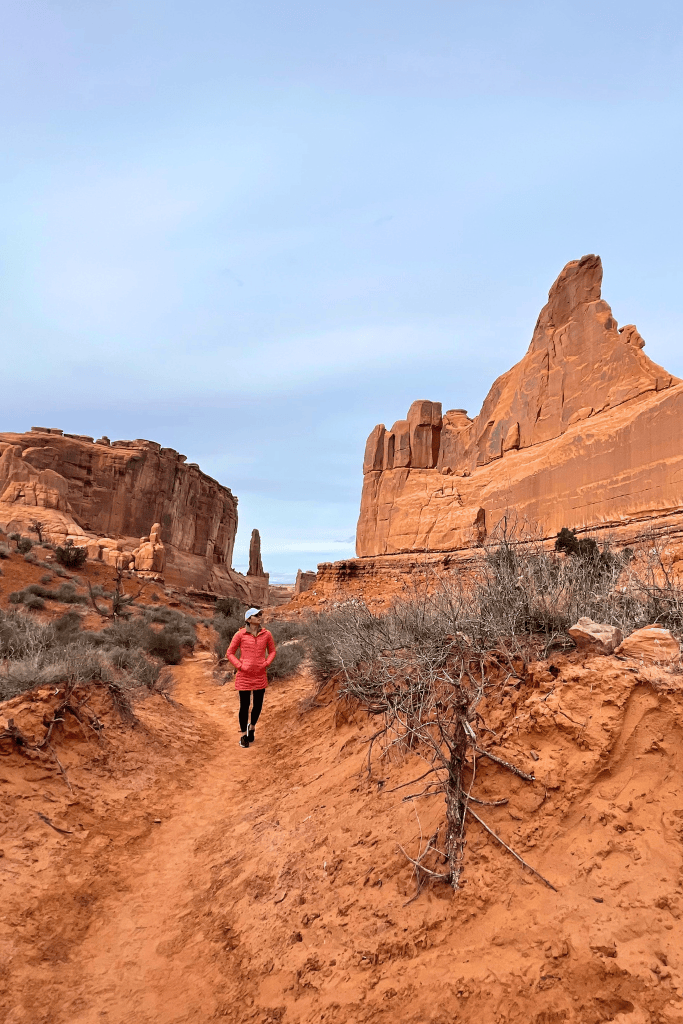
The trail is one mile one-way (or two miles round trip). If you’re with someone who can pick you up at the other end (Courthouse Towers lot), it’s a gentle downhill walk. I did the out-and-back and climbed the steep steps back up to the viewpoint since I was flying solo on this trip.
Kate’s Tip: Evening is the best time for lighting, and the towering walls glow in golden hues as the sun dips.
Specifics:
- Driving Time: 12 minutes from Balancing Rock
- Difficulty: Easy, but has a short, steep incline back to the parking lot if hiking out and back
- Time Allotted: 1 hour
Back to Moab for Dinner
If you have one more night in Moab, treat yourself to a good meal. I recommend Dewey’s Restaurant and Bar. I’ve eaten here a few times, and it never disappoints. Great food, relaxed vibe, and just what you need after a big day outdoors.
Tips to Make The Most of This Arches Itinerary
Here are a few things to know that will make your trip smoother:
Timed Entry Permit Required
To enter the park between April 1 and July 6 or August 28 through October 31, you’ll need a timed entry permit. These are in addition to the Park entrance fee and are released six months in advance through the official National Park website. They will not be available at park entrance stations or park offices.
The permits are free but require a non-refundable $2 reservation processing fee. And is only valid for entry during the one-hour period you reserved. Once you have entered the park, you can exit and re-enter the park any time that same day.
Each day will require an additional timed entry ticket.
Set a reminder to grab yours early!
NOTE: Visitors without a reservation must enter the park before 7 a.m. or after 4 p.m. And if you have a camping reservation or a fiery furnace reservation, you do not need a timed entry permit.
How to Avoid the Crowds
Visit in the off-season! February has proven to be the best time with no crowds, empty trails, and easy parking.
If you can’t travel in the off-season, you should make sure to arrive early in the morning to avoid crowds, as the park often reaches capacity by 8 or 9 a.m. So be sure to get your entry permit early to beat the lines and have a more peaceful experience.
Also, planning your visit mid-week will definitely help!
Driving & Parking in the Park
Arches Scenic Drive is a dead-end road, so you’ll be backtracking a lot.
The road is narrow with sharp curves, and parking lots are small. Get there early to avoid circling for parking. And be extra cautious of pedestrians and sudden stops. People tend to run out onto the road!
No Services in the Park
There are no gas stations or places to eat in the park. And the visitor center at the park entrance is the last place you could pick up water or snacks, so come prepared.
Make sure your tank is full, and your cooler is packed!
There are bathrooms at most trailheads, though, which is helpful.
No Cell Service in the Park Either
Download maps and trail info in advance. I used AllTrails offline, which was a lifesaver, especially on the Devils Garden Loop, where the trail gets tricky to follow.
FYI: Visitors should stay on marked trails and avoid climbing on arches to protect fragile ecosystems.
When is The Best Time to Visit Arches
The peak tourist months at Arches National Park are July and August, which are also the hottest months with temperatures exceeding 100°F.
Winter is a great time to visit for solitude, although it can be cold with a chance of snow.
Personally, I love visiting in February or March. You don’t need a timed entry permit, the crowds are nonexistent, temps are perfect for hiking, and lodging in Moab is way more affordable. By late March, prices spike, and the crowds arrive.
I haven’t been to the park in November, but my friend visited with her family then and said it’s similar to February.
The park is open 24 hours a day, year-round, allowing for early morning or late evening visits.
Where to Stay to Visit Arches National Park
There is no lodging inside of Arches National Park. And there is only one campground in the park (Devils Garden), and it books up a year in advance. Your best bet is to stay in Moab, which has plenty of great lodging options.
Here are my top recommendations:
- Spring Hill Suites: Closest to the park entrance and has great pools with a waterfall!
- Red Cliffs Lodge: A little bit of a drive outside of Moab, but it has stunning red cliffs and river views.
- Hoodoo Moab: The best upscale stay to treat yourself with.
- Moab Rustic Inn: The best budget-friendly hotel in Moab. Lots of positive reviews.
- Under Canvas Moab: Luxurious glamping with dreamy desert views. A truly unique stay!
Where to Eat
You’ll definitely want to bring your own food and snacks into the park, since there is nowhere to buy anything once you pass the visitor center. But after a full day of hiking and exploring, you’re going to be hungry, and Moab has some really great choices for dinner.
Here are a few of my favorite places to eat:
The Blu Pig: This is hands down my go-to spot after a big hiking day. It’s a laid-back BBQ joint with huge portions and all the comfort food you could want. Their brisket is amazing, and be sure to get a side of their mac and cheese. They also have live blues music some nights.
Dewey’s Restaurant and Bar: I’ve eaten here several times and always had a good meal. The burgers are solid, and they also have really good salads and pastas if you want something lighter.
Thai Bella: If you’re craving something different, this is a great choice. Their curry dishes are so good, and the portions are decent. It’s a nice change if you’ve been eating a lot of typical road trip food.
Doughbird: You absolutely have to stop here at least once during your trip, especially if you have a sweet tooth. They have some of the most creative and delicious donuts I’ve ever tried. Great for grabbing breakfast on the go or a fun afternoon treat.
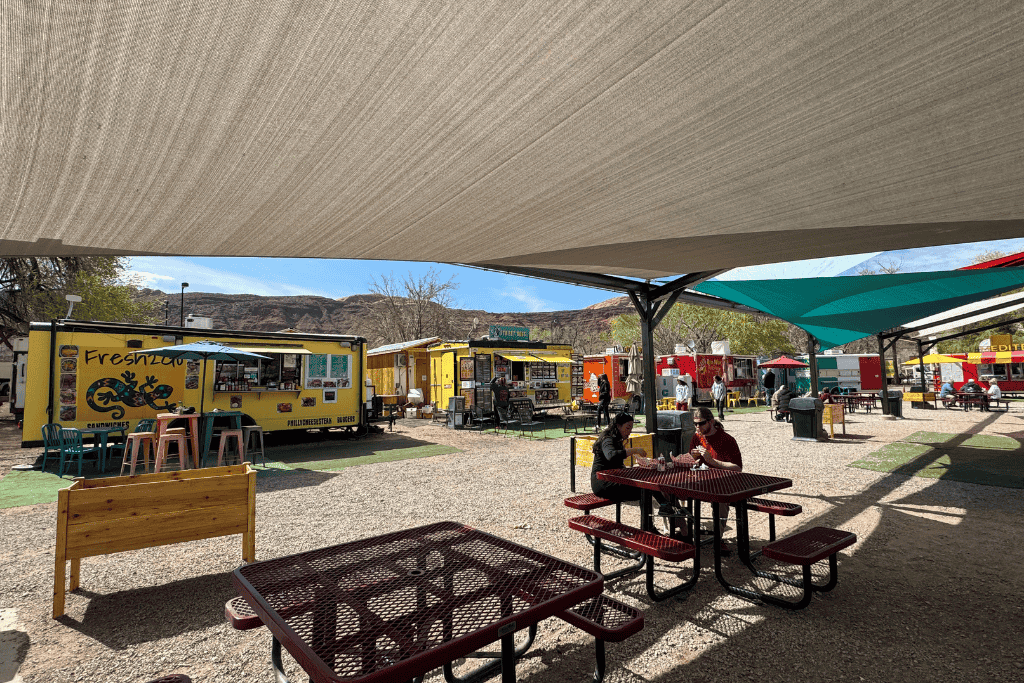
Moab Food Truck Park: This is such a fun spot, especially if you’re traveling with a group. Everyone can grab something different, and you can all sit together at the shared tables. Hours can vary by season, so check ahead if you’re visiting in the winter.
Kate’s Tip: Moab gets busy during peak travel seasons, and restaurants fill up fast, especially after sunset when everyone’s coming back into town. I recommend getting there a little early for dinner or calling ahead if they take reservations.
What You Should Pack
Let’s talk about what to pack for Arches, because honestly, this depending on when you visit. And it can be a little overwhelming if it’s your first time visiting the desert.
The weather in Arches can be all over the place. Hot and dry in the summer, cold and windy in the winter, and the mornings and evenings can be way cooler than the middle of the day.
Most trails have no shade, and there are no stores, food, or gas once you pass the visitor center.
But don’t worry, I’ve added a short list of the essentials you’ll need…
- Daypack: You’ll need something to carry your water, snacks, camera, and layers. A small backpack works great.
- Cooler: Pack it with lunch, drinks, and snacks. There’s nowhere to buy food inside the park, and having something cold waiting in your car is a lifesaver.
- Water bottle or hydration bladder: Bring more water than you think you need. I usually carry two bottles and drink all of it, even in cooler weather.
- Salty snacks: You’ll be sweating a lot, and salty snacks help keep your energy up.
- Hiking shoes with good grip: The trails range from sand to slickrock.
- Layers: Even if the forecast looks warm, mornings and evenings can be chilly. I usually wear a light fleece in the morning and end up in a t-shirt by noon.
- Sun protection: A hat, sunglasses, and sunscreen are musts. The sun can be intense, even in winter.
- Headlamp or flashlight: This is especially important if you’re doing Delicate Arch at sunset. You’ll be walking out in low light, and the trail isn’t well-marked.
- Offline maps: There’s zero cell service in most of the park. I downloaded trail maps in the AllTrails app ahead of time and used them a lot, especially on the longer hikes.
Optional extras that came in handy:
- A packable camp chair: For picnic lunches
- A camera tripod
- Gloves and a beanie: For cold mornings if you’re visiting in winter
Once you’ve got your gear sorted, the rest is easy. Just make sure you’re self-sufficient for the day and you’ll be good to go!
Other Things You Should Do Near Arches National Park
The Moab area is absolutely bursting with adventure. Every time I visit, I find something new to explore. If you have extra time, don’t miss these nearby gems:
- Canyonlands National Park: Stunning canyon views and Mesa Arch
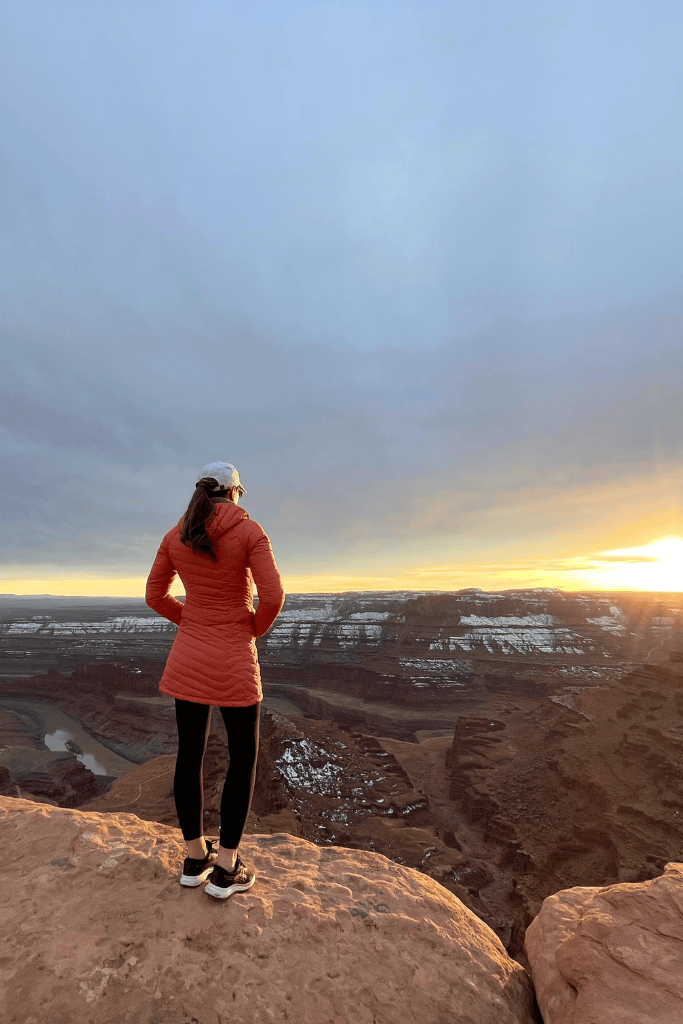
- Dead Horse Point State Park: The best place for sunset views
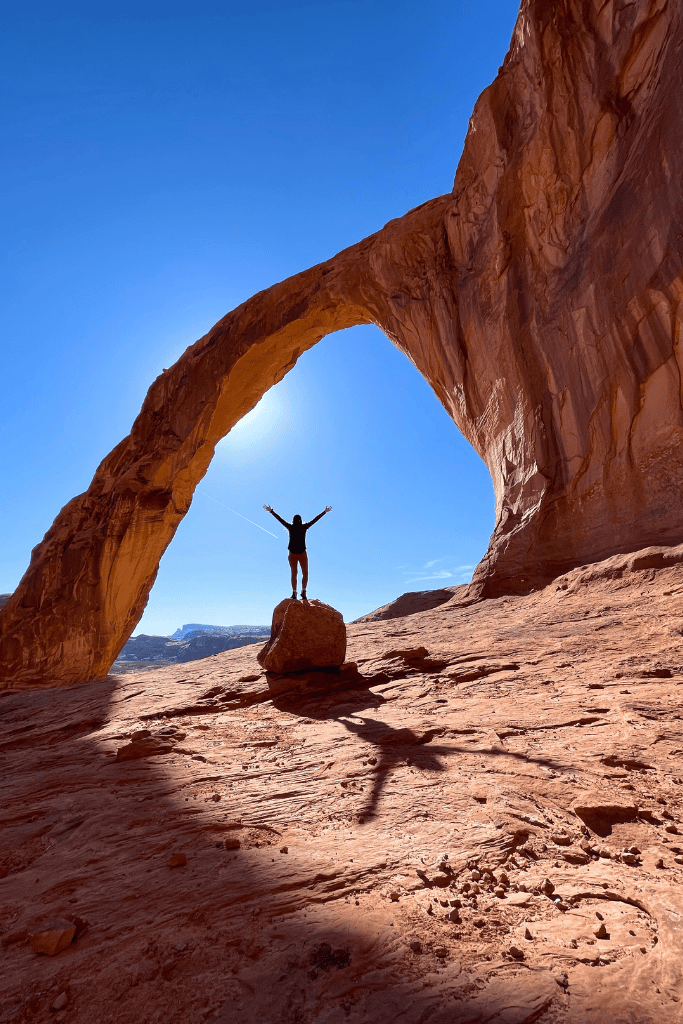
- Corona Arch: Massive arch outside the park (3.2-mile hike)
- See Dinosaur Tracks: Check out Willow Springs or Mill Canyon Tracksites
- Morning Glory Arch: 4.5-mile hike to a jaw-dropping arch bridge
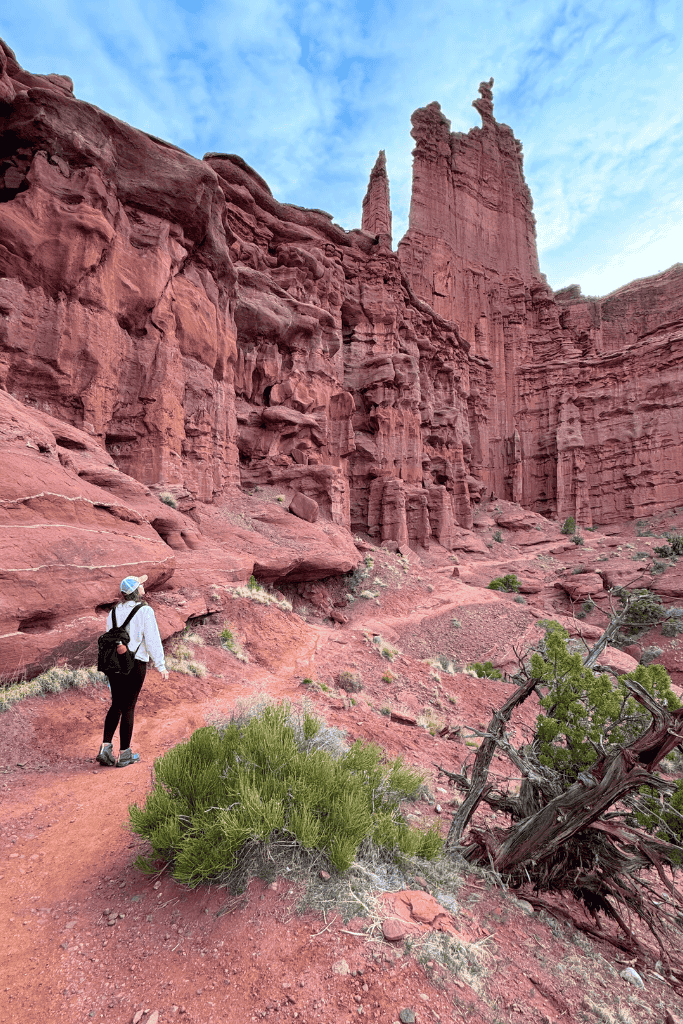
- Fisher Towers Trail: One of my favorites! Moderate 4-mile hike along towering red rocks
That’s a Wrap
I hope this Arches National Park Itinerary gives you everything you need to plan an unforgettable trip. Whether you’re here for the epic arches or the incredible hiking, this park delivers in a big way.
Before you go, be sure to grab my free Arches National Park Guide for extra tips, a downloadable itinerary, and packing lists to make your trip stress-free.
Thanks for reading! I’ll catch ya on the next adventure.