11 Best Hikes in Sedona You Really Don’t Want to Miss
Get ready to be blown away by Sedona’s mesmerizing red rocks, serene vibes, breathtaking views, and perfect weather! To truly experience it all, check out the best hikes in Sedona!
In this post, you’ll discover the 11 best hikes in Sedona! The ones that truly wowed me, and I’m certain they will you too! I’ll guide you through these must-visit trails and help you choose which ones to include in your Sedona itinerary.
Whether you prefer easy trails or challenging ascents, Sedona’s red rock wonderland has a trail with your name on it!
So, lace up those hiking boots, pack some snacks, and let’s discover the very best hiking trails Sedona has to offer.
Sedona is calling, and you must answer!
Kates Crossing Blog is a member of affiliate programs and the Amazon Services LLC Associates Program. Some of these links are affiliate links and if you make a purchase, at no cost to you, I may earn a small commission that helps run this website — Read my Disclaimer for more info.
11 Best Hikes in Sedona – You Don’t Want to Miss These
Let’s jump into my top 11 favorite hikes in Sedona. These trails wowed me, and I’m confident they’ll do the same for you!
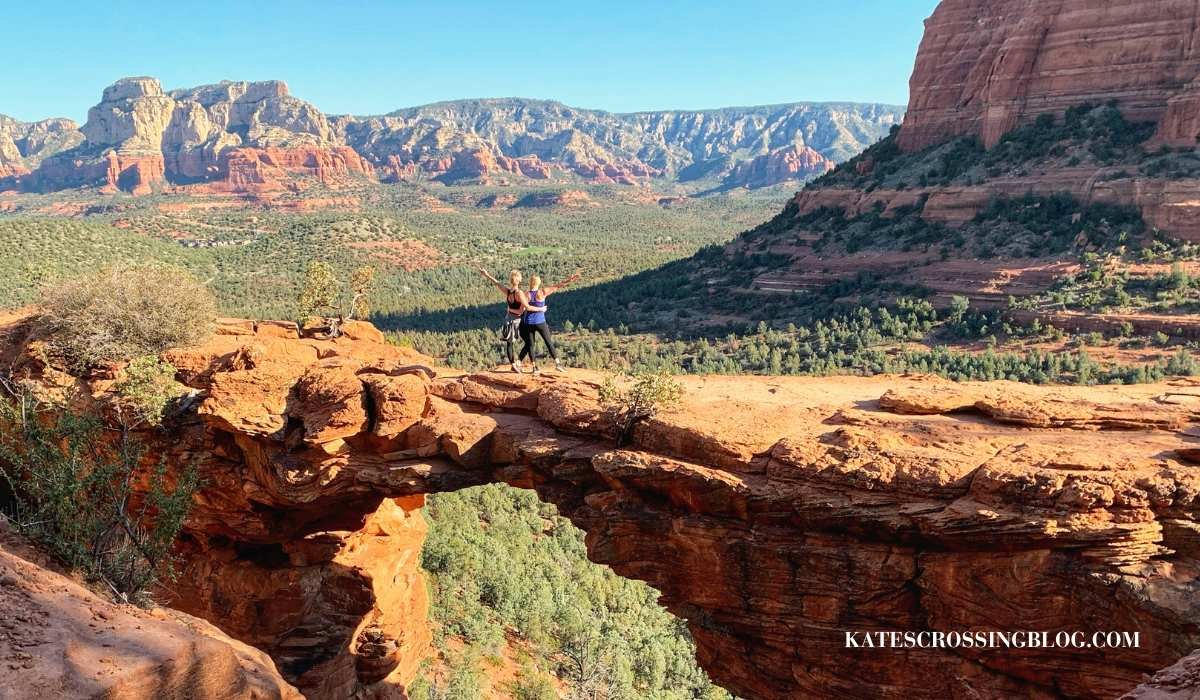
Views from atop the Devil’s Bridge
1. Devil’s Bridge Hike
Nestled in the heart of Sedona’s iconic red rock terrain, the Devil’s Bridge hike is definitely the most popular trail in Sedona.
Even though hundreds of people hike it every day, it’s still worth it. Why? Because the views are incredible! And I consider it to be a right of passage for any first-timer visiting Sedona!
The Devil’s Bridge Hike is short and easy to get to. It suits all kinds of hikers, with a path that’s mostly flat and only gets a bit steep at the end. When you finish, you’ll see the biggest natural sandstone arch around.
You can drive to the Devil’s Bridge Trailhead, but for that, you’ll definitely need a 4WD with high clearance because the road is rough with big rocks and potholes.
If you don’t have one, you can hike from the Mescal Trailhead or park and walk from the Dry Creek Vista Trailhead. Both add a few more miles to your hike.
When you get to the bridge, expect a long line for the iconic photo on the bridge. Be careful walking to it, but once you’re on the bridge, it’s way wider than it seems.
I felt safe walking out there. Just stay away from the edges, and don’t do any funny poses that could make you lose your balance.
PRO TIP: If you want to enjoy the bridge without too many people around, try getting there before sunrise or after 3 pm for the sunset. You won’t have the place to yourself, but there probably won’t be a long wait to get your photo!
Trail Stats:
Length: 2 miles out and back from Trailhead
Elevation Gain: 400 feet
Difficulty: Moderate
Time: Approximately 2-3 hours
Trailhead: Devil’s Bridge Trailhead, Mescal Trailhead, or Dry Creek Vista Trailhead
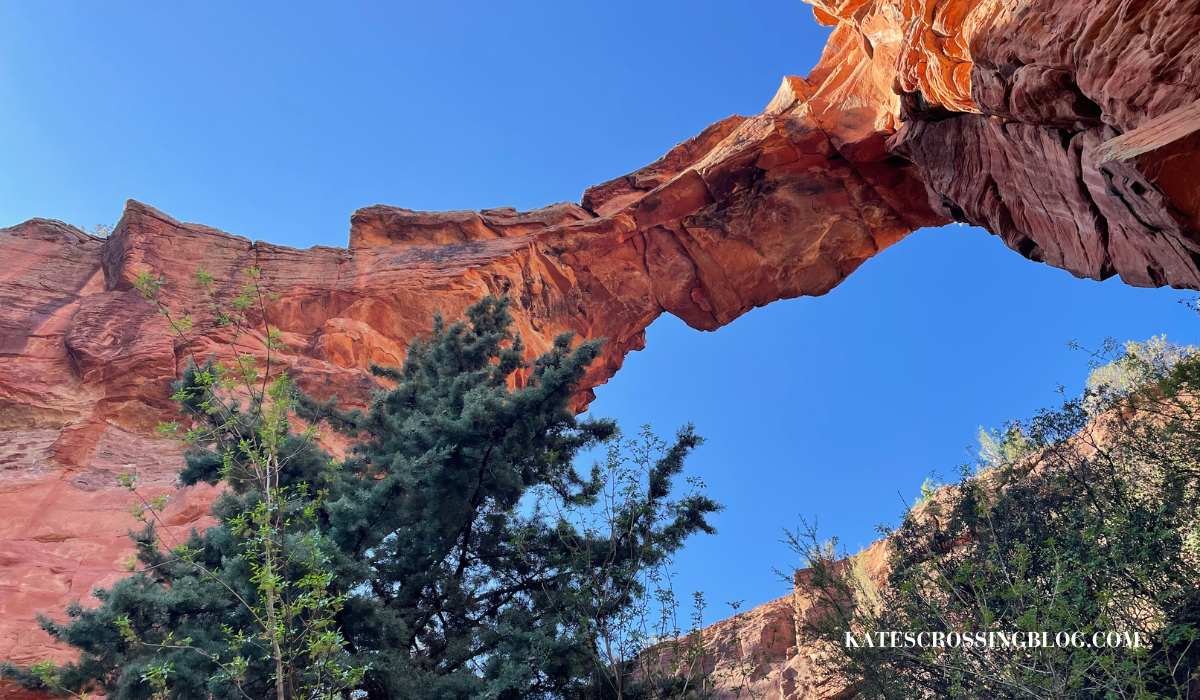
Take the trail that leads below Devil’s Bridge for a new perspective on how huge it is!
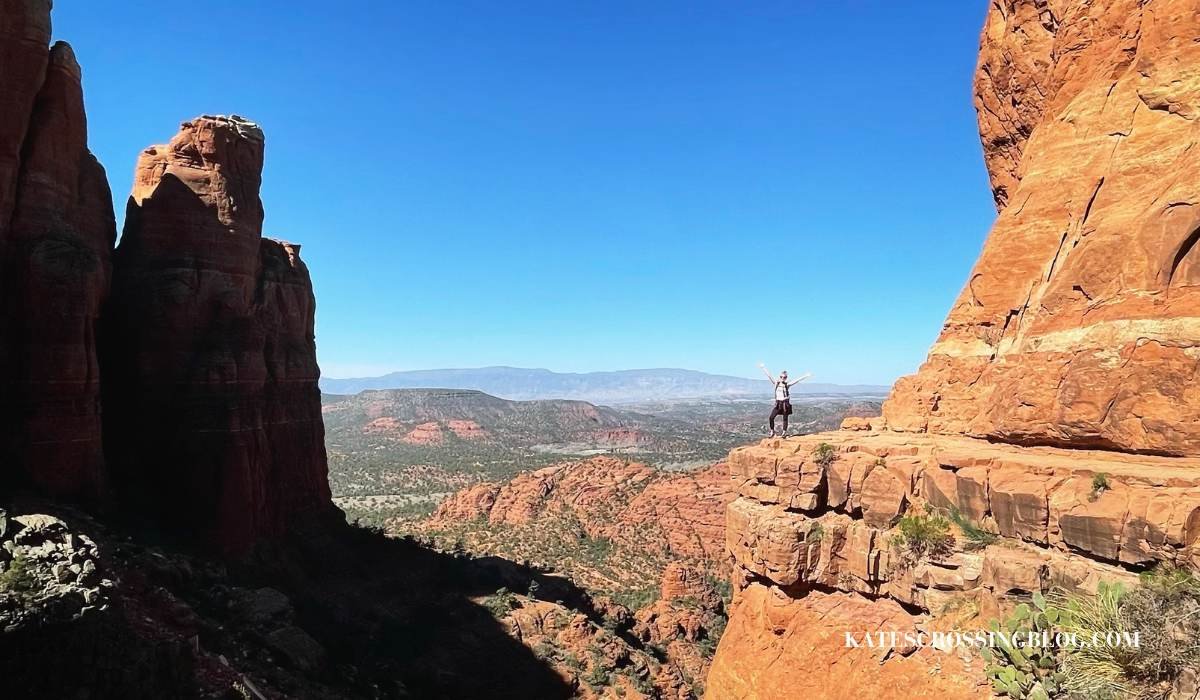
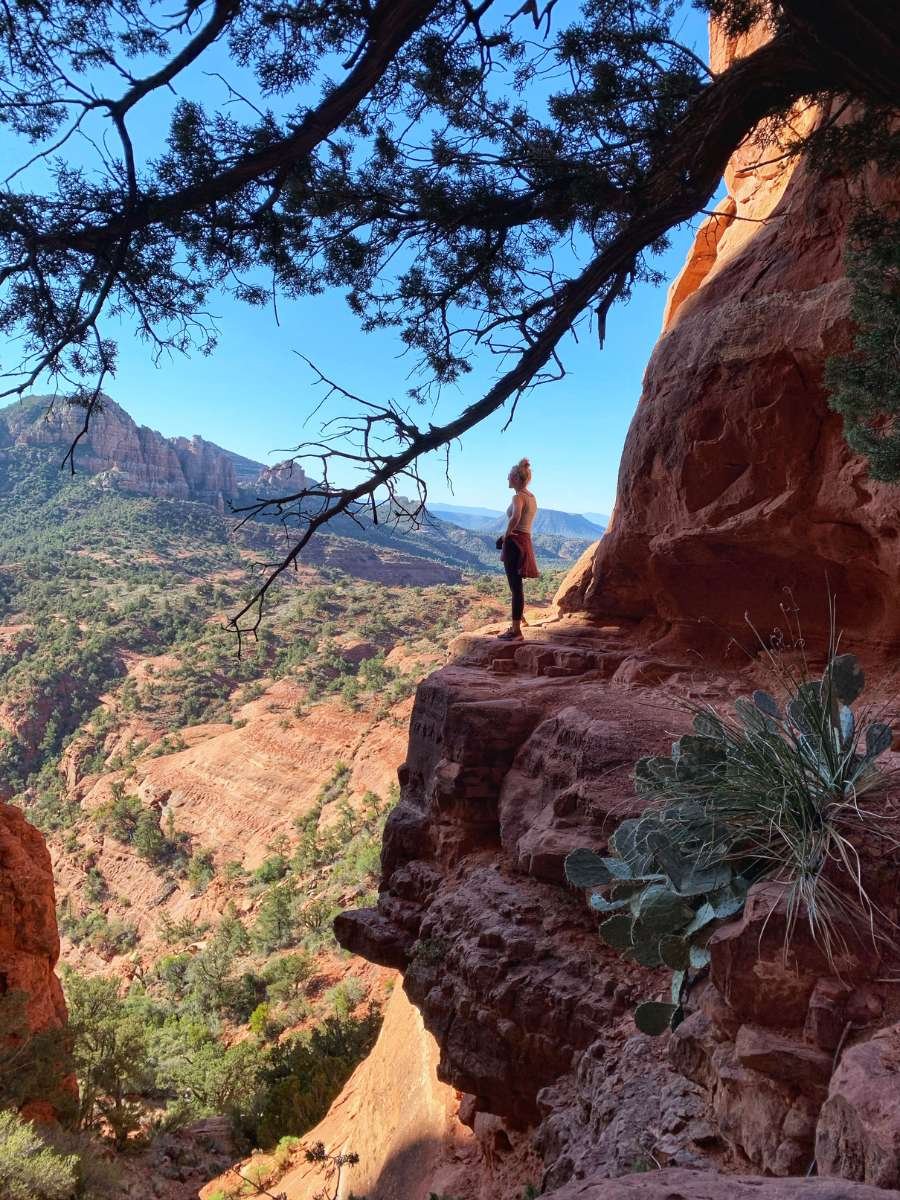
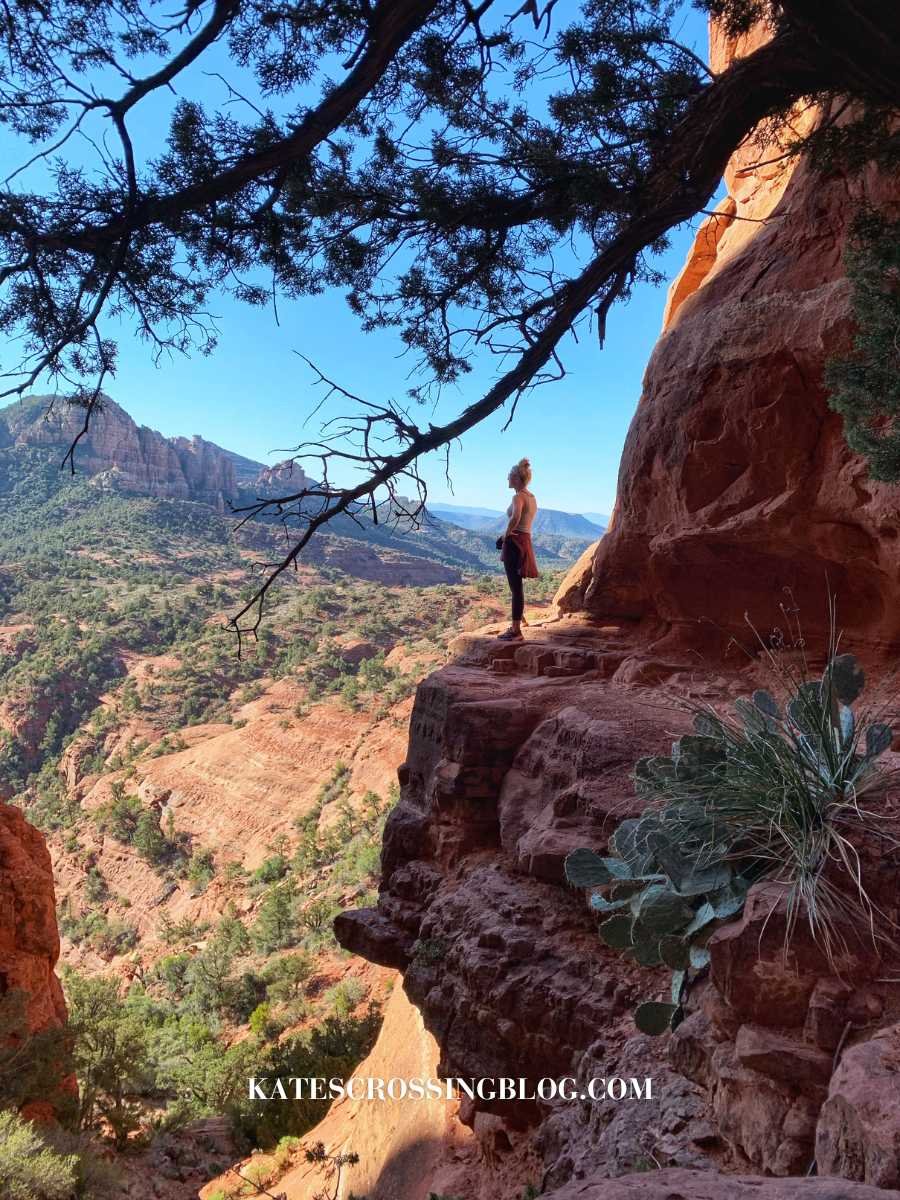
Iconic Photo Spot on Cathedral Rock
2. Cathedral Rock Trail
Cathedral Rock is one of the best hikes in Sedona and my favorite!
It’s a short but steep hike with a huge payoff when you reach the top!
As you make your way to the summit be ready for a strenuous climb with some rock scrambling. Follow the trail markers to stay on course, wear hiking shoes with a good grip, and consider an early start to catch the sunrise and avoid the crowds.
Upon reaching the top, take a moment to absorb the indescribable feeling of accomplishment. Just like at Devil’s Bridge, exercise caution near the edges and skip any risky poses for safety.
Cathedral Rock also has one of those special spots called a vortex that makes Sedona famous. Take the secret trail to find the vortex, needle spire, and other amazing photo spots.
PRO TIP: This hike is super popular in Sedona, and finding a parking spot can be a bit tricky. Luckily, there is more than one way to get there. For all the details, including the best spots for photos, check out my guide: Discover the Cathedral Rock Hike Secrets & Best Photo Spots
Trail Stats:
Length: 1.2 miles (round trip)
Elevation Gain: 660 feet
Difficulty: Intermediate
Time: About 1-2 hours
Trailhead: Start at Cathedral Rock Trailhead
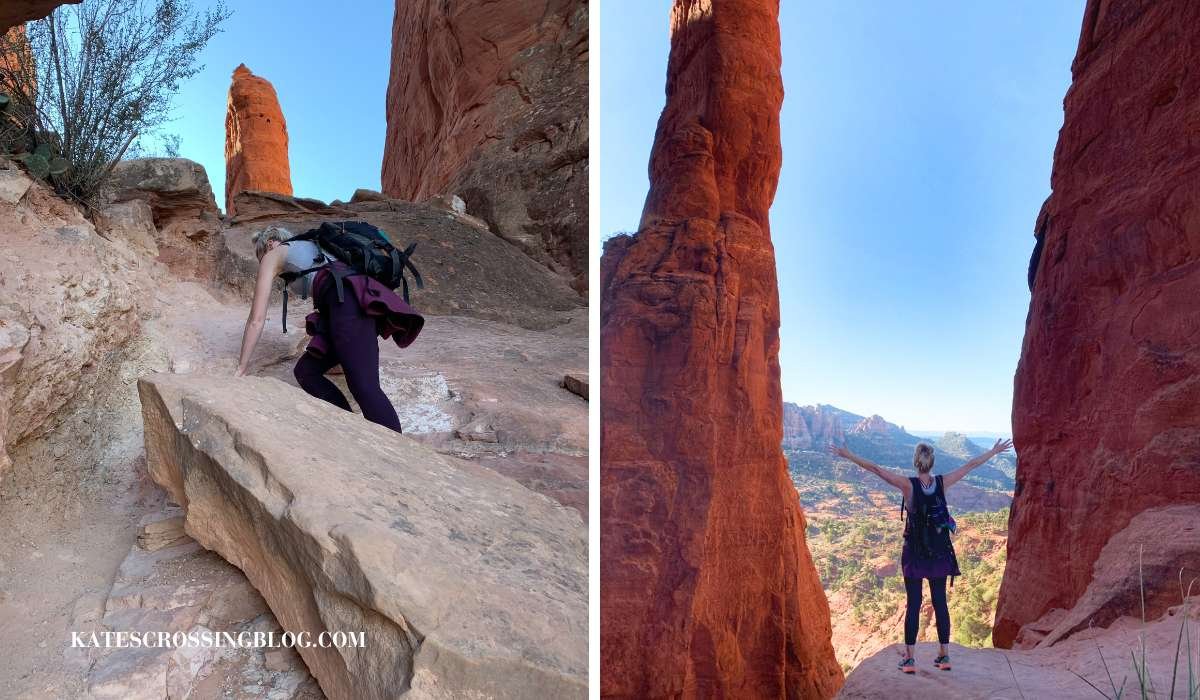
Secret trail leading to needle spire and Cathedral Rock vortex
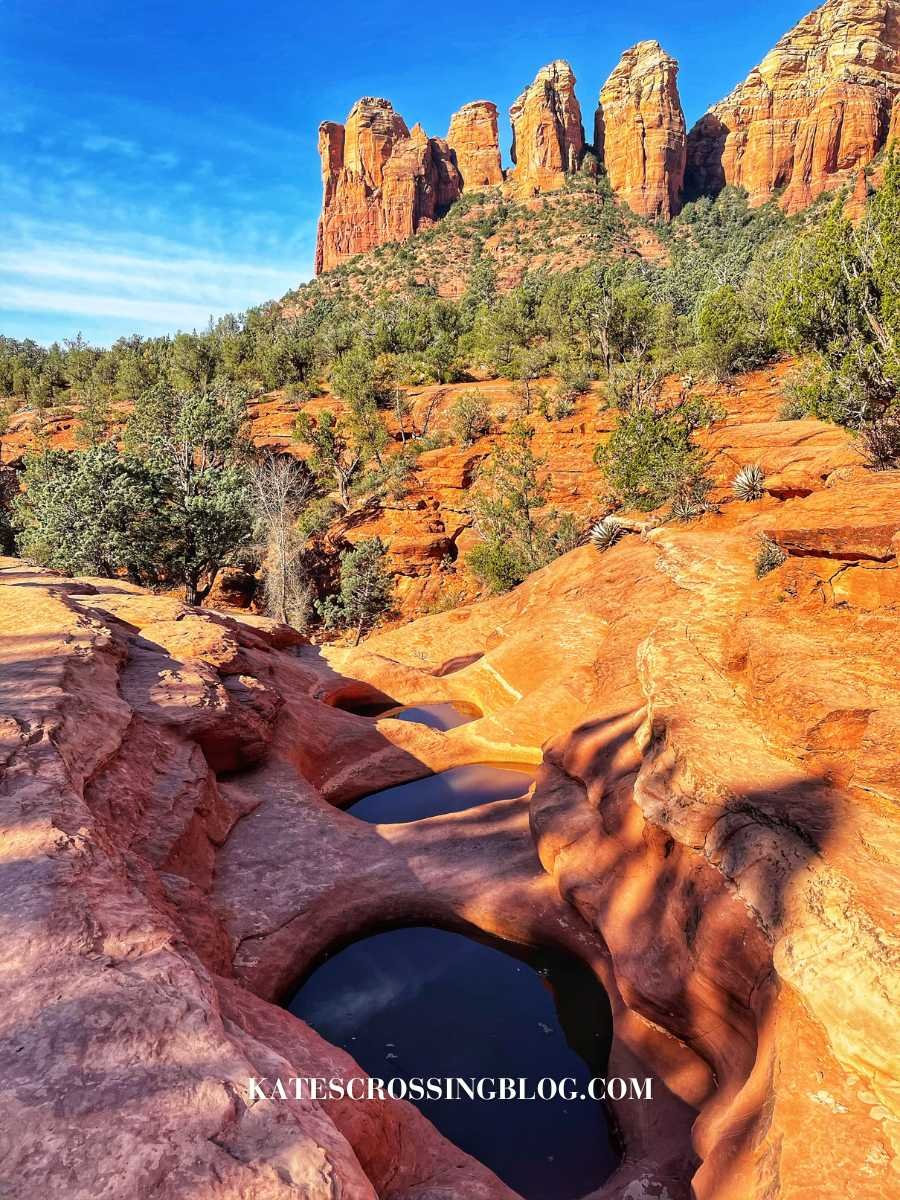
Seven Sacred Pools
3. Seven Sacred Pools Trail
Now, let’s explore the tranquil Seven Sacred Pools trail, a section of the longer Soldier Pass Trail, offering an easy 1.5-mile stroll.
Despite being part of the Soldier Pass Trail, I’m highlighting the Seven Sacred Pools as its own trail. Many folks are drawn to these pools for the classic photo op and don’t want to do the whole trail.
They’re one of Sedona’s most photographed landmarks, probably popping up on your Instagram feed.
This flat and easy trail initially follows an old Jeep track for a short distance. Take your time as you stroll, appreciating another incredible landmark, Devil’s Kitchen, along your way to the pools.
Devil’s Kitchen is an active giant sinkhole created by a cave that caved in.
After you’ve appreciated the seven sacred pools and their views, retrace your steps back to the trailhead. However, if your adventure spirit calls for more, the Soldier Pass Trail continues beyond the pools.
PRO TIP: For a quieter experience at the Seven Sacred Pools, consider visiting on weekdays or during the early hours when the serenity is at its peak and the pools are less crowded.
Trail Stats:
Length: 1.5 miles out and back
Elevation Gain: Minimal
Difficulty: Easy
Time: About 1 hour
Trailhead: Soldier Pass Trailhead
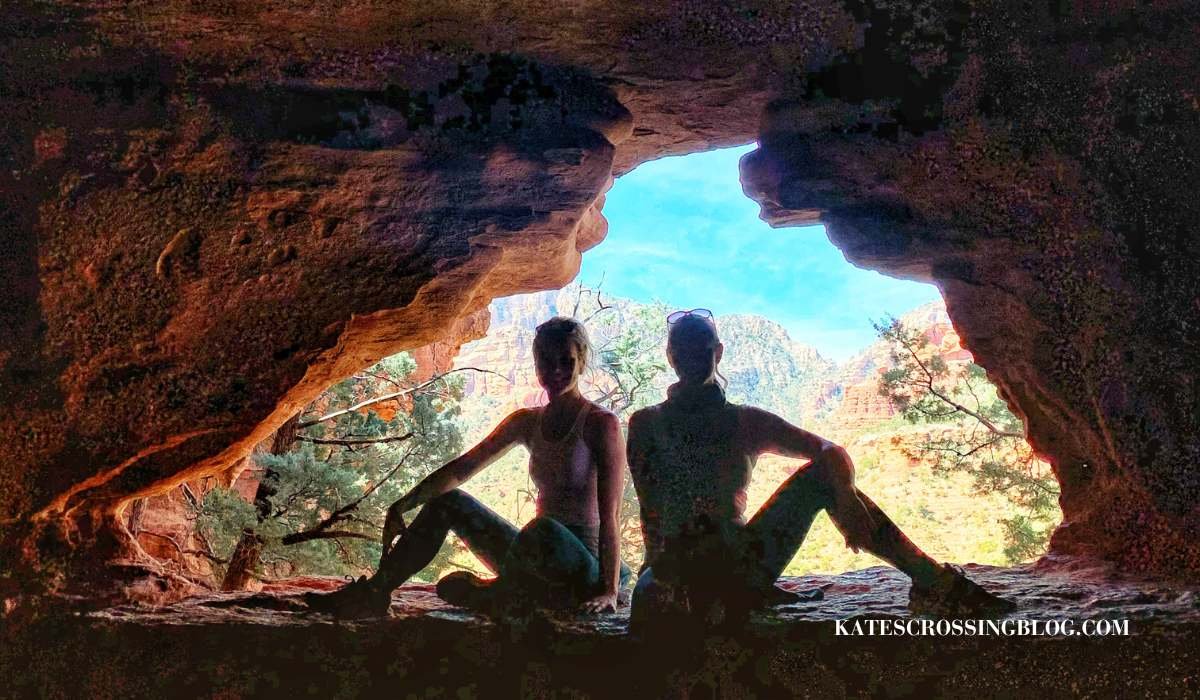
Soldier Pass Cave
4. Soldiers Pass Trail & Soldier Pass Cave
Now, let’s explore the Soldiers Pass Trail.
It’s definitely one of the best hikes in Sedona because it’s the gateway to a treasure trove of Sedona’s wonders, including the famed Seven Sacred Pools, the impressive Devil’s Kitchen Sinkhole, and the hidden Soldier Pass Cave—a true gem to be found!
As you hike on this trail, keep in mind that it’s a popular destination for jeep tours. Off-roading jeeps may pass by, causing a bit of a buzz.
The trail kicks off with a fairly flat and well-marked path, making it accessible for hikers of all levels. It’s an ideal choice for those seeking a fun hike without an overly strenuous climb.
However, if you opt to take the spur trail leading to the hidden Soldier Pass Cave, be ready for a short, steep incline up to the cave. The climb is doable, even for beginners, as long as you take it easy and go slow.
The pictures from inside the cave make the climb worth it!
PRO TIP: Once again, finding a parking spot can be a bit tricky for this trail. For all the specifics on navigating the parking challenges and finding the hidden cave, check out my article: Soldier Pass Trail: Discovering the Hidden Cave & Beyond.
Trail Stats:
Length: Around 4.5 miles (round trip)
Elevation Gain: 400 feet
Difficulty: Moderate
Time: About 2-3 hours
Trailhead: Start at Soldier Pass Trailhead
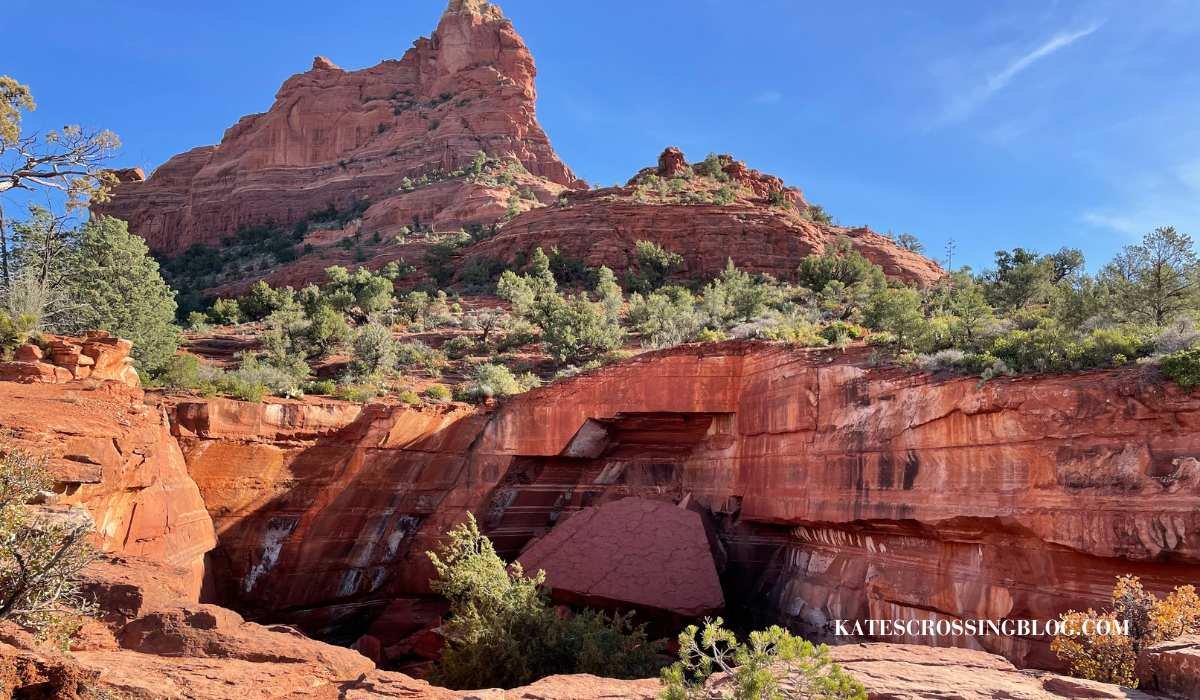
Devils Kitchen is the first cool landmark you come to on the Soldier Pass Trail
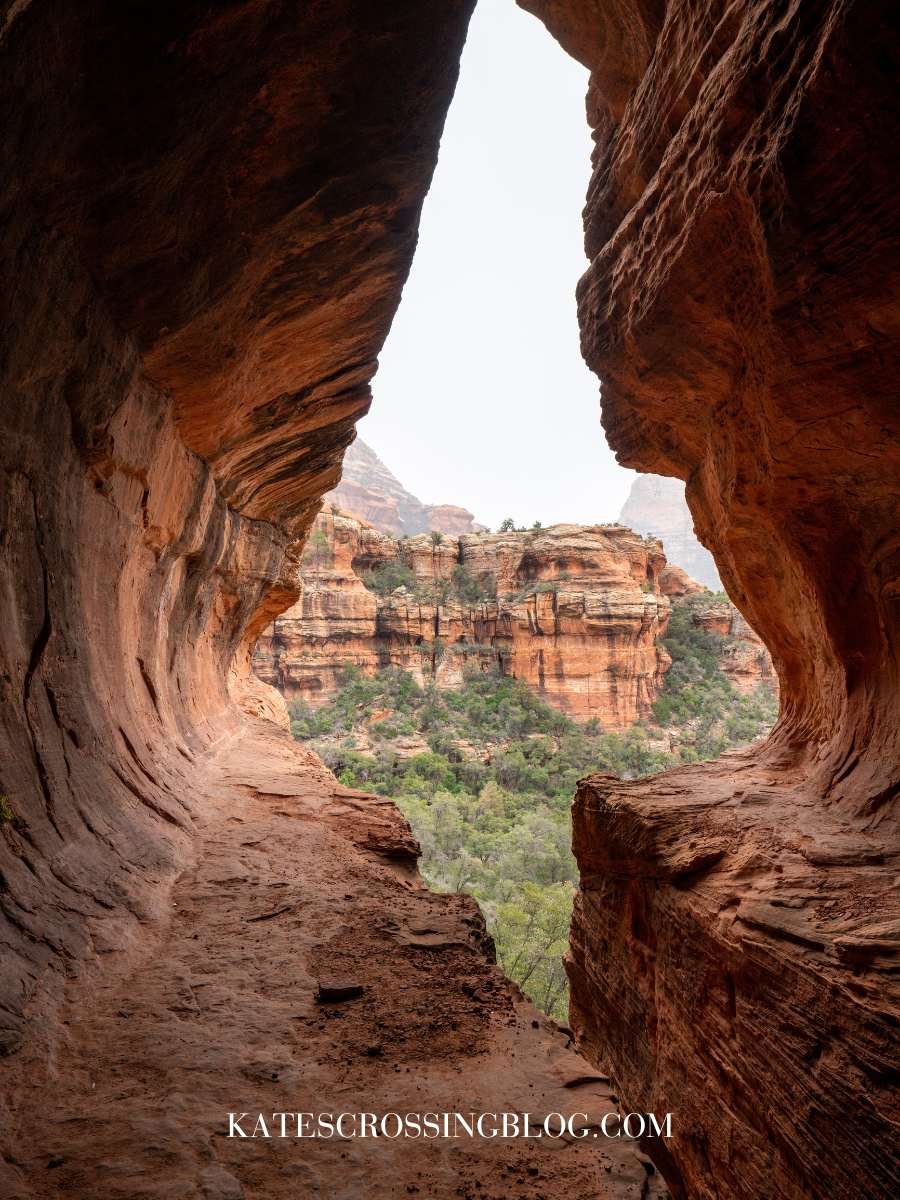
Subway Cave
5. Boynton Canyon Trail & Subway Cave Side Trail
The Boynton Canyon Trail is like the Soldier Pass Trail in that it has several treasures along its path. It includes a vortex and a hidden cave, making it one of the best hikes in Sedona.
The trial is not too tough. It has a mostly flat path shaded by trees. At the trail’s end, there’s a viewpoint from which you can see the whole of Boynton Canyon.
But wait, there’s more! You can take two side trips to make your hike even better.
At the beginning, take the Boynton Vista Trail to find the Boynton Vortex at the base of a rock spire.
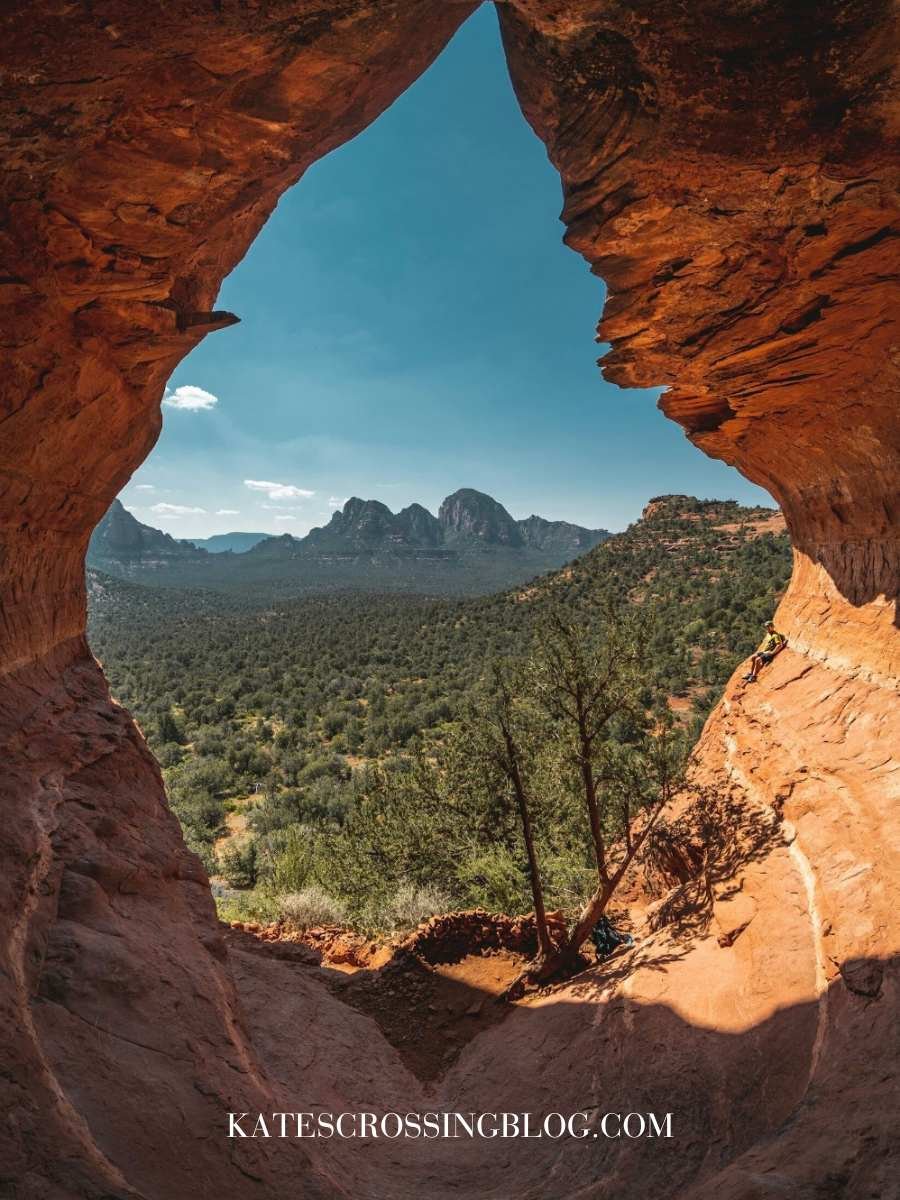
And about two-thirds down the trail, there’s the increasingly popular cave called the Subway Cave.
The hardest part of this trail will be getting up in the Subway cave. It’ll take a bit of rock climbing and shoes with a good grip to get inside. But the photos and views from within will be worth your effort!
PRO TIP: There are two ways to access the cave. You can climb directly up the rocks or choose the rim trail to the left. Personally, I went straight up the rocks and opted for the rim trail on my way down. Neither option is for those easily intimidated. Just be careful!
Trail Stats:
Length: About 6 miles (round trip)
Elevation Gain: 400 feet
Difficulty: Easy – Moderate
Time: Around 2-3 hours
Trailhead: Start at Boynton Canyon Trailhead
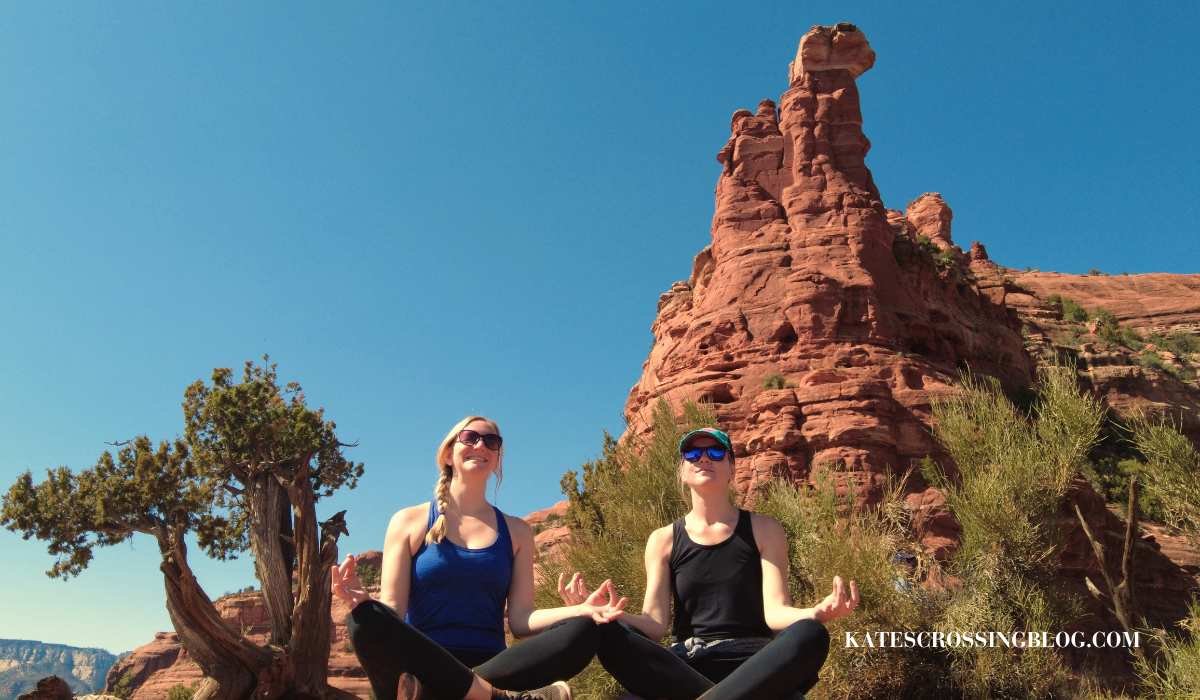
The Boynton Canyon Vortex is at the base of the rock spire.
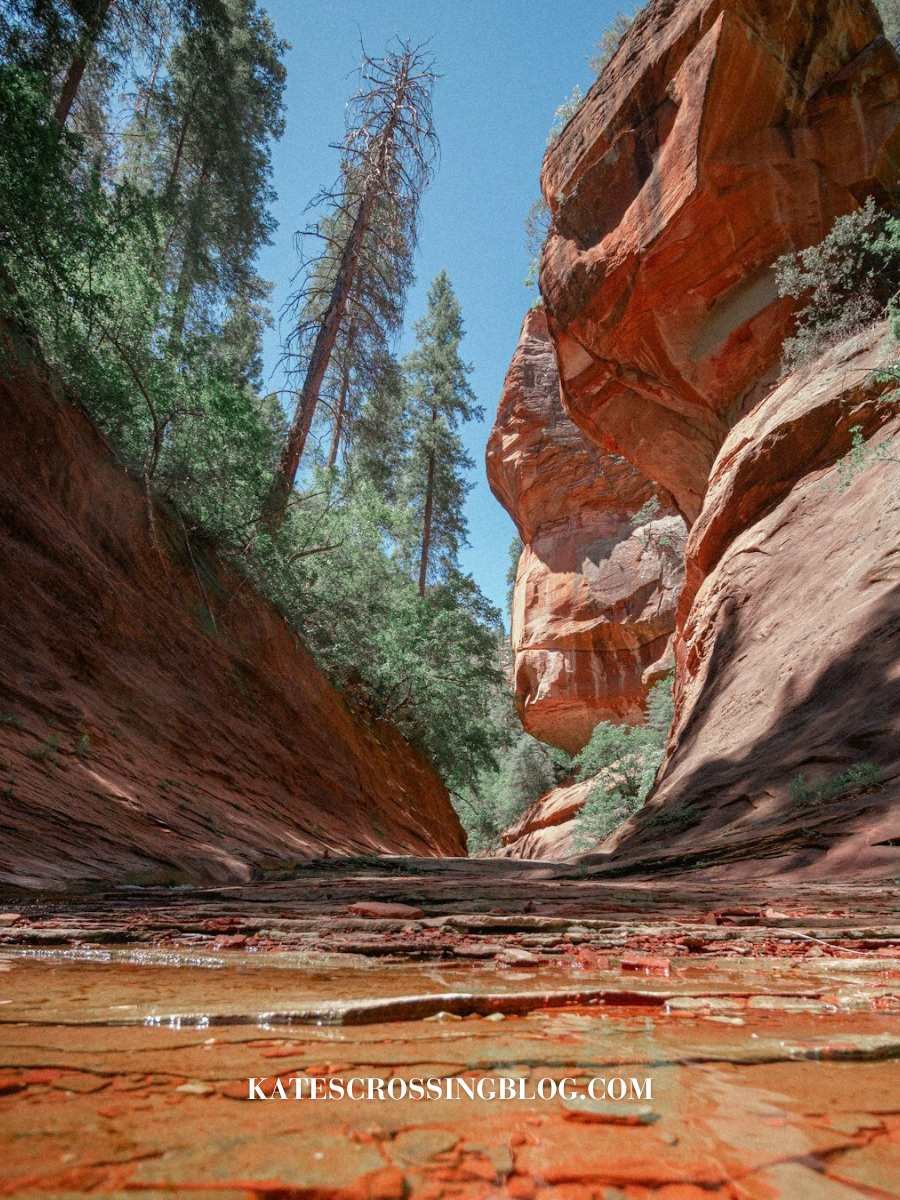
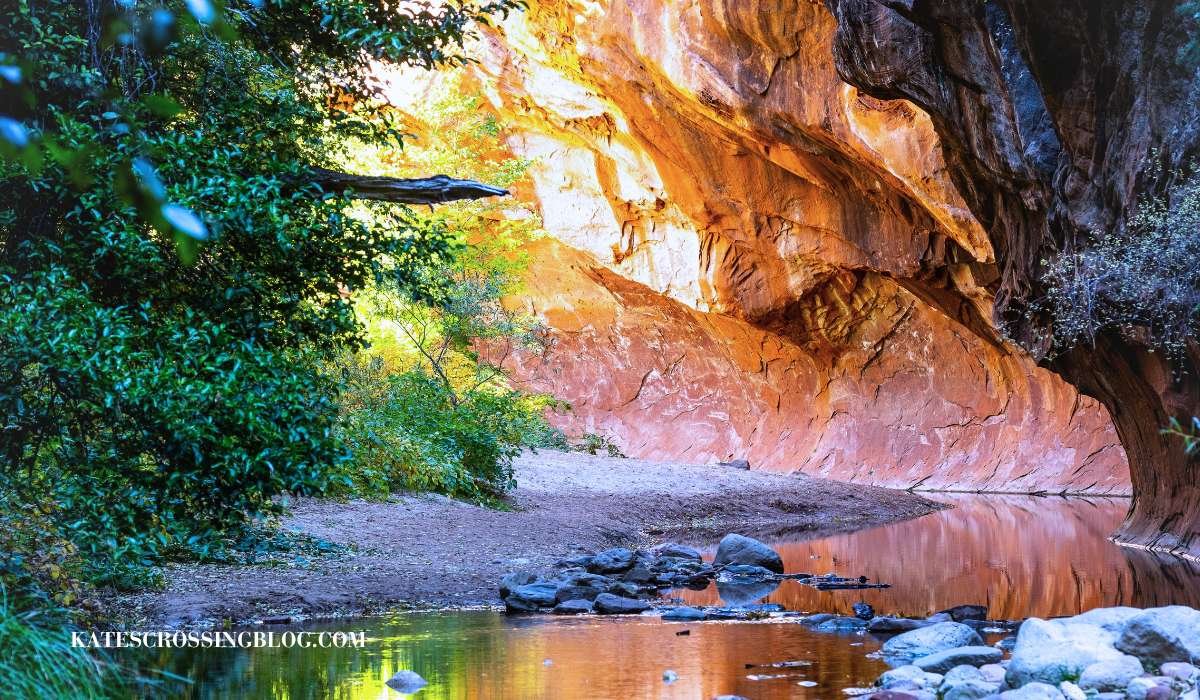
6. West Fork Trail
Prepare for an absolutely stunning hike on the West Fork Trail! In my opinion, it’s like Sedona’s miniature version of the famous Narrows Trail in Zion National Park.
This trail offers a refreshing escape from the sun, with partial shading from trees and towering canyon walls. It’s the perfect choice to stay cool while exploring Sedona.
Even though it’s considered an easy hike, be ready for multiple crossings of Oak Creek along the way. Most crossings have stepping stones and logs, but there’s a good chance your feet will get wet!
The trail ends when the canyon closes in, and you can’t go any further. But you have to at least hike in 3 miles to get to the prettiest part!
Pro Trip: For this 8-mile round-trip trail, I strongly recommend waterproof hiking shoes and hiking poles to help you balance on the slick rocks.
Trail Stats:
Length: 8-mile round trip
Elevation Gain: 540 feet
Difficulty: Easy – Moderate
Time: 3-4 hours
Trailhead: Call of the Canyon Day-use Area (opens at 8:00 am)
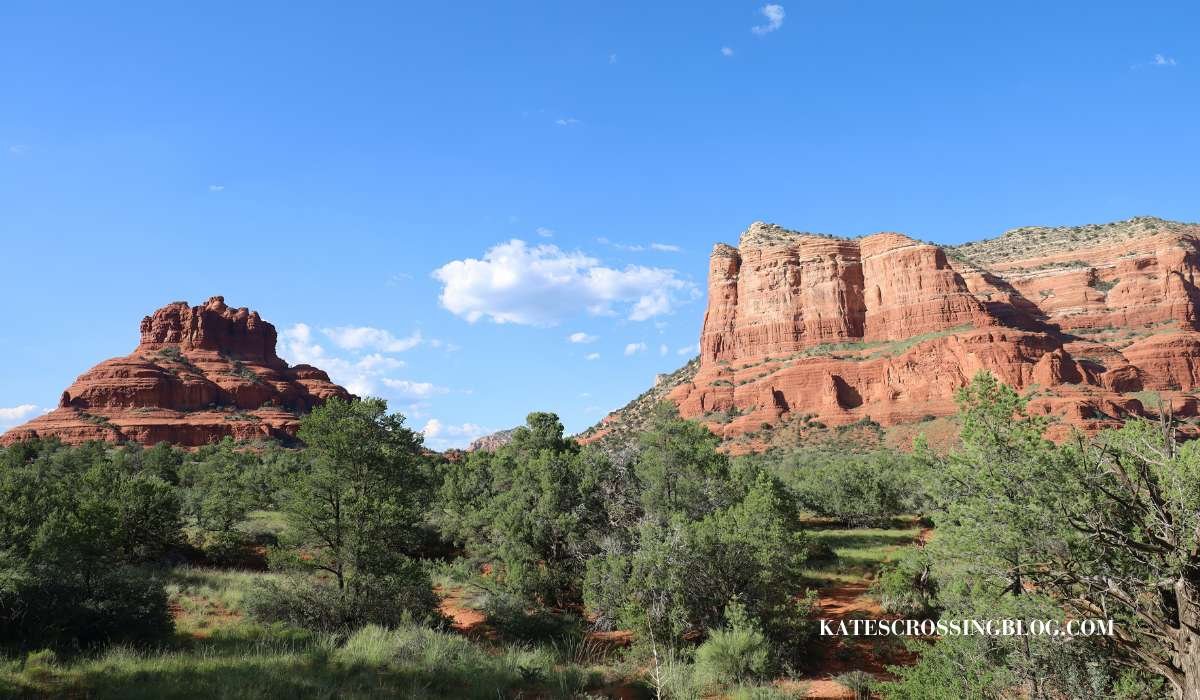
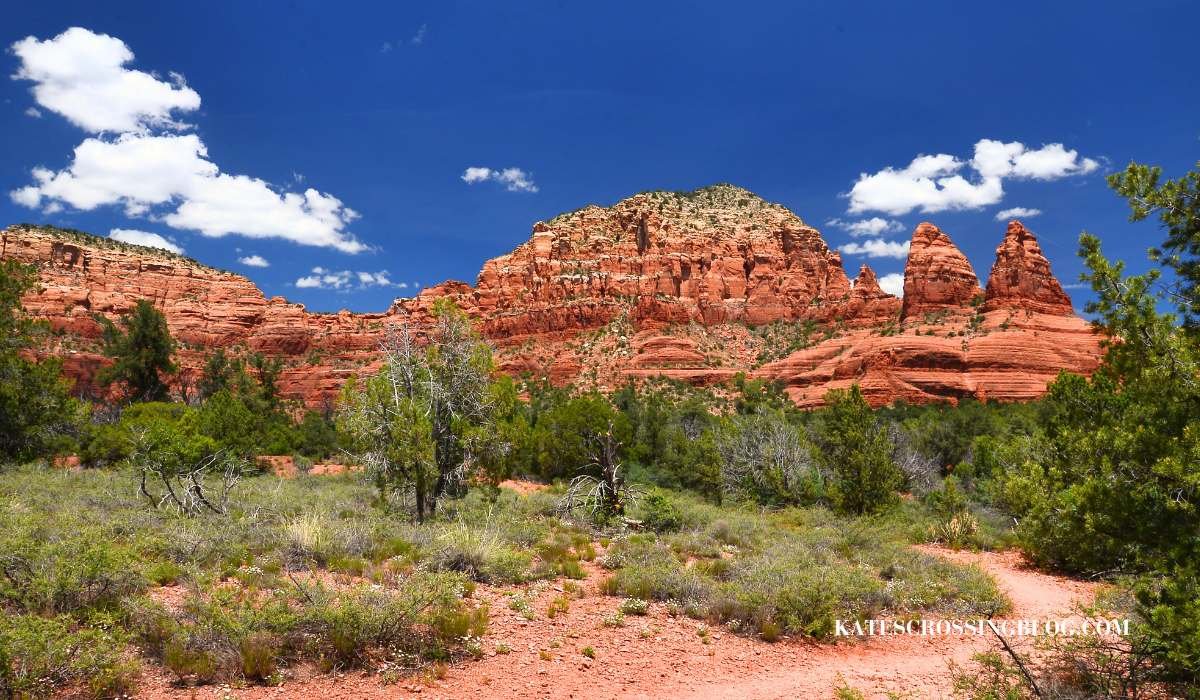
Bell Rock and the Courthouse Butte
7. Bell Rock Trail & Courthouse Butte
Embark on an unforgettable adventure with the Bell Rock Trail and Courthouse Butte – two captivating wonders nestled in the heart of Sedona’s red rock landscape.
Bell Rock Trail stands as an iconic red rock formation, drawing hikers seeking both natural beauty and a bit of challenge.
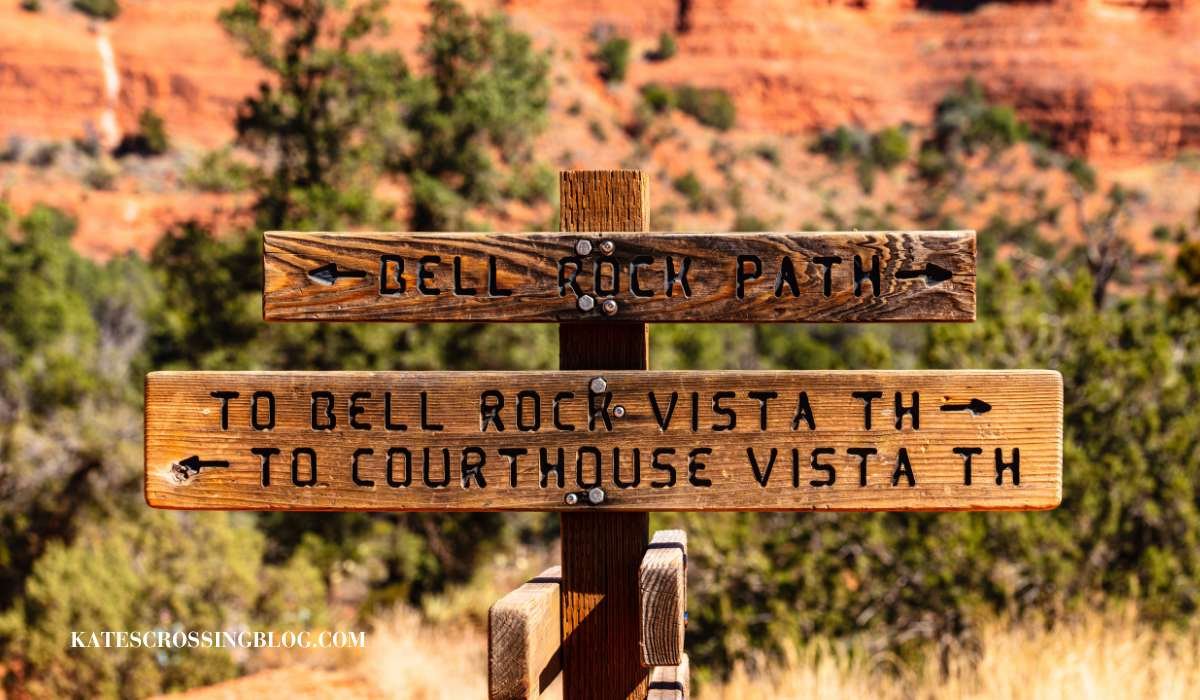
Starting at the Bell Rock Pathway Parking, the trail invites you to immerse yourself in the mesmerizing surroundings. As you ascend, the panoramic views of Sedona’s unique landscape unfold, making this hike a must for any adventurer.
The Courthouse Butte is a majestic companion to Bell Rock and shares the same trailhead at Bell Rock Pathway Parking.
What sets Bell Rock Pathway apart is its versatility. The trail allows you to customize your experience, with additional trail options to decide how far you want to venture into the mesmerizing scenery.
PRO TIP: I highly recommend hiking up Bell Rock for incredible sunset views!
Trail Stats:
Length: About 4 miles out and back
Elevation Gain: 515 feet
Difficulty: Easy – Moderate
Time: Approximately 2-3 hours
Trailhead: Bell Rock Pathway Parking Lot
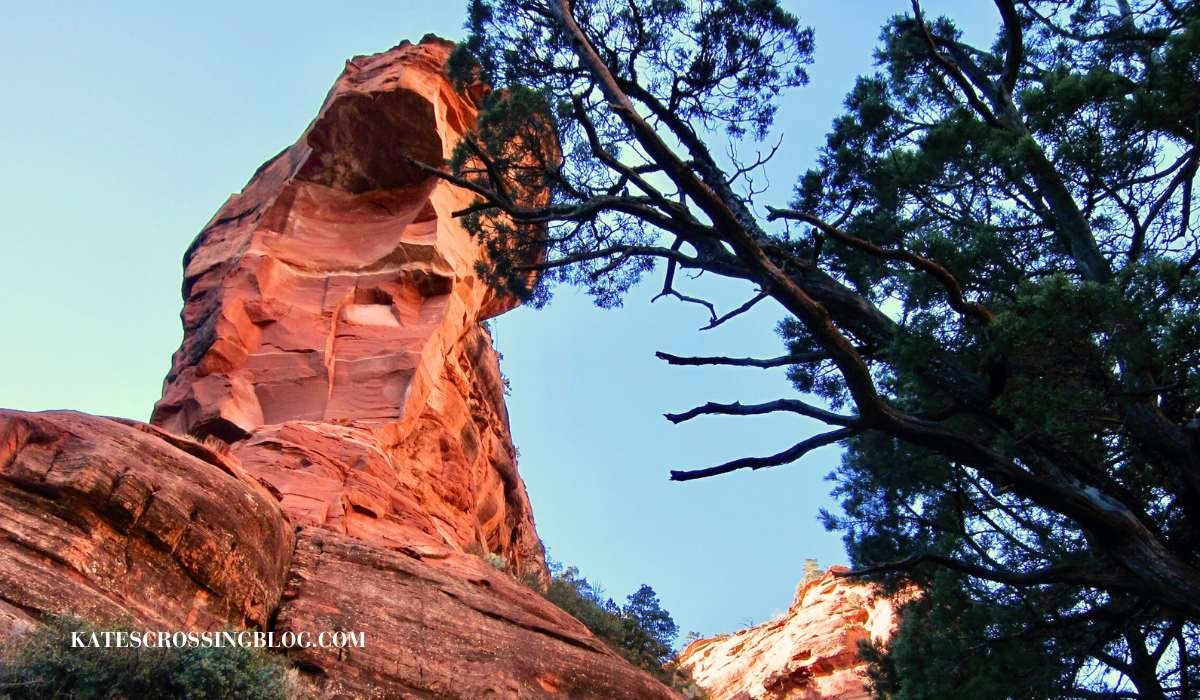
8. Fay Canyon Trail
Fay Canyon Trail makes it to my list of best hikes in Sedona for some really cool reasons.
As you stroll through Fay Canyon, the trail is relatively flat from beginning to end and has lots of shade, making it a pleasant hiking experience.
As you make your way down the trail, you’ll get glimpses of breathtaking views of towering canyon walls and expansive red rock formations.
The hike ends at the back of the canyon, marked by the unmistakable “End of Trail” sign.
If you’re seeking an extra dose of adventure, a short spur trail leads to the sandstone Fay Canyon Arch.
This cool arch is on the right side of the canyon before the trail finishes. You can kinda see it from the main trail, but you might need just the right sunlight to really spot it. It’s a hidden treasure for those who keep a good lookout.
PRO TIP: Arrive early to secure a parking spot and avoid crowds, as the parking lot is relatively small. But street parking is available.
Trail Stats:
Length: 2.3 miles out and back roundtrip
Elevation Gain: 193 feet
Difficulty: Moderate
Time: 1.5 hours
Trailhead: Fay Canyon Trailhead
Birthing Cave
9. Birthing Cave Hike
The Birthing Cave Hike may be the easiest Sedona cave hike, but it’s still one of the best hikes in Sedona. From a diamond-shaped cave sitting on a short cliff, you’ll see amazing views.
It’s a quick and easy hike. The path to the Birthing Cave is mostly flat, offering a nice walk through Sedona’s pretty landscapes. But, at the end of the trail, you’ll need to climb a little bit into the cave.
Wearing good hiking shoes and staying low will make this short climb not too hard.
Once you’re inside the Birthing Cave, you can climb a bit higher on the cave walls to a ledge just a few feet up for awesome views.
Believe me, the Birthing Cave and the stunning views make the quick, steep climb totally worth it!
PRO TIP: I highly recommend you bring a camera with a wide-angle lens! It helps capture the whole entrance of the Birthing Cave. Come early to have the cave to yourself for great photos and a peaceful time in this special spot in Sedona.
Trail Stats:
Length: 1.9-mile out-and-back
Elevation Gain: 250 feet
Difficulty: Easy
Time: Approximately 1-1.5 hours
Trailhead: Long Canyon Trailhead
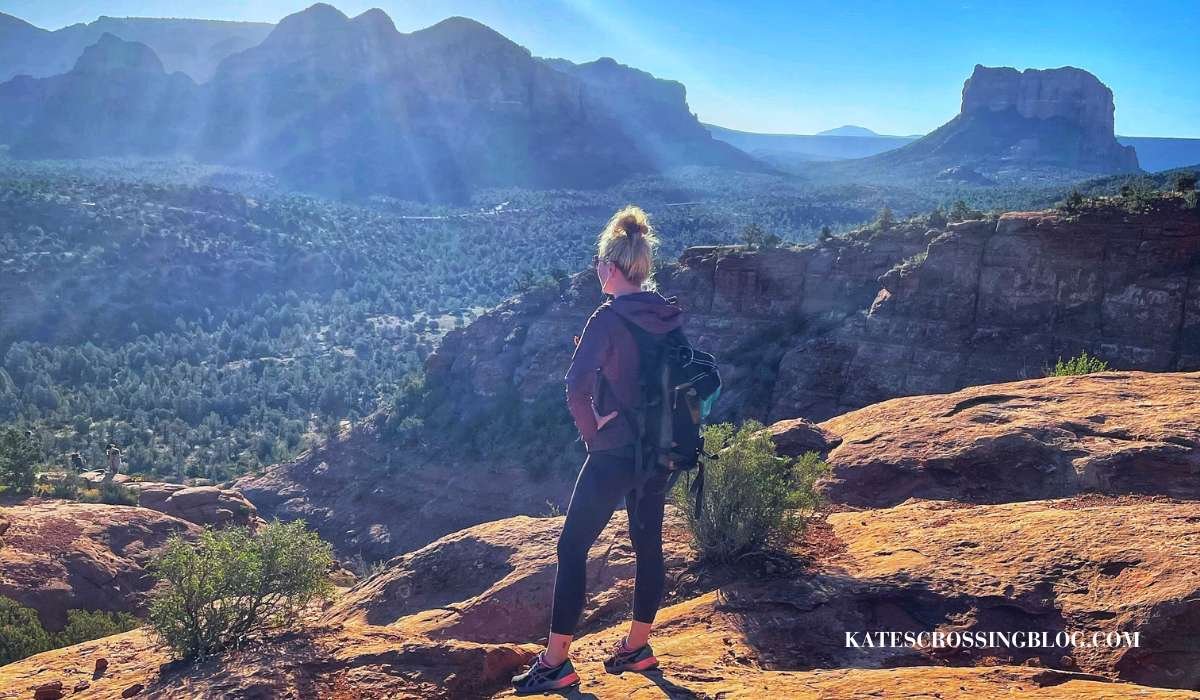
Little Horse Trail to Chicken Point
10. Little Horse Trail to Chicken Point
The Little Horse Trail to Chicken Point is one of the best hikes in Sedona, treating you to unforgettable red rock formations and breathtaking views in a short, relatively easy hike.
This adventure starts on the Bell Rock Pathway, taking a left turn at the marked fork for Little Horse Trail. The trail follows an old jeep road before ascending the backside of Chicken Point.
The panoramic views from Chicken Point are continuous and offer some of the most stunning red rock formations in Sedona.
Your jaw will probably drop because it’s that awesome!
PRO TIP: Since most of the hike is exposed to the sun, make the most of any shady spots you come across, as they are limited on the trail. Ensure you pack sunscreen and wear a hat to stay protected from the sun’s rays.
Trail Stats:
Length: 3-mile round trip
Elevation Gain: 350 feet
Difficulty: Easy
Time: approximately 2-2.5 hours
Trailhead: Little Horse Trailhead
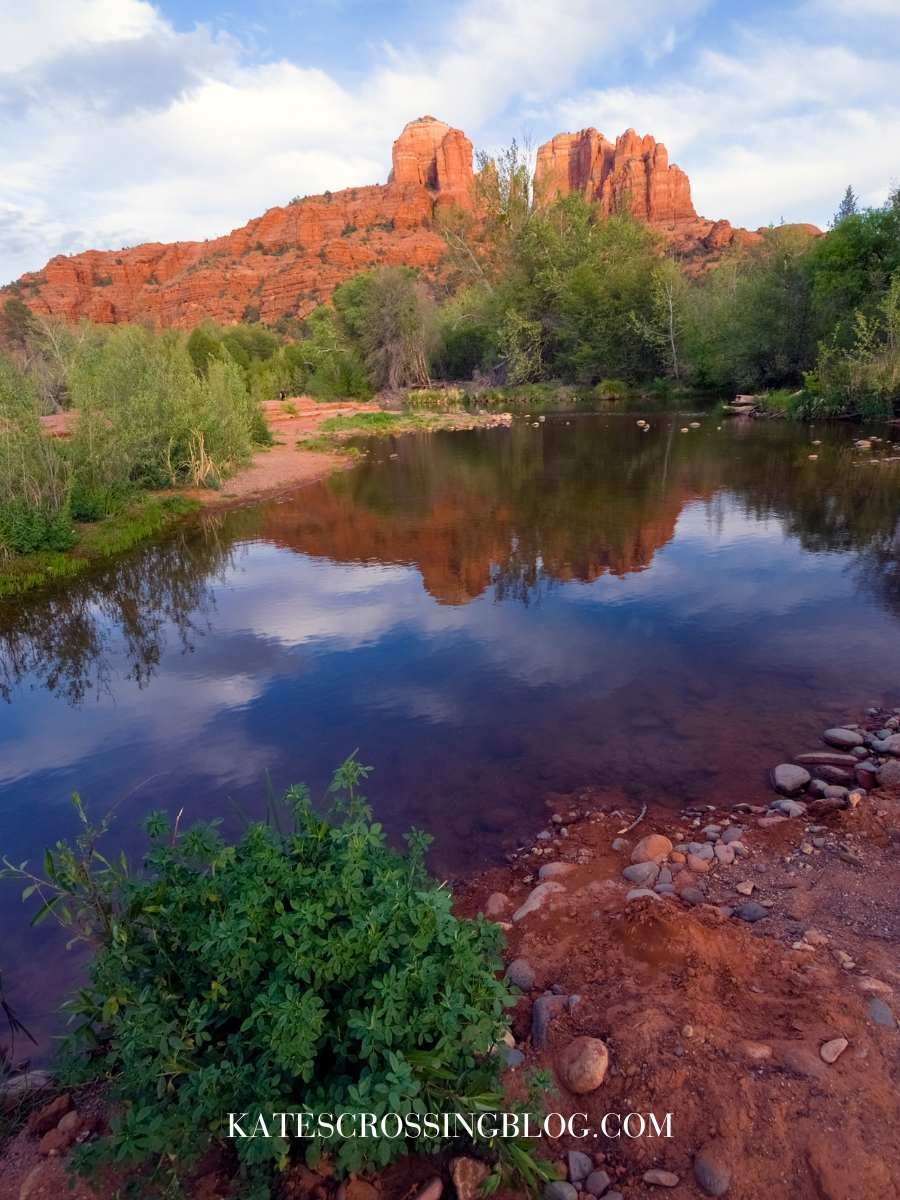
Red Rock Crossing is the best place to photograph Cathedral Rock!
11. Red Rock Crossing
Explore the easy and beautiful Red Rock Crossing Trail in Sedona – perfect for those who want a simple yet incredibly rewarding experience.
This trail is not your usual “hike.” It’s a short 0.8-mile walk along the pretty Oak Creek. Its calm and peaceful atmosphere is what makes it so charming.
You can dip your toes or take a cool swim while enjoying the stunning views of Cathedral Rock. It’s one of the Sedona’s best water holes and a great way to relax and escape the Arizona heat.
The trail starts at the back of a park and takes you to a small riverfront with amazing views of Cathedral Rock.
Just be aware that the small river can turn into a bigger one, making it tricky to cross. To get here, park in the Crescent Moon Day Use parking lot, which costs $10 in cash.
PRO TIP: After recent rain, always watch your step, but know it’s the perfect time to capture reflections of Cathedral Rock in the serene water puddles.
Trail Stats:
Length: 0.8 miles (round trip)
Elevation Gain: none
Difficulty: Easy
Time: About 1 hour
Trailhead: Crescent Moon Day Use Parking Lot
Other Sedona Hiking Trails on My Bucket List
Sedona is a treasure trove of awesome hiking trails! You could easily spend weeks here exploring and trying out a new trail each day. These are the other trails I have on my bucket list I think you would like too:
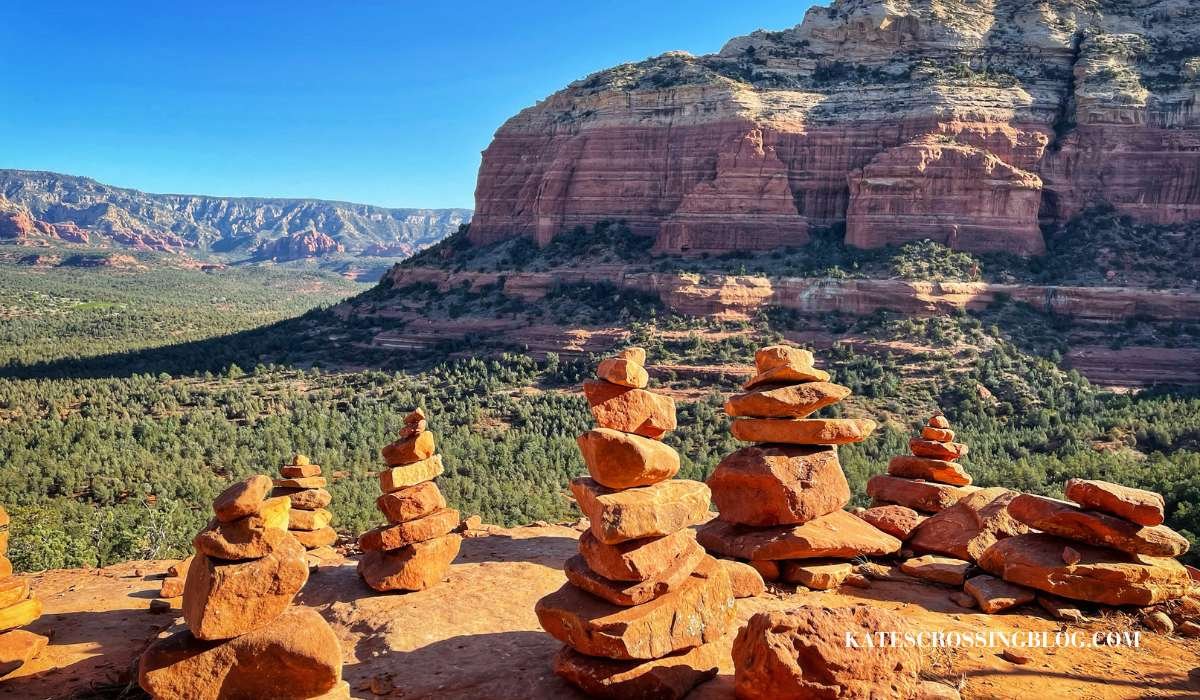
Please don’t build cairns. Building cairns where they shouldn’t be has been known to cause hikers to get lost.
Sedona Hiking Tips For the Best Experience
You’re almost all set for an awesome adventure as you tackle the best hikes in Sedona! But before you hit the trails, there are a few things you should know.
Here are some tips to ensure your experience is a smooth one.
Several of the trailheads require you to have a Red Rock Pass to park there. Or if you have the annual America the Beautiful National Park Pass, that works, too!
You can pick up a Red Rock Pass for $5 per day, $15 per week, or $20 per year at many of the trailhead parking lots or the Sedona Chamber of Commerce. Or do what I did and purchase it online.
Remember to put your pass on the windshield when hiking, and always lock your vehicle!
When the Sedona shuttle is up and running, they close down several of the popular trailhead parking areas, and you’ve got to hop on the shuttle to reach them. But when the shuttles aren’t operating, you’re free to park right at the trailheads.
If you attempt to park in the lot when the shuttles are running, they’ll send you away.
It’s a FREE shuttle that runs from 7:00 am to 5:30 pm Thursday through Sunday.
Here are the trailheads the Sedona Shuttle takes you to and where you can hop on:
North SR 179 Park and Ride provides service to:
-
Cathedral Rock Trailhead.
-
Little Horse Trailhead.
Posse Grounds Park and Ride provides service to:
-
Soldier Pass Trailhead
-
Dry Creek Trailhead
West SR 89-A Park and Ride provides service to:
-
Mescal Trailhead
-
Dry Creek Trailhead
Tips for Making the Most of The Best Hikes in Sedona
Here are some of the tips I’ve learned while hiking in Sedona that will help you out on your hiking adventures
Get on the Trails Early!
Sedona is a very popular hiking destination, and finding a parking spot can be tricky. It’s best to go early, like before the sun comes up, to get a spot.
In busy times, the trailheads fill up fast, sometimes as early as 7 am. When I went to the Cathedral Rock Trailhead at 6:30, it was already full, and three cars were waiting.
Carry Enough Water!
Keeping yourself hydrated is the key to a fantastic hike, especially in Sedona’s hot weather. Try to drink one liter (32 ounces) of water every two hours while you’re hiking.
Since there aren’t any water stations along the trails in Sedona, make sure to bring your own. To play it safe, stick to shorter hikes, especially when it’s hotter.
Staying hydrated helps lower the chance of heatstroke, keeps your energy up, and stops dehydration. And don’t forget, if you’re feeling thirsty, dehydration has already kicked in.
Wear Layers:
The weather in Sedona can be quite unpredictable, with temperatures all over the place.
The mornings can be chilly, even in the summer, but by mid-day, it’ll be sweltering hot! That’s where layering becomes your secret weapon to staying comfy and adjusting to the changes.
Also, shade is pretty scarce on the trails, and the sun can really drain your energy levels.
So, it’s wise to gear up with long-sleeve tops and bottoms made of fast-drying fabrics that whisk away sweat and keep you cool and dry.
Always Leave No Trace!
Let’s be responsible trail mates. Always clean up after yourself, carry out all your trash, and stick to the “Leave No Trace” principles when exploring Sedona.
It’s not just about soaking in the gorgeous red rocks; it’s about preserving the trails for all the hikers who come after us. So, let’s all chip in and keep Sedona’s trails in top-notch condition.
Must-Have Gear for The Best Hikes in Sedona
Get ready for your hikes in Sedona with the gear you really need to make them awesome!
Here are my favorite must-have items I think you should bring with you:
Day Backpack
A day backpack is a must for hiking in Sedona. It helps you carry all the stuff you need, like water, snacks, and sunscreen.
Plus, Sedona’s weather can fluctuate a bunch, so having a backpack lets you bring or shed extra layers in case it gets colder or warmer.
It keeps your hands free to walk and makes sure you’re ready for anything on the trails. Don’t forget to pack some water in there too!
Hydration Pack
Keeping yourself hydrated is crucial while hiking in Sedona. Folks, the heat in Sedona is serious!
Having a hydration pack in your daypack is a game-changer. It lets you take a sip whenever necessary and eliminates the inconvenience of struggling to retrieve a water bottle from your pack.
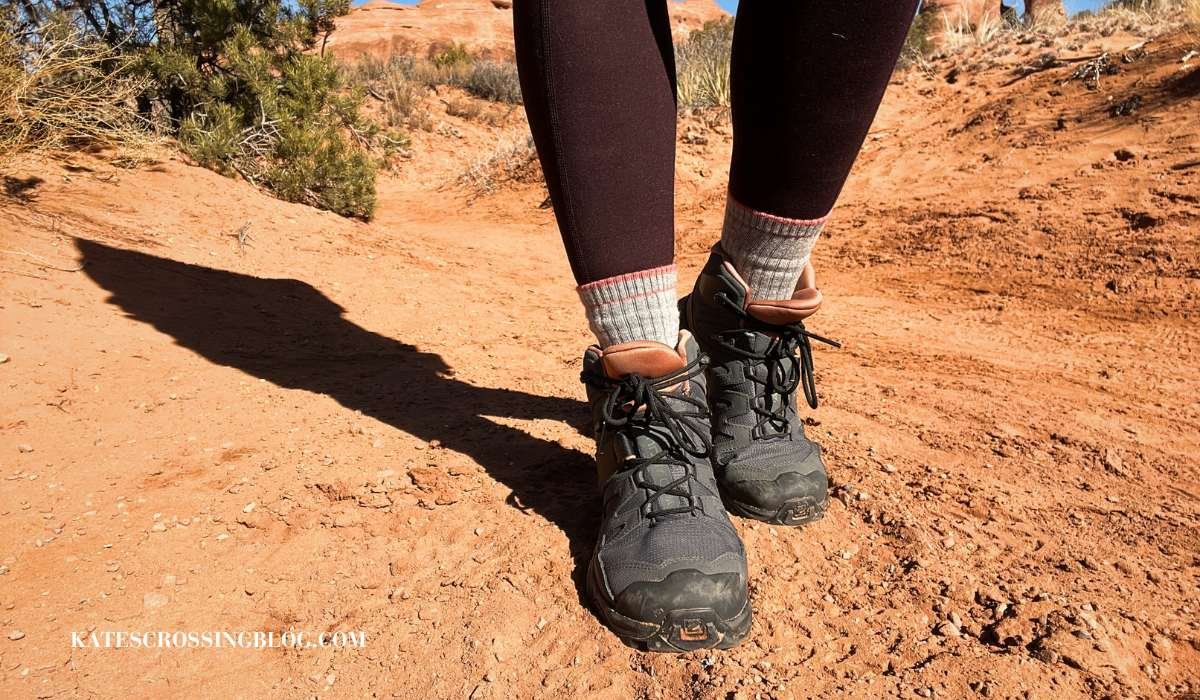
Hiking Shoes
Having the right shoes for hiking in Sedona is a must. They give your feet the support and grip you need on the trails, keeping you stable and safe from slips on the rocks.
If you like more ankle support, you might want to check out these hiking boots, but honestly, you don’t really need boots in Sedona. Most hikes are pretty short, so a good pair of hiking shoes with good grip is all you really need. These hiking shoes are my personal favorite.
Trekking Poles
Using trekking poles is a smart move, especially if you are planning to hike the West Fork Trail and its many water crossings. They help you stay steady on bumpy ground, lower the chance of slipping, and take the pressure off your knees and legs.
These Trekking Poles will make your hiking experience safer and more fun, especially in Sedona’s tricky terrain with ups and downs and lots of red rocks.
Emergency Beacon
In the desert, things can get tricky – it’s easy to lose your way, and the heat can be tough.
With an emergency beacon, you can signal for assistance, and rescue teams can find you faster.
I always bring my SPOT device on every adventure. It’s like having a lifeline to make sure you stay safe and sound during your desert adventure. It’s always better to be safe than sorry!
Head Lamp
A headlamp is super important for hiking in Sedona. You’ll want to start early before the sun comes up or hike out in the dark after the sunset to avoid big crowds at cool spots like Devil’s Bridge or Cathedral Rock.
A headlamp is way easier than a flashlight or your cell phone to find your way in the dark. Let’s have a safe and fun hike by avoiding getting lost or tripping on rocks.!
Resources to Help You Plan Your Trip to Sedona
🏜️ Looking to make the most of your time in Sedona? Take a look at my article, Ultimate Sedona Itinerary for an Epic Weekend Getaway. If you’re pressed for time and eager to make the most of a day in Sedona, check out this article: The Ideal Sedona Day Trip Itinerary + The Best Highlights
🏨 I’ve already picked out the Best Hotels in Sedona with a View, making your accommodation choice a breeze. If you want to save on your hotel, go ahead and book through Hotels.com or VRBO and start racking up that One Key Cash!
🛩️ Just a heads up – you can score extra One Key Cash by booking your flights and car rental through Expedia. Use it for more travel adventures and discounts down the road!
💡Looking for things to do in Sedona besides hiking? Explore GetYourGuide or Viator for exciting tours and activities. Plus, enjoy the peace of mind that you’ll get a full refund if plans take an unexpected turn.
🧳 Make sure you don’t forget anything with this complete Sedona Packing List.
That’s a Wrap on the Best Hikes in Sedona
There you have it—the lowdown on the best hikes in Sedona and my personal favorites.
Have I helped you decide which one you want to do?
Personally, I think each one is a unique and stunning experience and a must-do when visiting Sedona!
Whether you’re capturing the amazing views from Devil’s Bridge or Cathedral Rock or just meandering through Fay Canyon, these 11 best hikes in Sedona will not disappoint.
Want more adventures? Follow me on Instagram and Facebook for the latest updates and travel tales! I’ll Love Ya Forever!!
Thanks for stopping by!