Devils Bridge Hike 101: Everything You Need to Know
So you’re gearing up for a trip to Sedona, and the Devil’s Bridge Hike is calling your name, huh?
Having personally tackled this iconic trail, I can vouch for the jaw-dropping views that’ll greet you. Devil’s Bridge isn’t just a hike; it’s a Sedona masterpiece and a right of passage for anyone’s first time visiting Sedona!
In this guide, I’ll dish out all the deets – from insider tips to the hidden trail that takes you below the arch.
Let the adventure begin!

Everything You Need to Know About the Devils Bridge Hike
Are you looking for more Sedona hikes? If so, then you’ll love reading my other posts:
Discover the Cathedral Rock Hike Secrets
Soldier Pass Trial: Finding The Hidden Cave
You Have Five Options to Reach Devils Bridge
When planning your hike to Devil’s Bridge, you have four different routes to choose from, each offering a unique experience and varying levels of difficulty. Here’s a quick guide to help you decide the best path for you.
1. Drive Dry Creek Road to Devils Bridge Trailhead
Distance: 1.3 mile drive up Dry Creek Road to Devils Bridge Trailhead + 1 mile hike from the trailhead to the bridge (2 hiking miles round trip)
Time: 45min – 1 hour
Elevation Gain: 350
Difficulty: Moderate
For the quickest route to Devil’s Bridge, opt for driving directly to the trailhead. You’ll drive beyond the Dry Creek parking lot, tackling a very rocky and rutted dirt road for 1.2 miles until you reach the parking area at the Devil’s Bridge trailhead.
This shortens your Devils Bridge hike to just two miles round trip.
Keep in mind that a high-clearance vehicle with 4WD is necessary for this route. Additionally, be aware of the considerable foot traffic heading up Dry Creek Road, as it’s the path that most people hike.

2. Hike Dry Creek Road to Devils Bridge
Distance: 2 miles one way (4 miles total round trip).
Time: About 2-2.5 hours
Route Type: Out & Back
Elevation Gain: 450 feet
Difficulty: Moderate
If you don’t have a 4WD high clearance vehicle, then your second option is to park at the Dry Creek Vista Trailhead parking lot and walk the jeep road up. To park here, you will need to pay $5 or have a Red Rock Pass, which you can purchase online.
The terrain is rough, dusty, and frankly boring – not to mention the dust clouds as the vehicles drive past.
I strongly advise against taking this route and suggest starting from either Chuck Wagon or Mescal (which I will discuss next) for a better Devils Bridge hike.

3. Chuckwagon Trail to Devil’s Bridge
Distance: 4.2 miles one way (8.5 miles round trip).
Time: About 2.5-3 hours
Route Type: Out & Back
Elevation Gain: 738 feet
Difficulty: Easy-Moderate
Choosing this path adds some distance to your hike, but the trade-off is a much more picturesque and enjoyable route compared to walking along the dusty Dry Creek Road.
To reach the Chuck Wagon Trailhead, you’ll need to park in the lot off Dry Creek Road. Although the parking area is fairly large, it tends to fill up fast! So get there early, before 7 am. Or choose to go in the evening after 4 pm.
Although this option is the longest, it’s an easy walk till you get to the Devil’s Bridge Trailhead. The trail is well-marked and quite obvious with all the foot traffic. So don’t worry about finding your way.
Look out for mountain bikers who also share this trail.
Chuckwagon Trail eventually connects with the official Devil’s Bridge Trail.
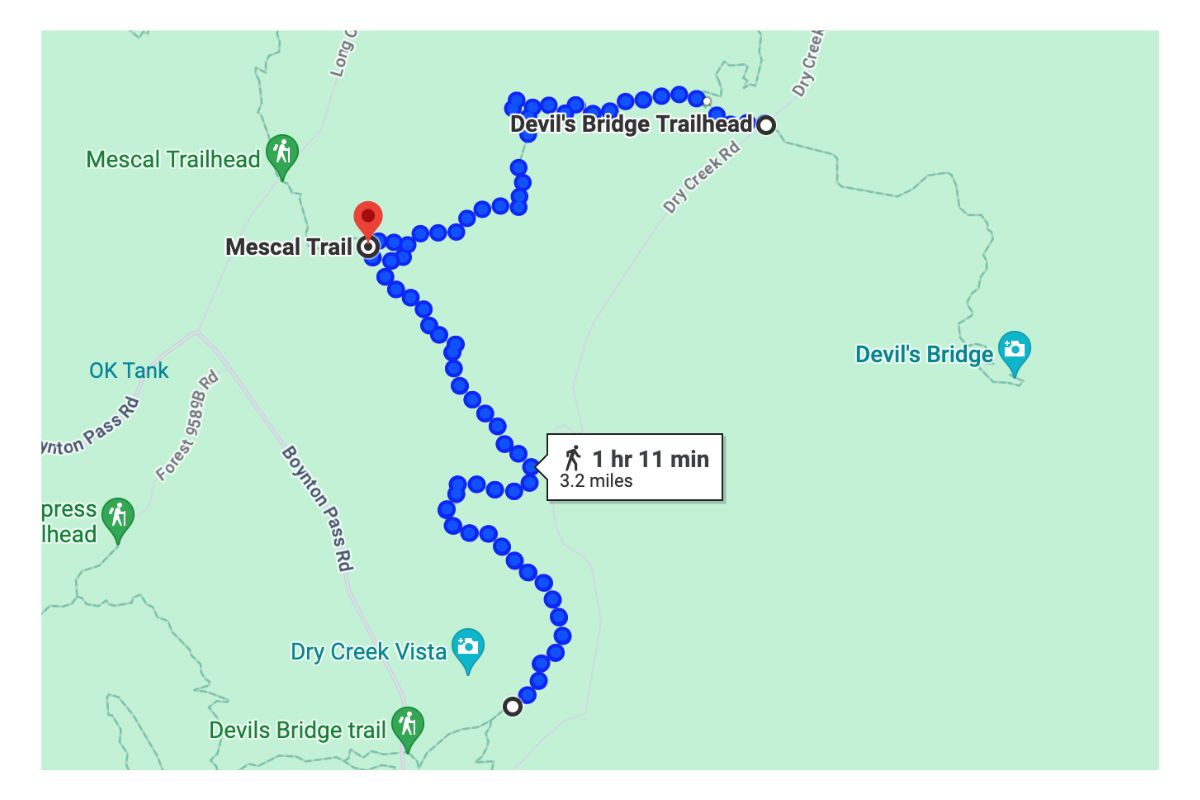
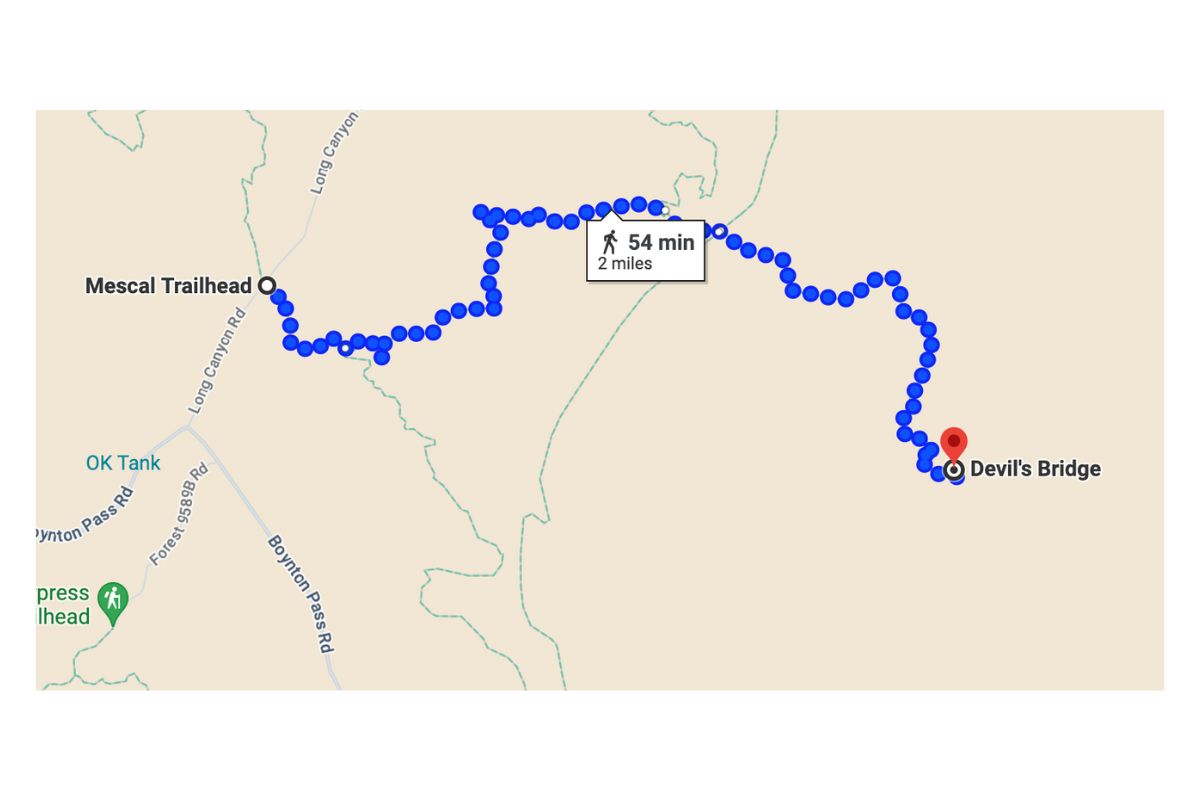
4. Mescal Trail to Devils Bridge Trail
Distance: 3.2 miles one way (6.4 miles round trip)
Time: 2-2.5 hours
Route Type: Out & Back
Elevation Gain: 509 feet
Hiking from Mescal Trailhead is the best route, in my opinion. It shaves a bit off the over-hike distance and offers better scenery along the way. The hike is mostly flat until you reach Devil’s Bridge trailhead.
Bear in mind that the parking lot is quite small, so snagging a spot isn’t guaranteed. Arrive very early, or you might have to park alongside Long Canyon Road as I did.
As mentioned above, the Mescal Trail joins the Chuckwagon Trail and then connects to Devils Bridge Trail.
Helpful Tip: You are allowed to park alongside the road as long as your car is completely off the pavement. This parking area does not require you to have a Red Rock Pass.
5. Taking the Sedona Shuttle to Trailhead
If you’re not up for the hassle of driving and dealing with parking, no worries!
Check if the Sedona Shuttle is running while you are there. It’s a nifty free service that’ll take you from central Sedona to Dry Creek Vista and Mescal Trailheads.
Important to Note: Since the Shuttle doesn’t start until 7 am, anticipate sharing the trails with a larger crowd by then. Also, expect to wait in line at the top as everyone vies for their turn to snap a photo on the bridge.

What to Expect Hiking the Devil’s Bridge Trail
Regardless of which route you decide to take, they’ll eventually all meet at the Devil’s Bridge Trailhead.
FYI: The rest of this post will describe the Devils Bridge Hike starting from the Mescal Trailhead since this is the route I chose to take.
On the Mescal Trail
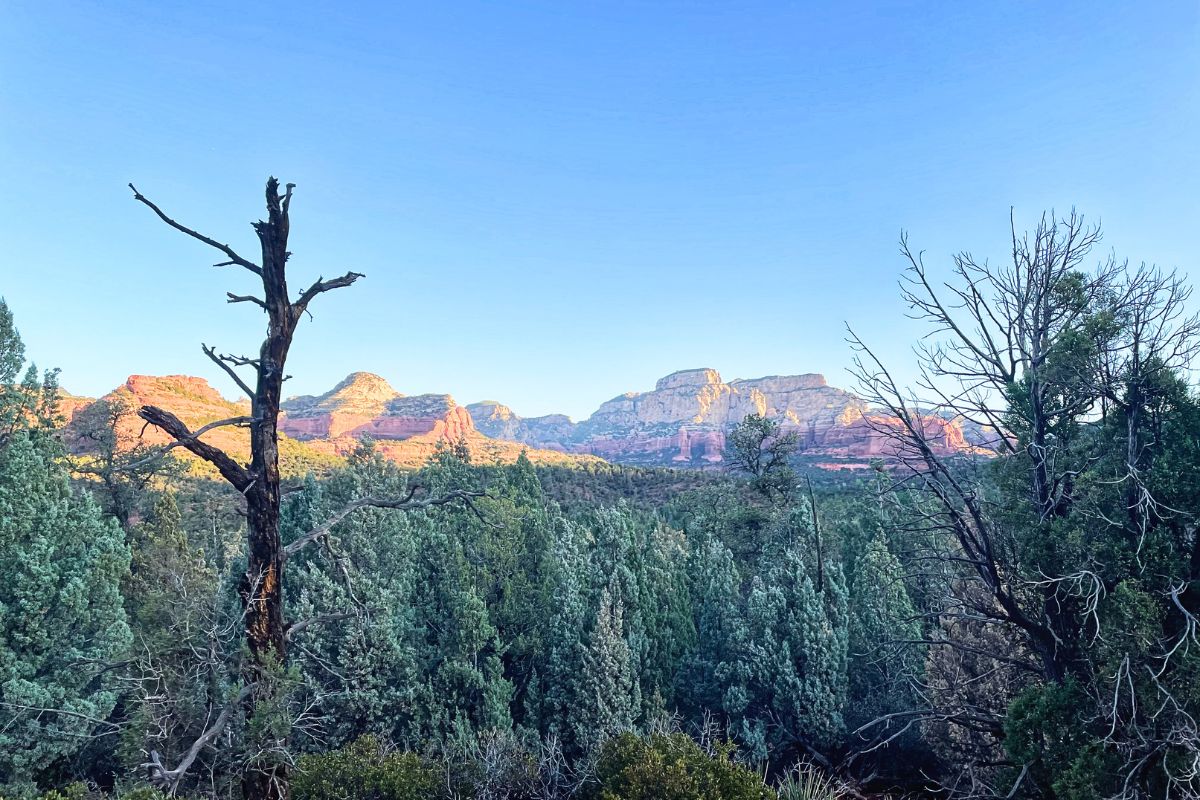
Starting from the parking lot on Long Canyon Road, follow the Mescal Trail into the forest. After a short walk of 0.4 miles, you’ll reach the end of the Mescal Trail and join the Chuckwagon Trail.
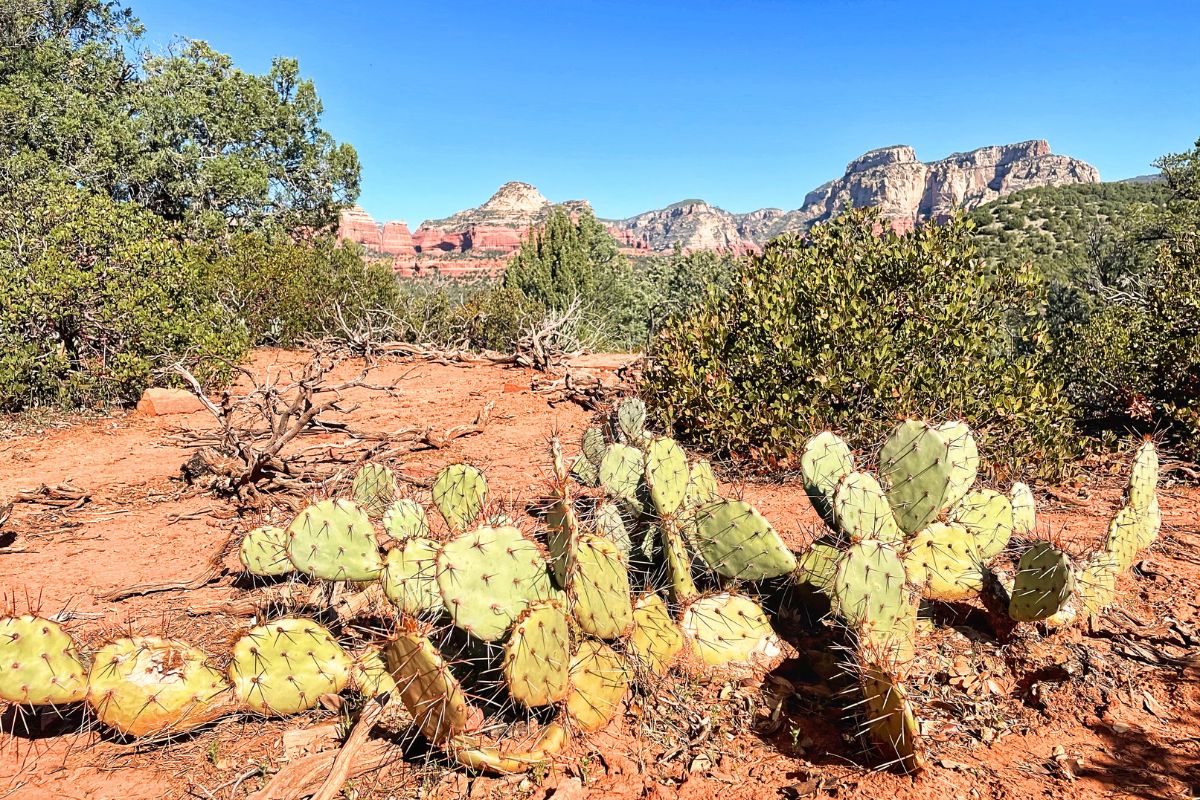
This trail winds through the exposed desert with thin patches of juniper trees offering little shade. The trail is relatively flat and feels more like a stroll through the park than a hike. You’ll see beautiful red rock mountains in the distance and cool cactus and yucca plants along the trail.
The trail is very easy to follow. There are signs all along the way, marking the trail.
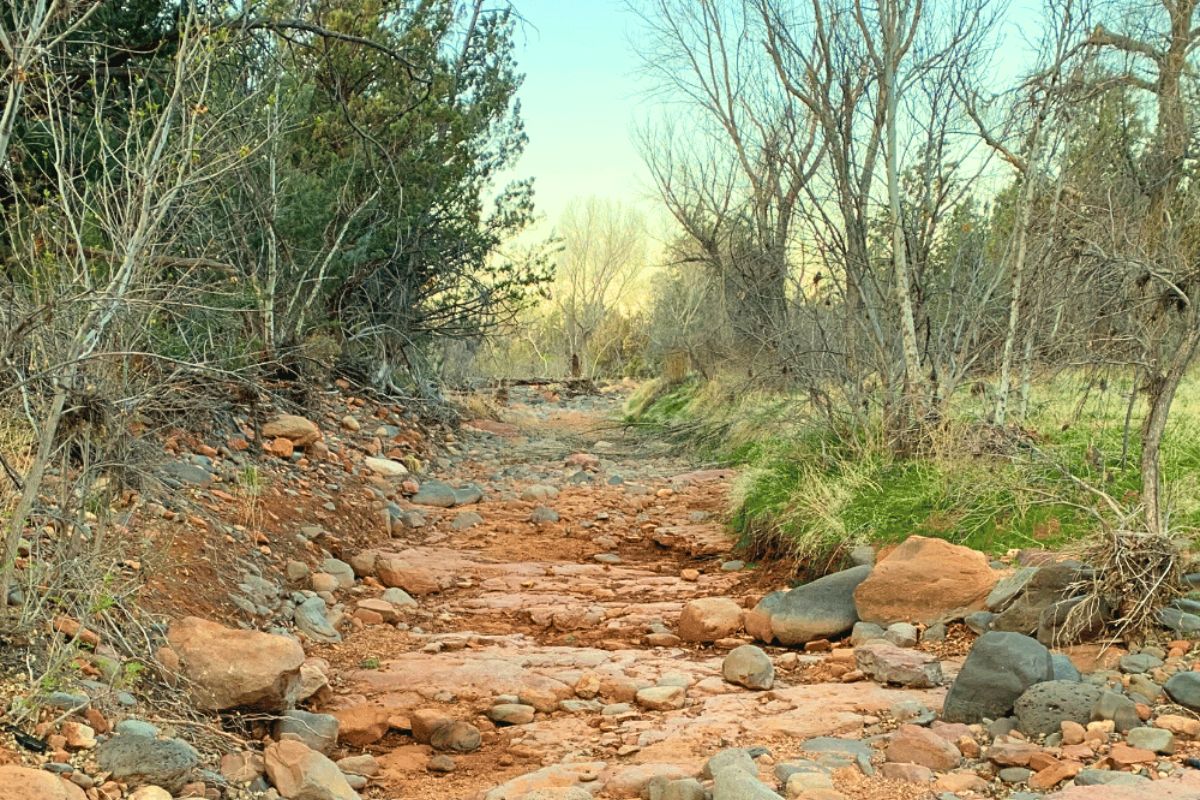
At a certain point, the trail intersects with a wash, and you’ll spot signs instructing you to walk up the wash, even though the trail seems to veer to the right. Don’t go right. Go up the wash!
Just watch for metal posts with arrows to keep you on track.
You’ll stay on the Chuckwagon trail, 0.9 miles, till you come to the jeep trail and Devil’s Bridge trail junction. Cross the jeep road and follow the signs. This junction is well-marked with signs, so you shouldn’t miss it.
The arch is just one mile from the Devil’s Bridge trailhead (2 miles round trip).
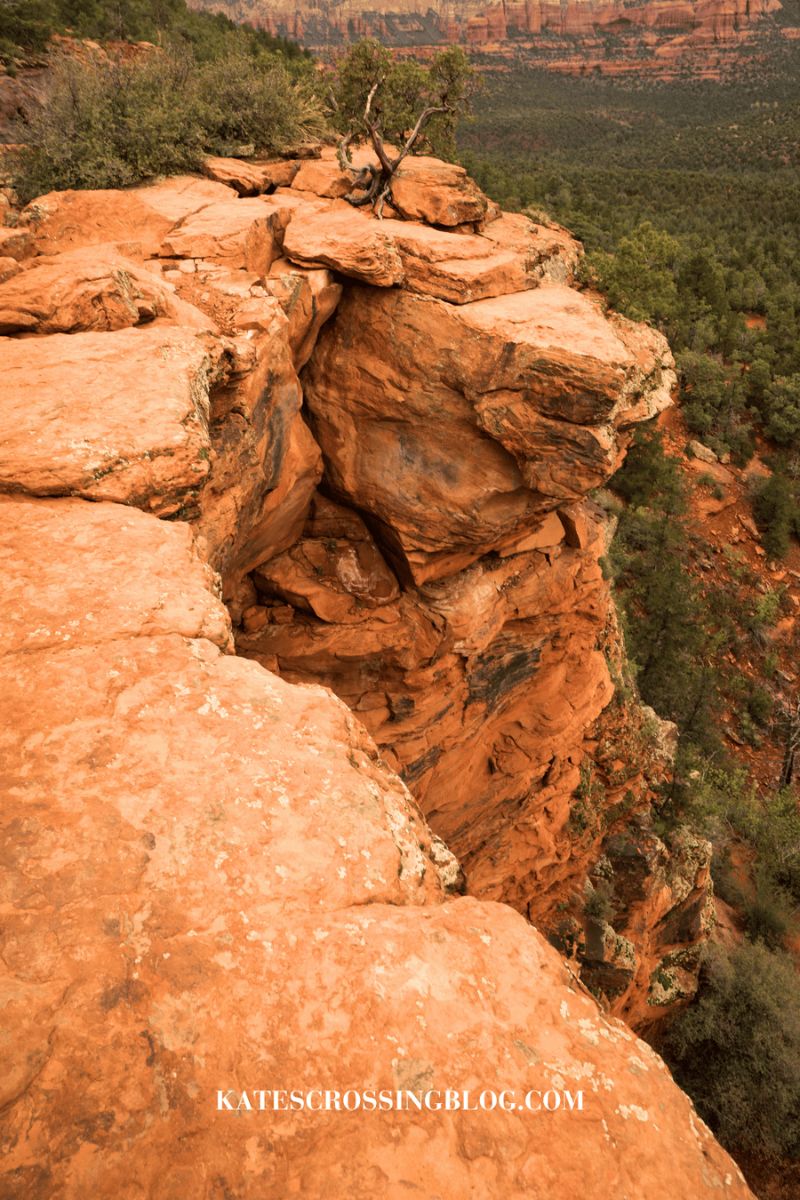
From this point on, the hike becomes more challenging as the trail starts climbing in elevation.
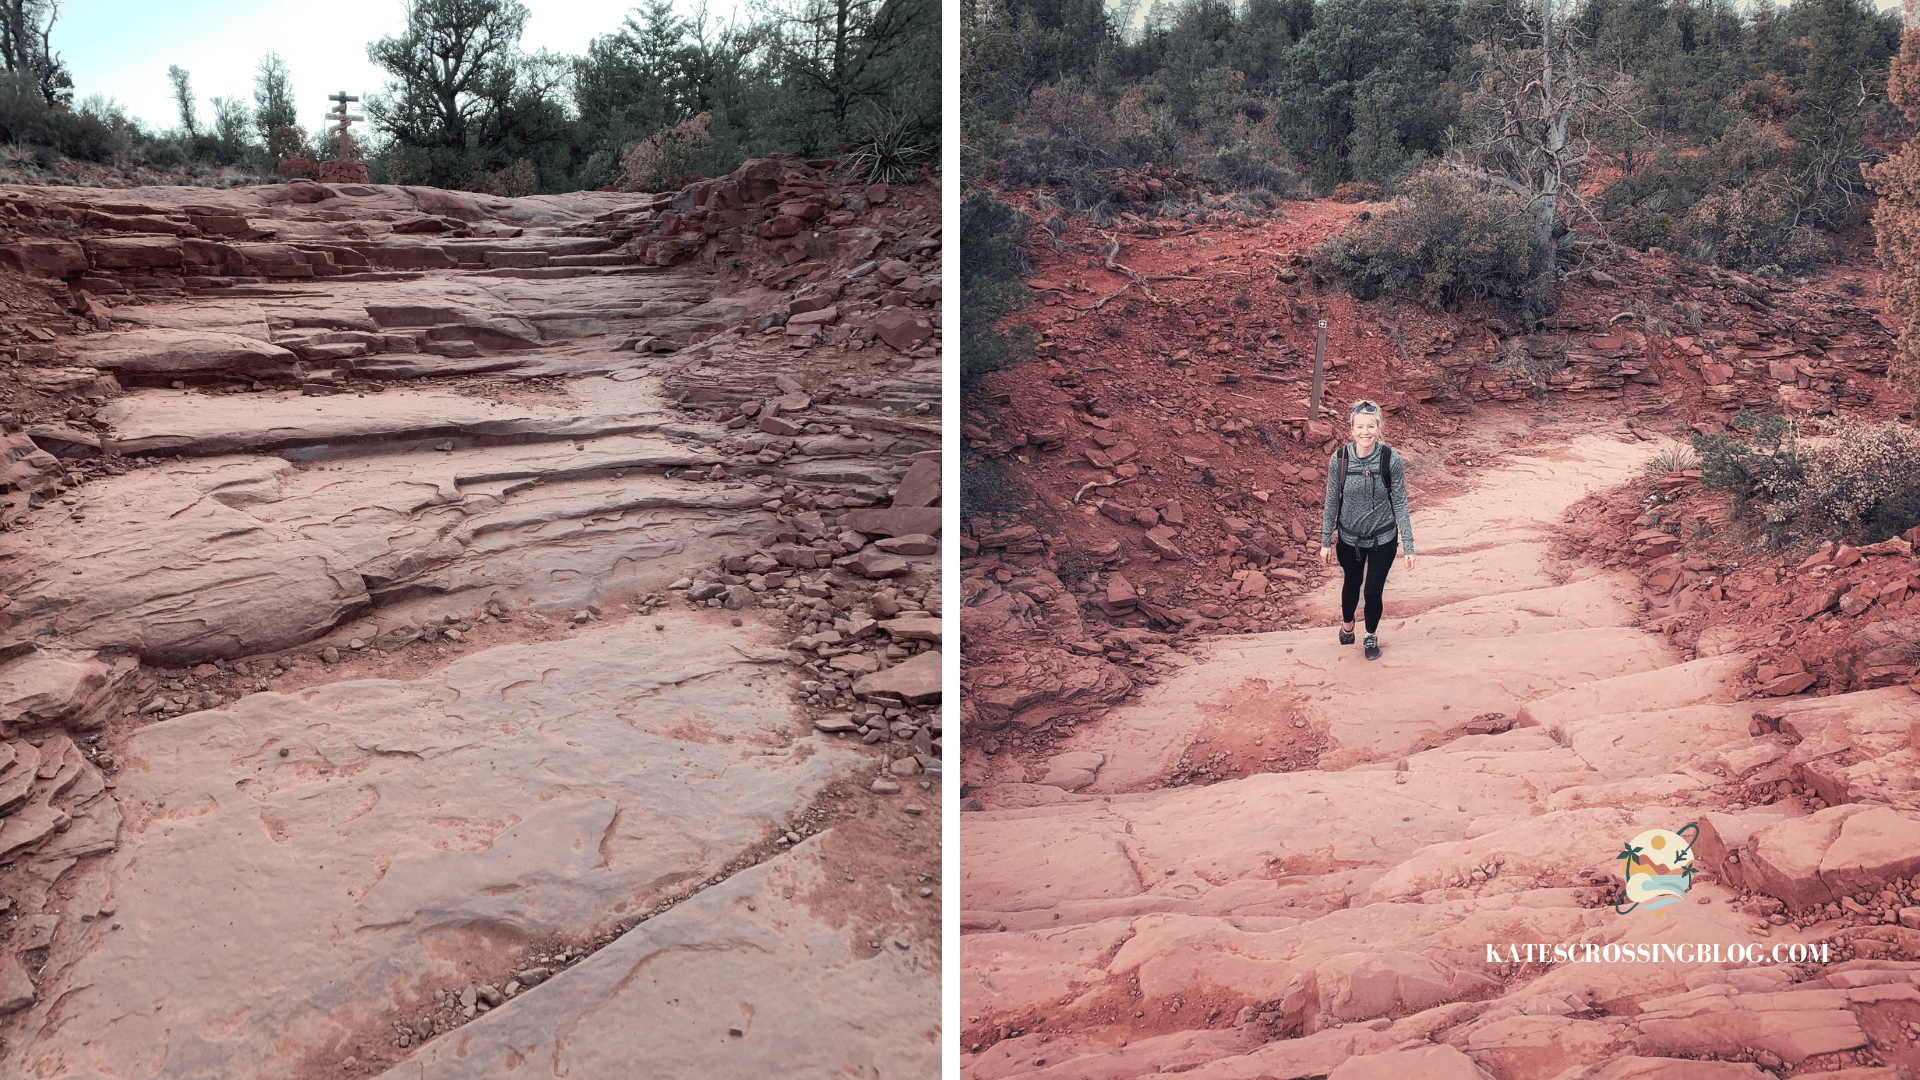
The Devils Bridge Trail begins as a wide, sandy wash before turning to the right and beginning the steep climb up a natural rock staircase.
You will need to be able to do multiple sets if you want to reach the bridge.
In some spots, you may even need to do some rock scrambling. The final stretch can be a bit daunting for some, but don’t rush. Take it at your own pace; it seems tougher than it really is.
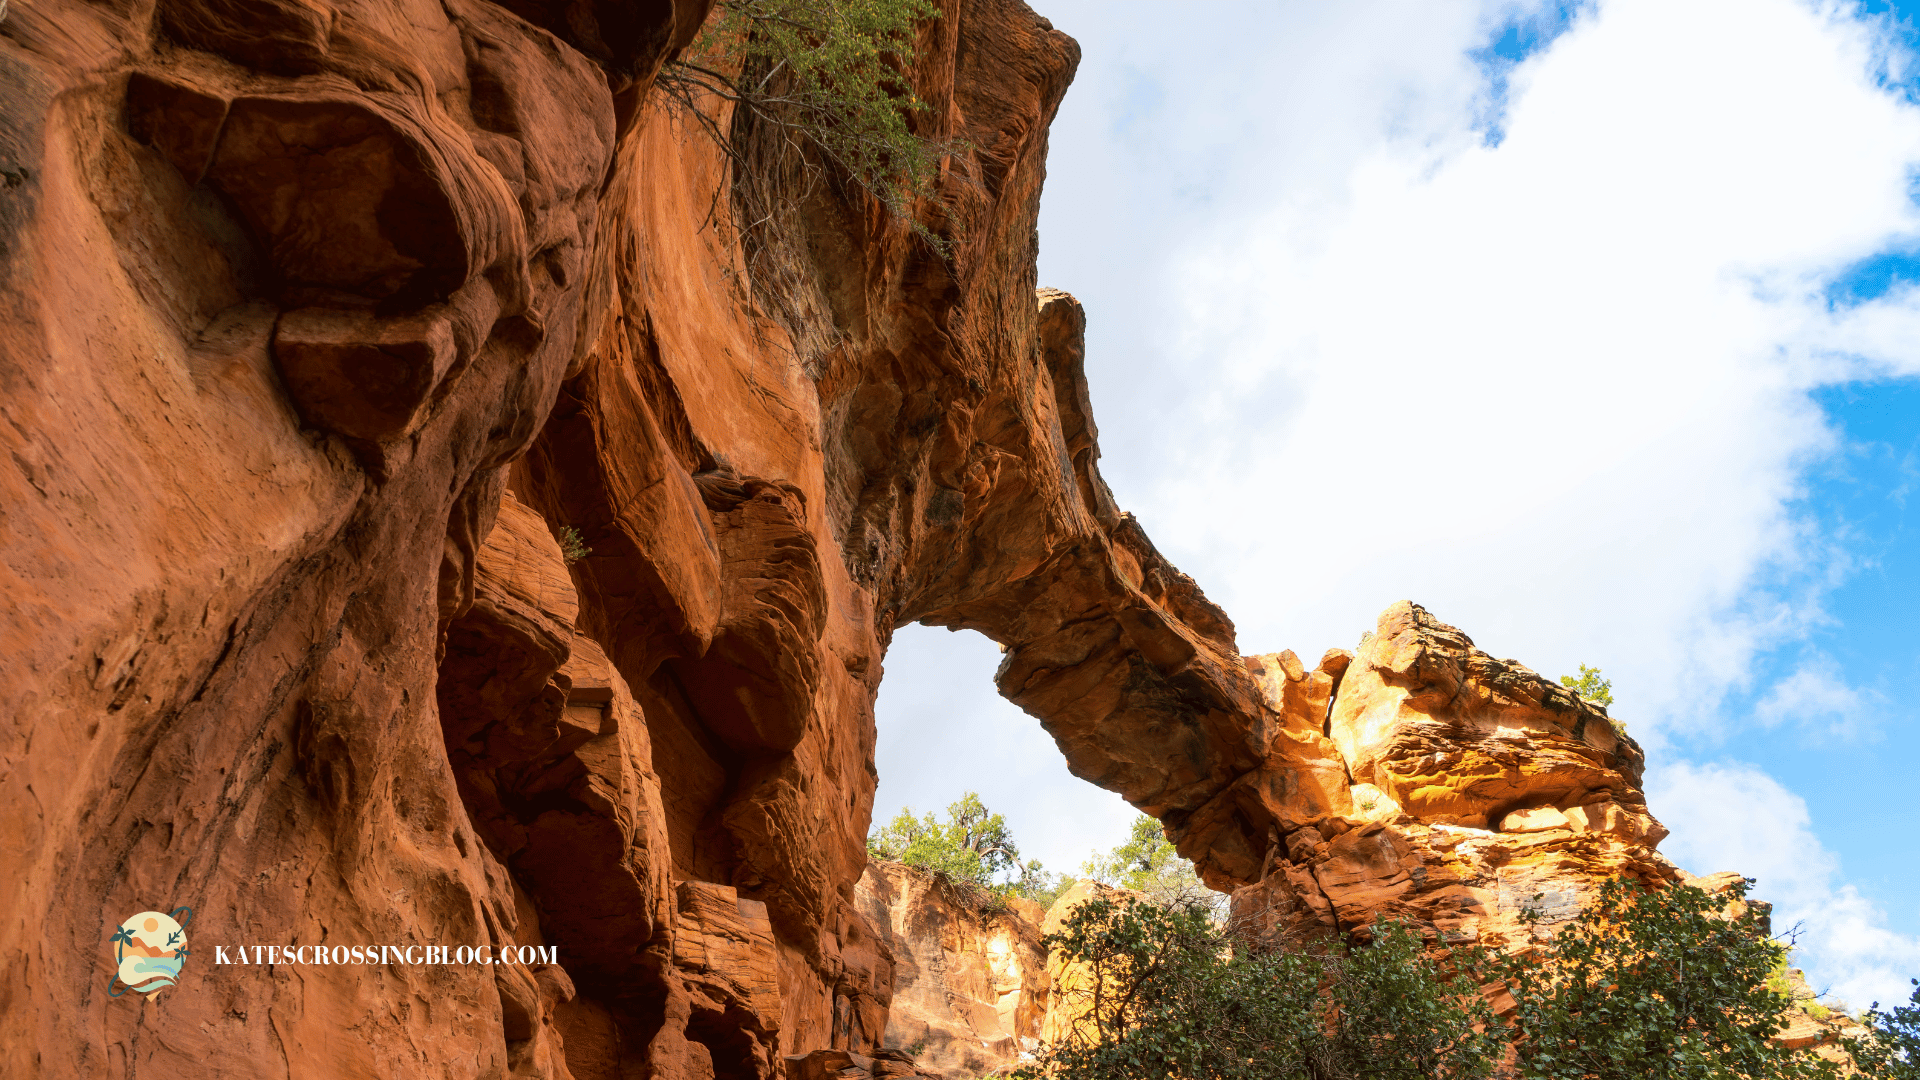
Thankfully, this section doesn’t last long. Once you power through it, you’re there! The Devil’s Bridge is waiting for you at the very end.
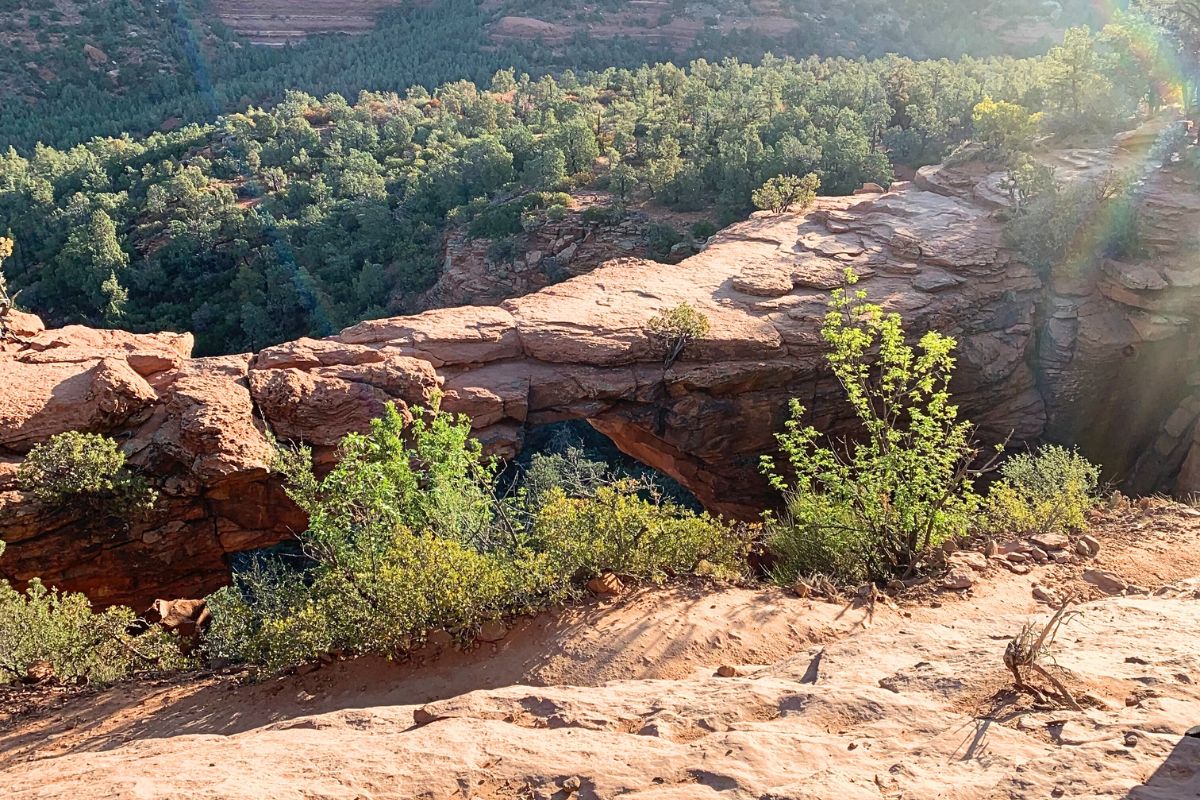
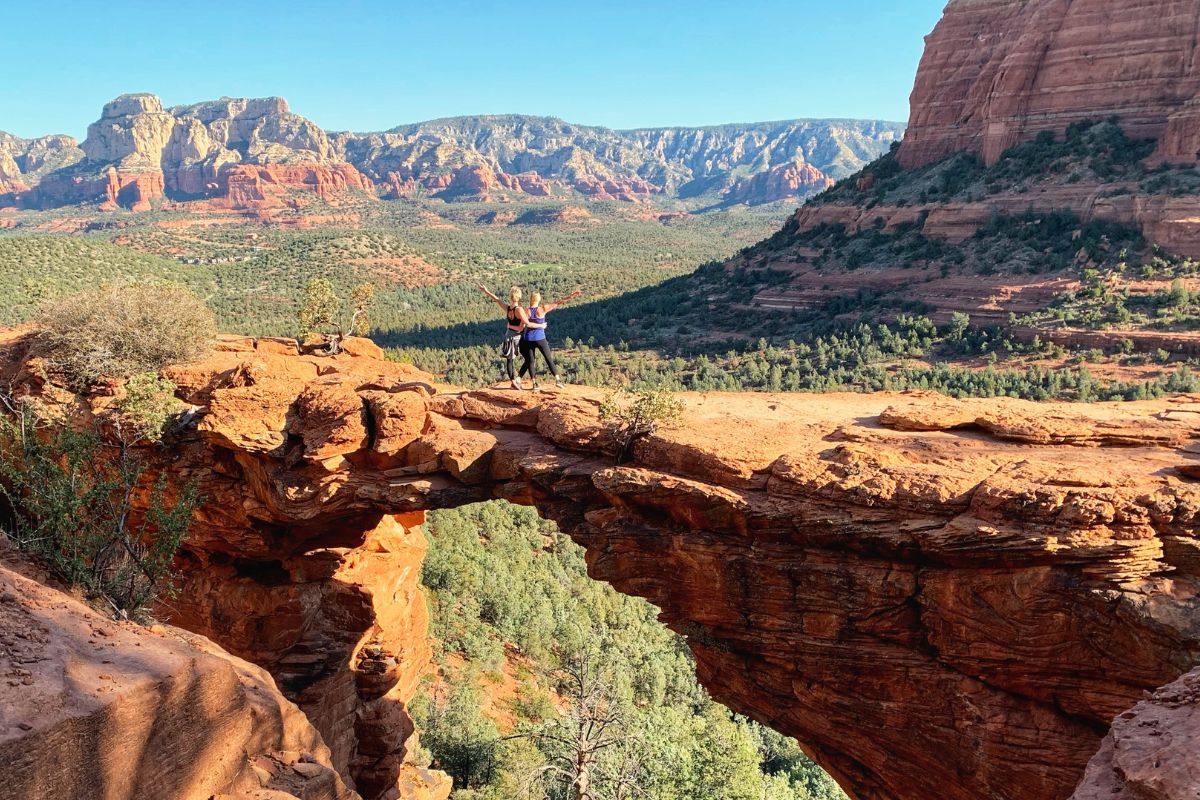
On Devil’s Bridge
Right next to the bridge, there’s a big, flat spot where you can sit, relax, and enjoy the view. It’s the perfect spot to wait for your turn to get your photo on the bridge.
I’ve heard of people having to wait for an hour or even longer just to step onto the bridge. For me, the wait was around 15 minutes. I headed up there before sunrise, and by the time I got to the bridge, there was only a handful of people.
If you go during the busy time of day, be prepared to wait if you want a photo on the arch! Since this is the most popular hike in Sedona, the odds of having the bridge all to yourself are zero.
Pro Tip: Get there first thing in the morning or come in the evening for sunset to lessen your wait time.
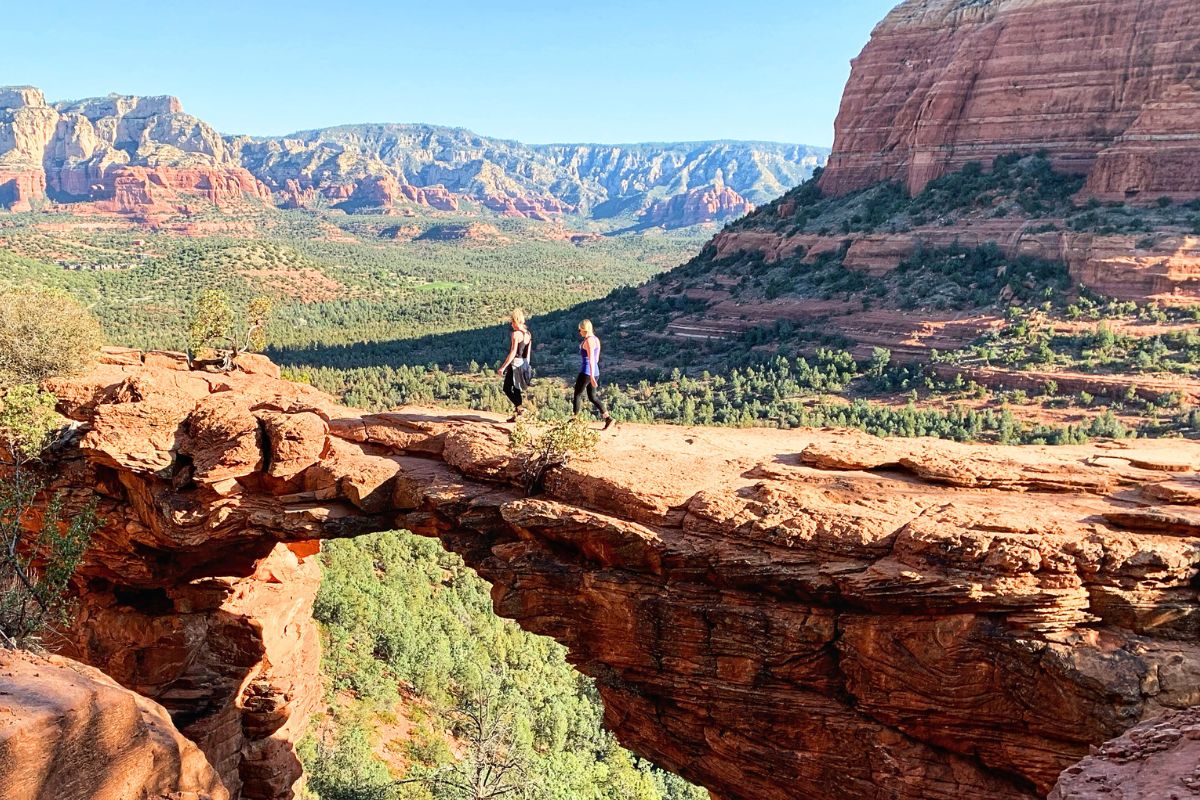
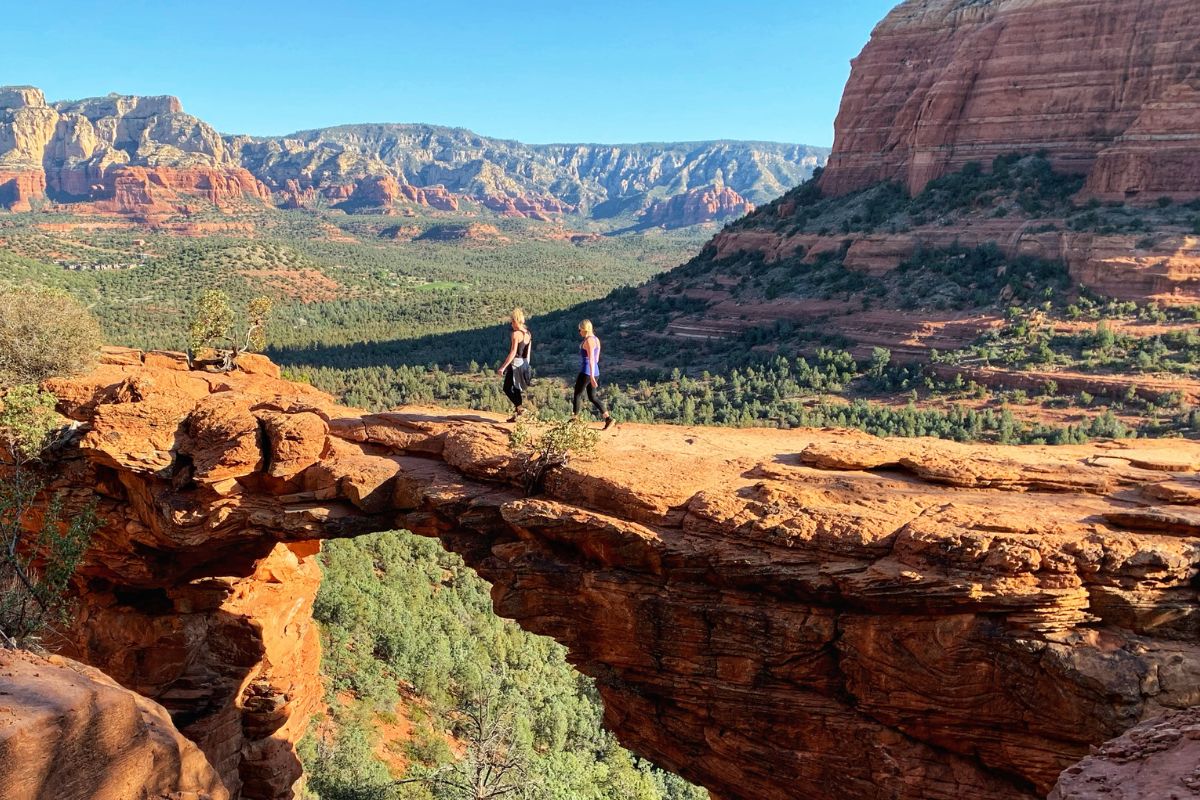
What makes Devil’s Bridge so appealing is the opportunity you have to walk across it.
From the photos I’d seen and even in person from the ground and side views, the bridge looks much more narrow than it is. Once you approach the bridge head-on, you’ll realize it’s actually quite wide.
I recommend walking across or at least standing in the middle for a unique experience.
Certainly, enjoying the bridge doesn’t mean walking on it, and if you have a fear of heights, you probably shouldn’t anyway. I’m not scared of heights, but being out there kind of gave me this weird sense of vertigo.
Friendly Reminder: While on the bridge, please avoid hogging it. Snap a few photos and promptly make room for others to enjoy the experience on the bridge. If you find you need additional shots, be considerate and wait your turn again. Let’s not add to the increasingly long wait!
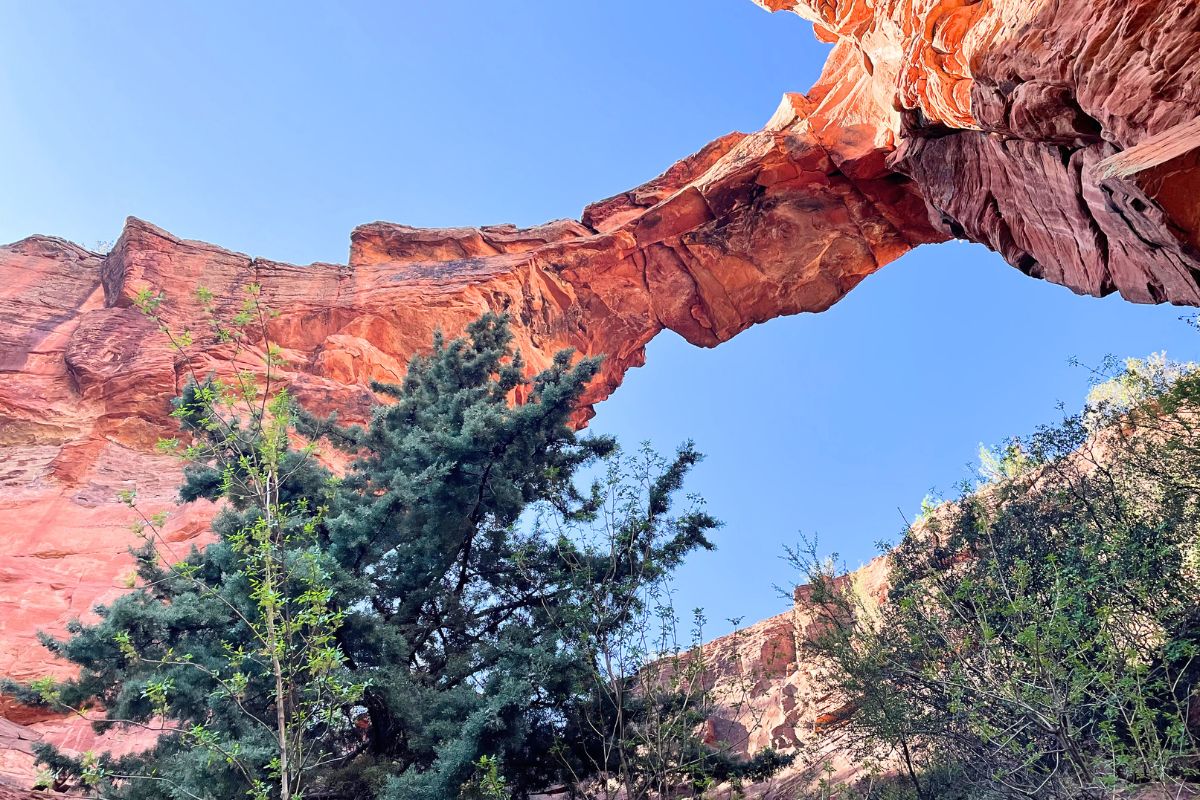
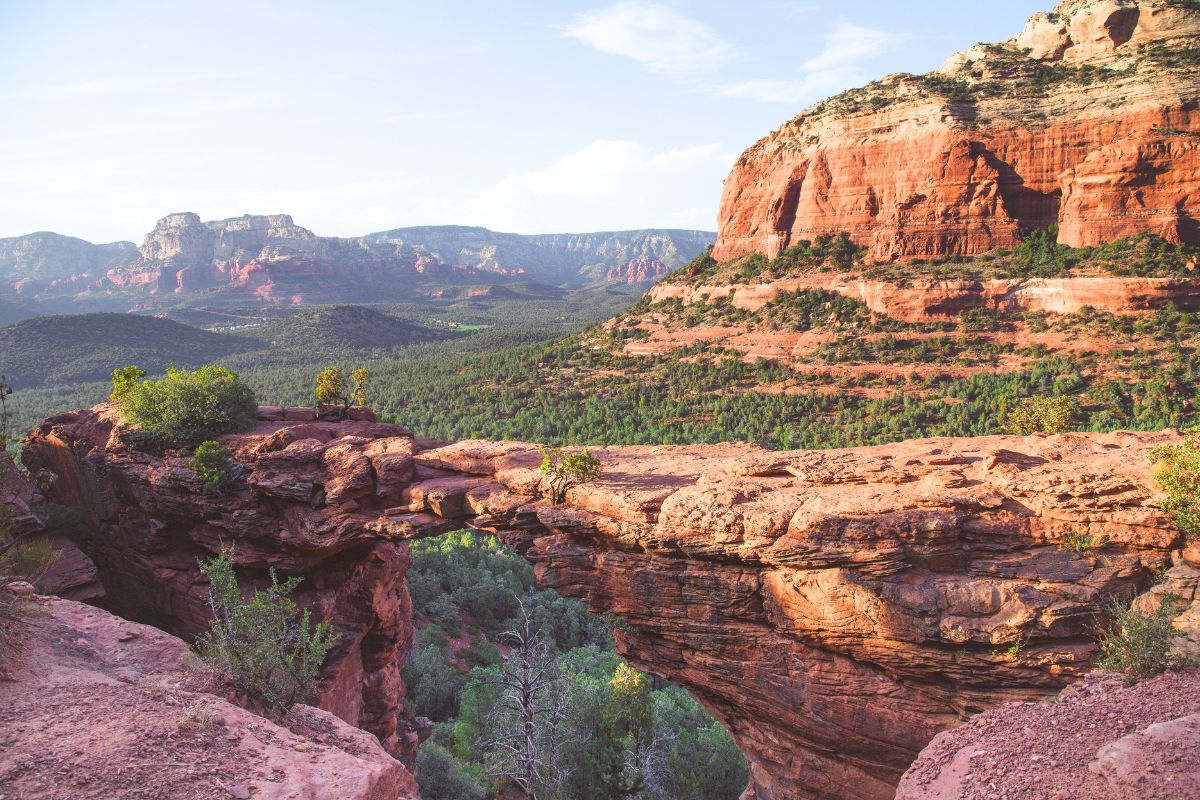
Secret Trail Below Devils Bridge
Don’t miss the best part!
The Devils Bridge Hike isn’t over yet!!
As you descend, keep an eye out for a small side trail to your right. This brief detour leads to a viewpoint directly beneath the arch, a hidden gem that often goes unnoticed by most. I find this perspective equally breathtaking, and chances are you’ll have it all to yourself.
Enjoy the solitude and unique perspective before you head out.
Safety Tips: Devils Bridge Hike
Before you set out on the Devil’s Bridge hike, it’s important to keep safety in mind. Here are some essential tips to ensure a safe and enjoyable adventure.
Hydration, Hydration, Hydration!
This trail offers no water and very little shade, so it’s crucial to be well-prepared. You should carry at least a liter of water for every hour you’ll be hiking, especially during the summer. Stay hydrated, and make sure you’ve packed enough to last the whole hike.
Sun Protection
Given the open exposure on the Devils Bridge hike, protect yourself from the sun. Wear sunscreen, a hat, and sunglasses to shield yourself from the Arizona sun.
Proper Footwear
Opt for suitable footwear when exploring the desert – sandals just won’t cut it. Trust me, you will want shoes with good traction.
Also, the desert’s got its share of pokey cacti and slithery friends. So, save the sandals for the beach and wear appropriate shoes that’ll keep you safe and on solid ground out there!
Watch Where You Put Your Hands
Sedona’s desert is teeming with insects and reptiles, some of which pack a poisonous punch. Keep your wits about you on the trail – watch where you’re putting those hands and feet, and give your surroundings a quick scan before you decide to park yourself. Can’t be too careful!
Don’t Build Cairns!
When you get up top, near the bridge, you’ll notice several cairns, those piles of stacked rocks. (see picture below) DO NOT build these!
These are essential trail markers set up by forest service staff to guide hikers on the trail. Building cairns where they shouldn’t be has been known to cause hikers to get lost by leading them on the wrong route. Besides, they aren’t natural, and we are supposed to leave no trace!
Leave No Trace
Respect the environment by packing out all your trash and adhering to the “Leave No Trace” principles. Help preserve the beauty of Devil’s Bridge for future hikers.

Best Time to Hike Devil’s Bridge Trail
With Sedona’s mild climate, there really isn’t a bad time to do the Devils Bridge Hike.
However, if you visit during the winter months, there’s a chance you’ll see the landscape with a sugar coating of snow. Which makes for really neat photos.
But heads up, summers can really crank up the heat, especially in the middle of the day. Of course, you can expect summer to be the busiest time to visit, with trails and sights being crowded. Especially the iconic Devils Bridge Hike!
For the best combo of mild weather and avoiding the masses, your best bet is visiting Sedona in the fall or spring. That’s the sweet spot – not too hot, not too crowded. Perfect for soaking in all those red rock wonders!
Essential Hiking Gear For Sedona
Having the right gear can make or break your hiking experience in Sedona. Here’s a list of essential items you should pack for a safe and enjoyable adventure.
Summer Gear:
Day Backpack
The Osprey Daylite Plus daypack is my top choice for day hikes! It’s small, but it is mighty! You’d be surprised at what I’ve fit in there! Whether you’re out on the trails or just exploring the city, this daypack will have your back!
Water Bottle
Trust me on this one – the Grayl filter water bottle is a must-have. It’s been a total game-changer for me, making sure I’ve got clean and safe drinking water wherever my adventures take me! After dealing with a nasty stomach bug in Peru, there’s no way I’m risking that again – hence, the arrival of this water bottle into my life!
Hiking Boots
I can’t recommend the Solomon X Utra 4 enough! It’s been my personal favorite for a while now! It’s got the kind of traction you’ll need for the trails in Sedona!
Sunglasses
I’m in love with Foldies Sunglasses! I’ve been wearing them for over a year now, and they are my go-to for traveling! They fold down three times and slide right into your pocket. Perfect for someone like me who loves keeping it light and easy!
Winter Gear:
Merino Wool Base Layer
I’ve been wearing my Smartwool Merino Wool Base Layer for YEARS. I swear by them! I adore how these keep me cozy even in the chilliest weather, and the best part? They’re odor-resistant! So, no stinking after sweating my way through a weekend of hiking in Sedona.
Waterproof Hiking Pants
Being wet is not my thing, be it from rain, snow, or sweating – it always leads to feeling cold. And you know what I dislike more than getting wet? Being cold! That’s why these waterproof hiking pants are fantastic. They not only keep me dry but also avoid turning into a sweat trap, unlike many others I’ve tried.
Other Popular Hikes to Do When Visiting Sedona
Ready to explore more of Sedona’s breathtaking beauty? Here are some other popular hikes Sedona you won’t want to miss during your visit.
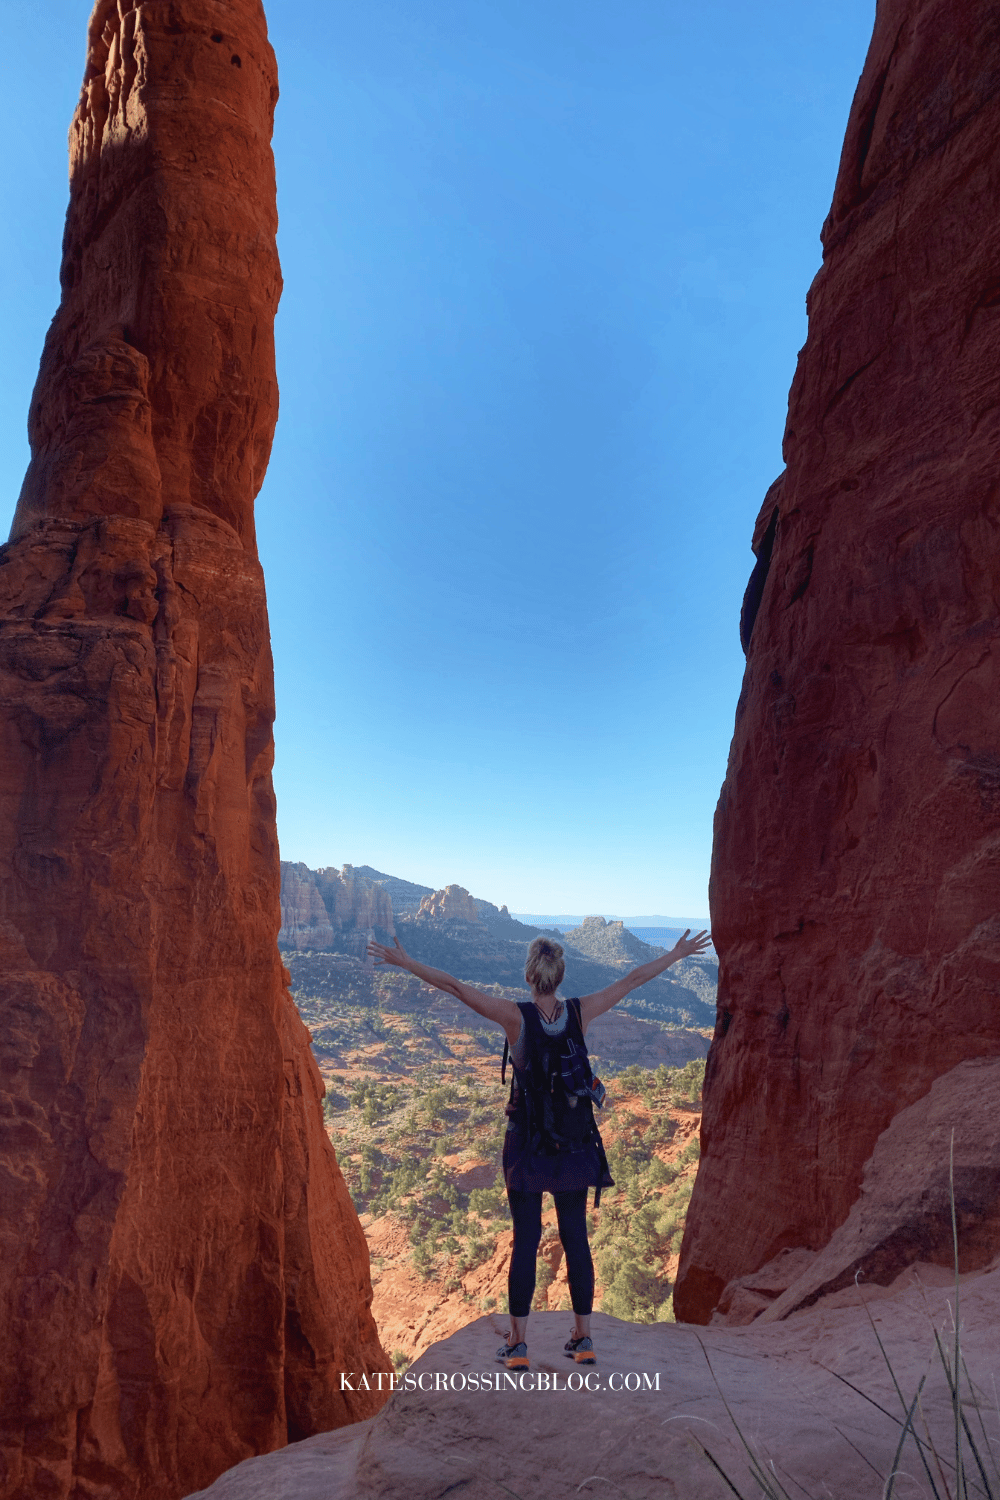
Cathedral Rock Hike
Length: 1.2 miles
Completion time: 1-2 hours
Arguably, the most popular hike in Sedona, the Cathedral Rock Trail, presents a thrilling challenge as it ascends over 700 feet in just half a mile. Be prepared for some rock scrambling and mild climbing, but the effort is well worth it.
Reaching the saddle of the butte unveils a breathtaking panorama, treating you to sweeping views of the iconic red rock formations that define Sedona’s landscape. Most popular at sunrise and sunset.
Soldier Pass Trail & The Hidden Cave
Length: 4.5 miles
Completion Time: 3 hours
Soldier Pass Trail is a relatively easy to moderate trail that takes you past unique geological features like the seven sacred pools, a giant sinkhole named Devil’s Kitchen, and the Soldier Pass Arch. At the end of the trail is a hidden cave for you to explore. Be careful because getting in can be a bit tricky!
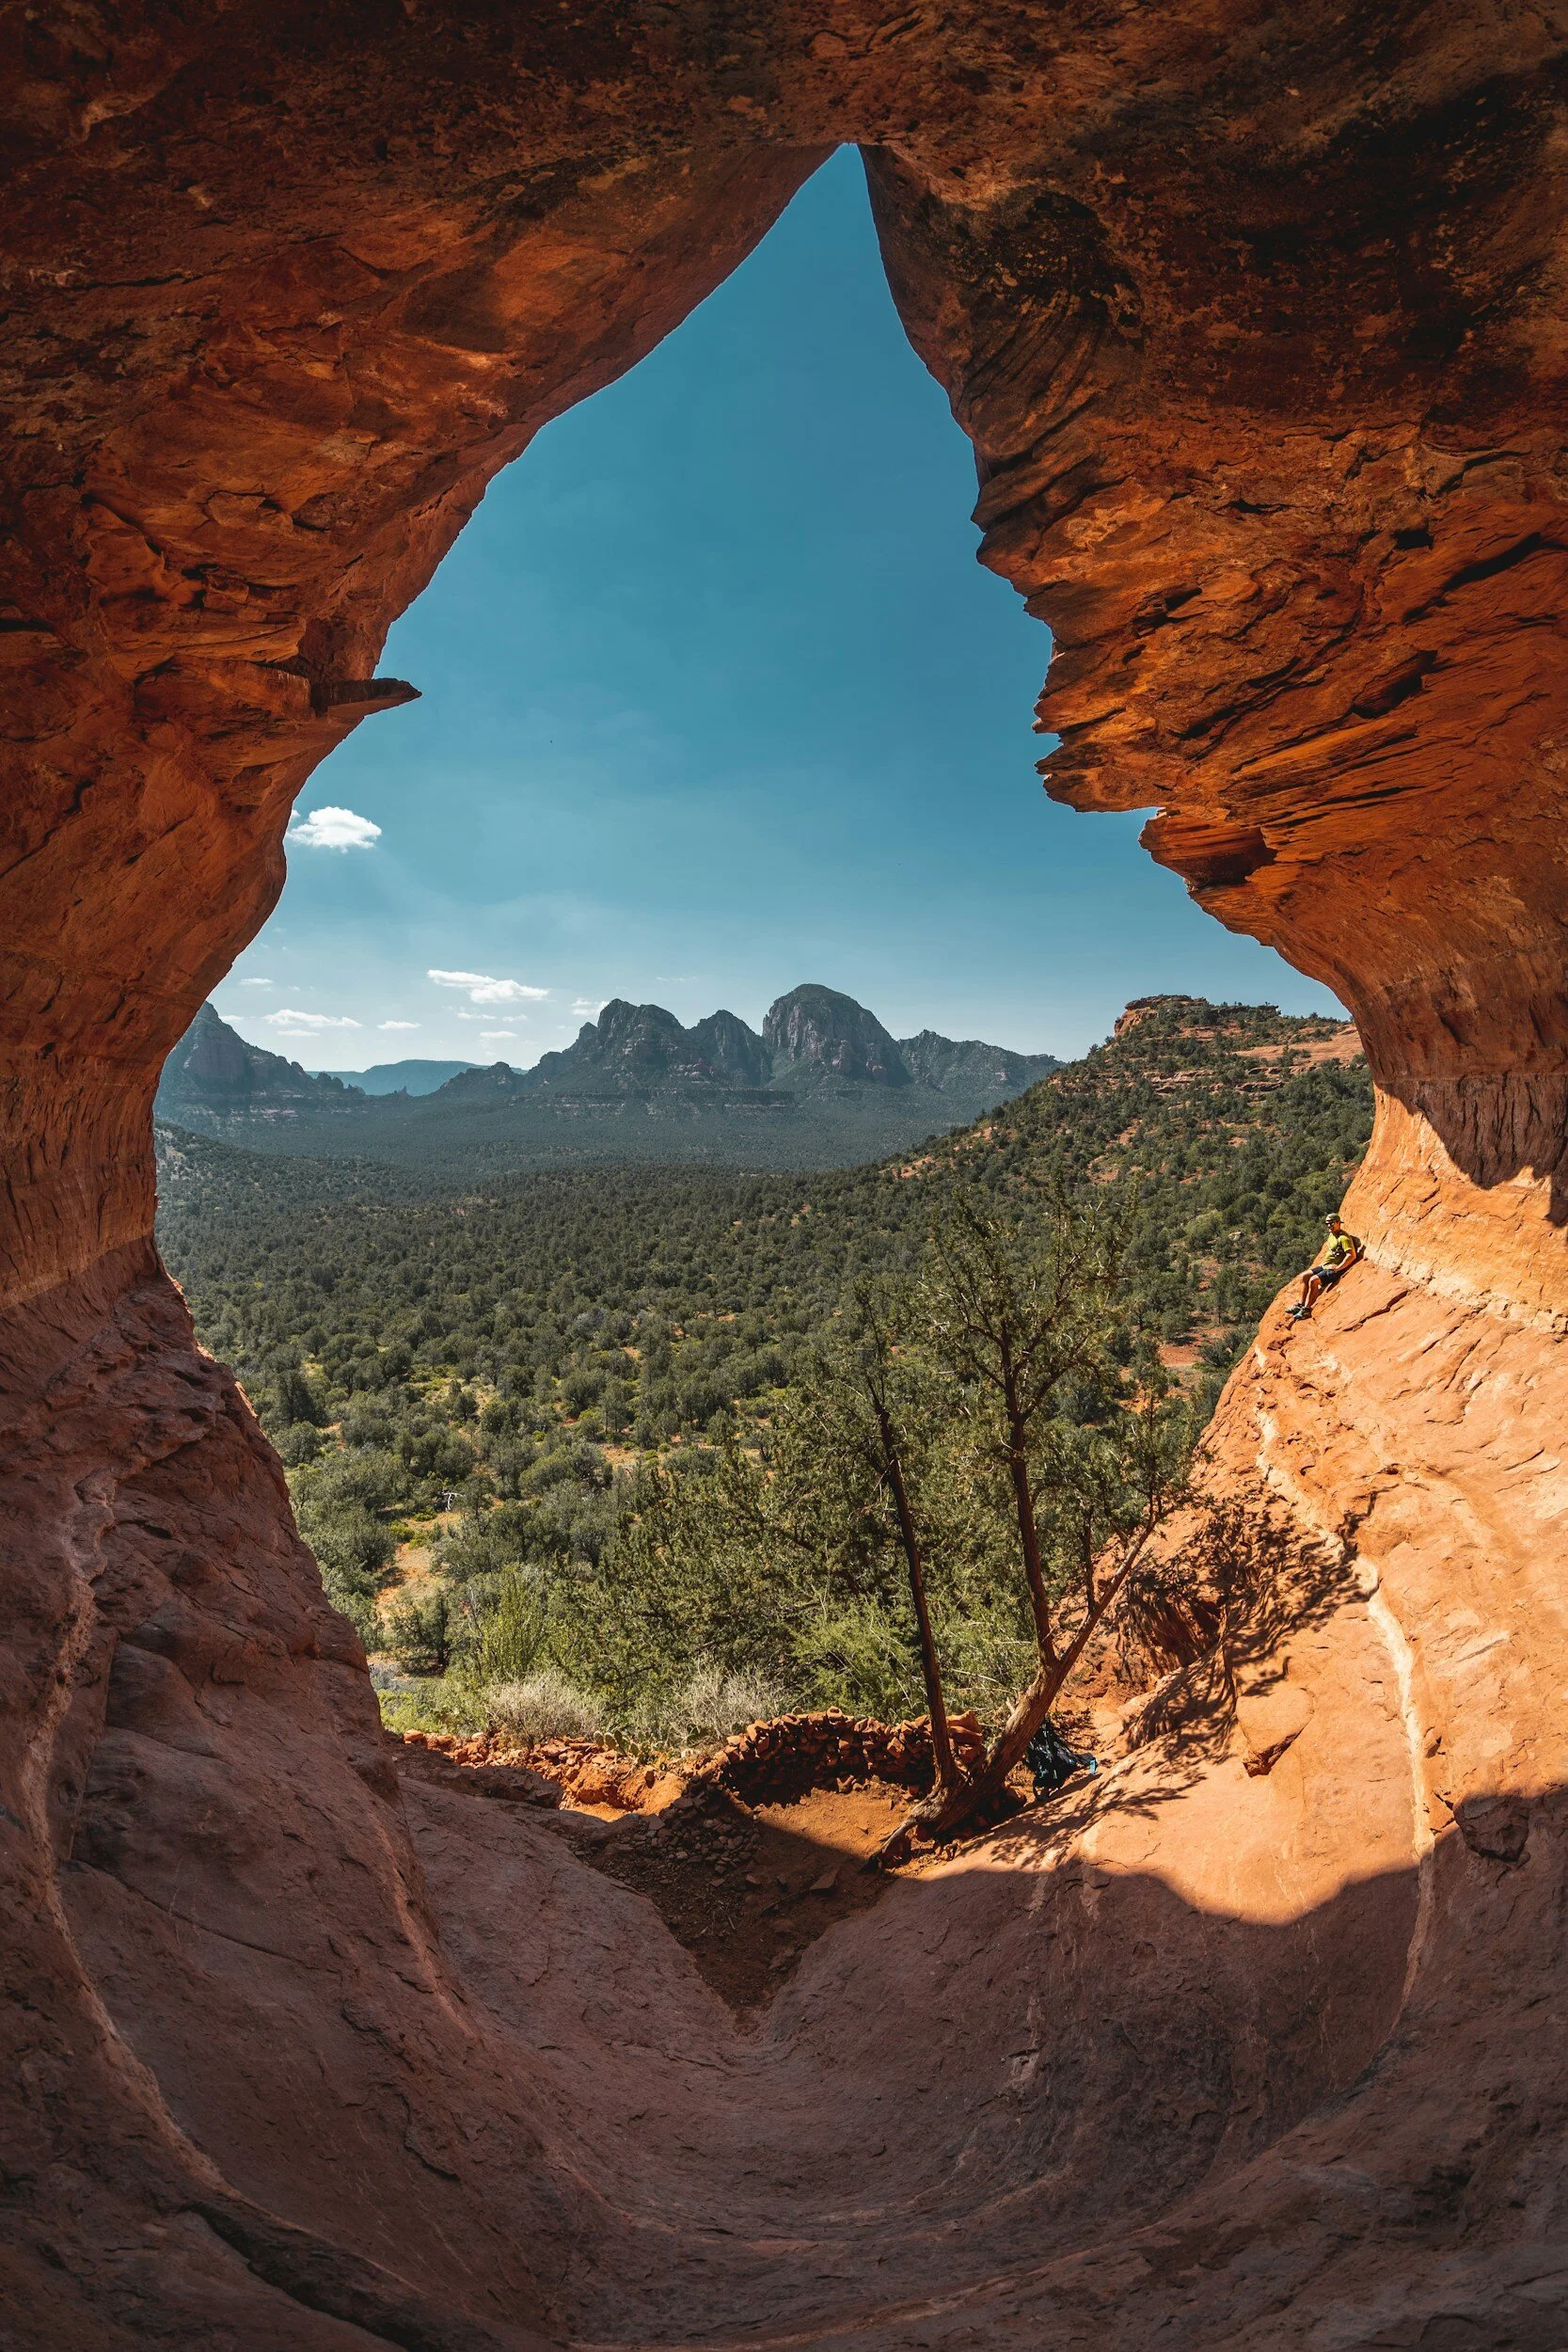
Subway Cave Hike
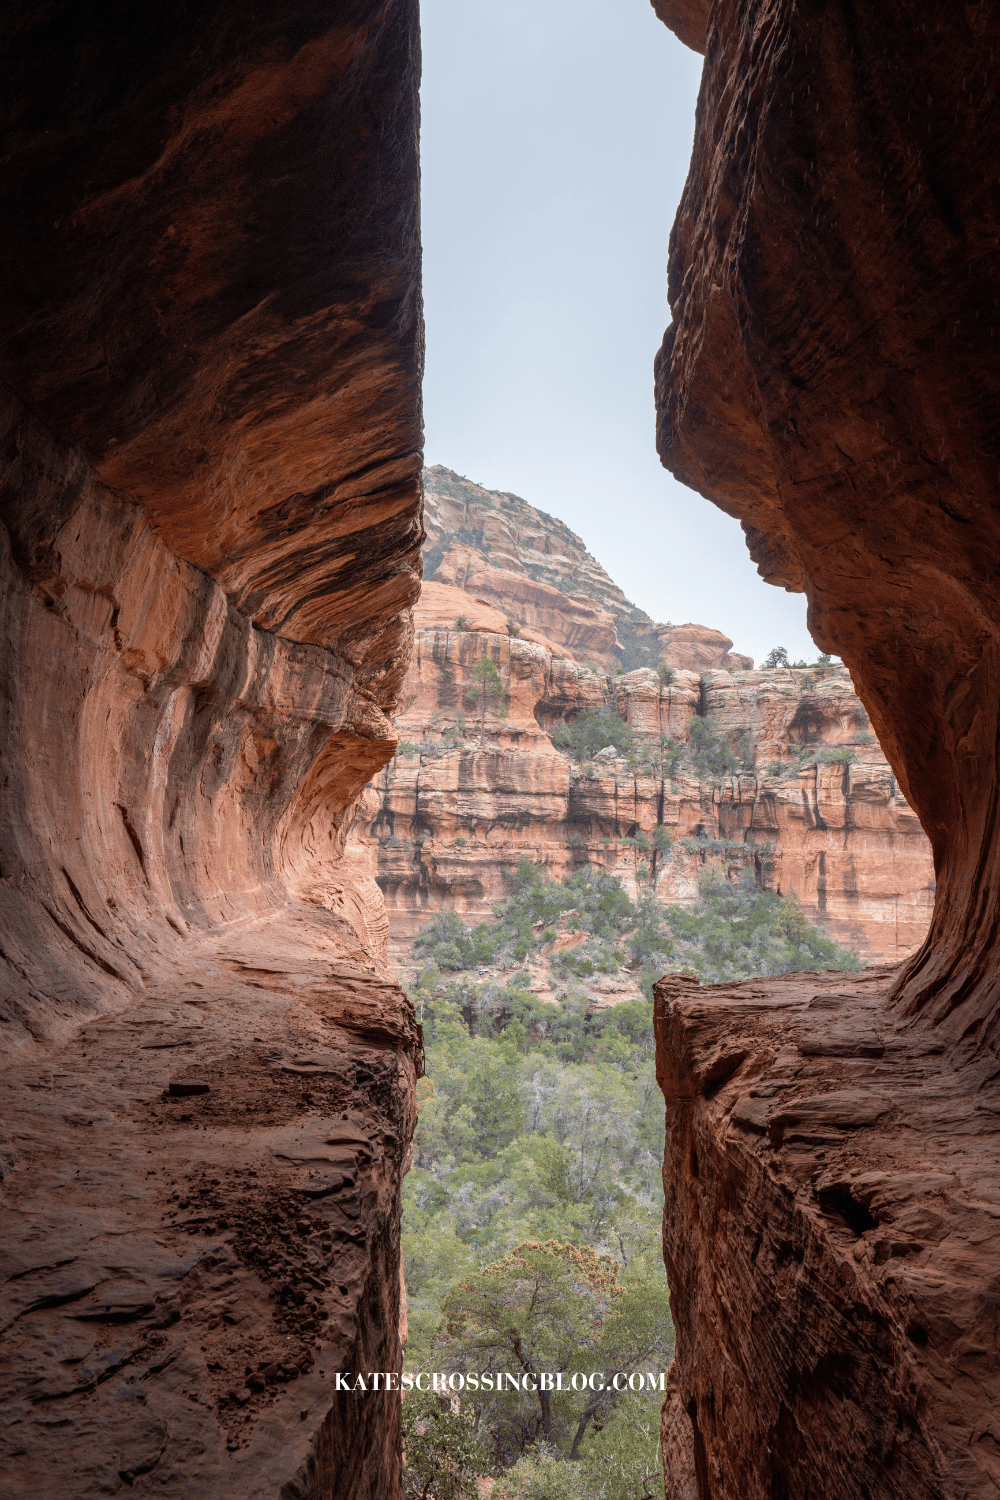
Length: 5.3 miles
Completion Time: 3.5 hours
The Subway Cave is a unique geological formation that makes for drool worth Instagram photos. Its popularity has been on the rise, drawing more and more visitors.
The trail leading to the cave is relatively easy, but getting into the cave involves either scrambling up a rock chute or opting for a slightly easier route around to the left. Be sure to walk around the ledge to visit some cool ruins.
Birthing Cave Hike
Length: 1.9 miles
Completion Time: 1.5-2 hours
The Birthing Cave is a unique diamond-shaped cave perched on a short cliff with amazing views of Sedona’s iconic red rocks.
Resembling the female anatomy, some believe it to be one of Sedona’s Vortexes emanating feminine and sexual energy. Given Sedona’s widespread popularity, you’d expect crowds to flock to this unique spot. Surprisingly, this trail has managed to stay somewhat off the radar!
If you’re looking for a break from hiking and want a list of other things to do, read my post, “29 AWESOME THINGS TO DO IN SEDONA BESIDES HIKING 2024.”
Best Resources to Help You Plan Your Trip to Sedona
Looking to make the most of your time in Sedona? Take a look at my article, Ultimate Sedona Itinerary for an Epic Weekend Getaway.
I’ve already picked out the Best Hotels in Sedona with a View, making your accommodation choice a breeze. If you want to save on your hotel, go ahead and book through Hotels.com or VRBO and start racking up that One Key Cash!
Just a heads up – score extra One Key Cash by booking your flights and car rental through Expedia. Use it for more travel adventures and discounts down the road!
Planning to spend a few days around Sedona and need more fun ideas? Explore GetYourGuide or Viator for exciting tours and activities. Plus, enjoy the peace of mind that you’ll get a full refund if plans take an unexpected turn.
Make sure you don’t forget anything with this complete Sedona Packing List.
FAQ’s: Devils Bridge Hike
Got more questions about hiking Devil’s Bridge? Here are the most common questions to help you plan your adventure.
What is the shortest hike to Devil’s Bridge?
For the shortest route, take the trail starting from Dry Creek Vista Trailhead and walk up the jeep trail. This makes it about 4 miles round trip.
How long does it take to do the Devils Bridge Hike?
Depending on which route you choose to take to Devil’s Bridge, plan on spending around 2 to 4 hours on the trail. Your pace and trail conditions can influence the duration.
Is it better to do Devils Bridge Hike in the morning or afternoon?
Many folks opt for mornings. The cool temps and the chance to catch a sunrise make it a top choice. And because of this, you can expect to share the trails and viewpoints with more fellow hikers. I’m in favor of evening hikes where there just aren’t quite as many people at the prime spots.
Do you have to pay to hike Devils Bridge in Sedona?
Nope, no fees to hike Devil’s Bridge. It’s open to everyone without an official entrance fee. However, if you do decide to park at the Dry Creek Vista Parking area, then you will need to purchase a Red Rock Pass. Parking at the Mescal Parking area is free!
Is the Devils Bridge hike scary?
While there’s a bit of elevation and a narrow section, most people find it quite manageable. The trail is mostly flat, except for the last 400 yards, where it ascends steep steps. Your comfort with heights and steep stairs will play a role in how you perceive this part of the hike.
Is Devil’s Bridge a vortex?
No. It is not a vortex hike. If you are looking for a vortex hike, consider hiking to the Cathedral Rock Vortex, Airport Mesa Vortex, or the Boynton Canyon Vortex.

That’s a Wrap: Devil’s Bridge Hike
The Devil‘s Bridge Hike may be the most popular and overcrowded trail in Sedona, but it’s still a must-see landmark.
So, lace up those hiking boots, work around the crowds, and let Devil’s Bridge captivate you with its natural beauty.
Enjoy your hike!
Catch ya later
Want more adventures? Follow me on Instagram and Facebook for the latest updates and travel tales! I’ll Love Ya Forever!!