Half Dome Packing List: Gear You Can’t Forget
What do you really need to pack for one of Yosemite’s most epic—and dangerous—day hikes?
If you’ve landed here, chances are you’re staring down the Half Dome Packing List, wondering if you’ve covered all your bases. Trust me, you don’t want to get halfway out on this grueling trail only to realize you forgot something essential.
Half Dome has been on my bucket list for years, and when I finally scored a permit, I immediately dove headfirst into researching what I’d need for this epic hike. The more I read, the more I realized this isn’t your average hike—people have actually died attempting it.
I wanted to be as prepared as possible, so after testing gear, checking recommendations, and making the climb myself, I’ve put together a list of exactly what I packed, plus a few bonus items I found surprisingly helpful.
In this post, you’ll find a trail-tested Half Dome Packing List that includes all the essential gear, clothing, hydration, and food you’ll need for a successful summit.

Ultimate Half Dome Packing List And Gear Recommendations
This is the exact list of gear I brought with me, plus a few extra things I found super helpful (or really wish I had). Hopefully, this saves you the trial and error!
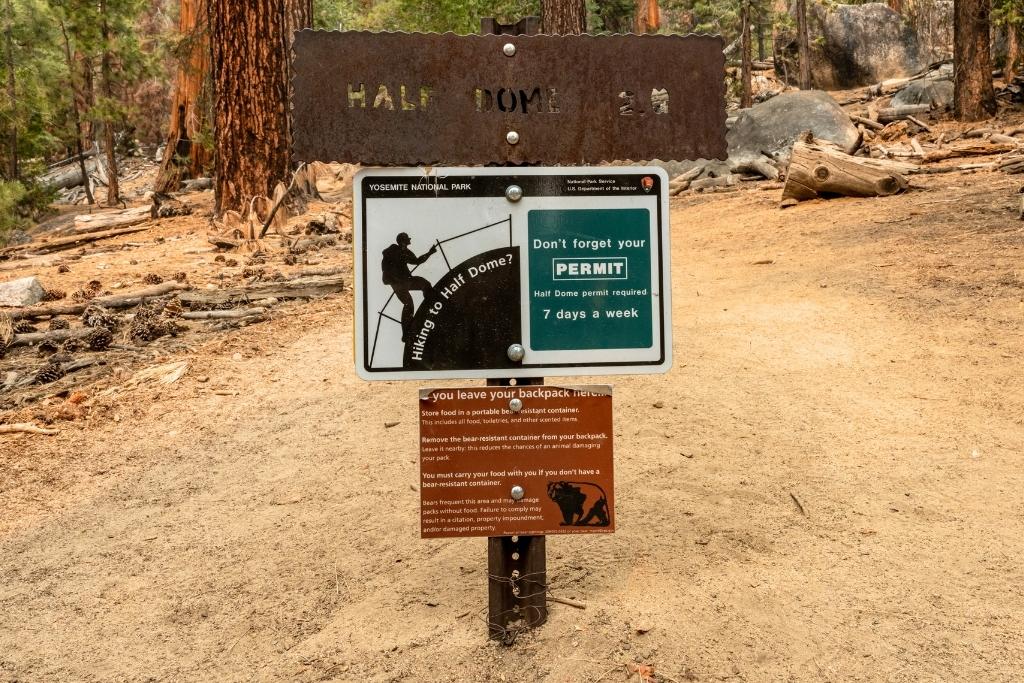
Hiking Permit & Photo ID
This seems like a no-brainer, but you’d be surprised how many people forget their permits! The rangers do check.
Also, be sure to have a hard copy of the Half Dome hiking permit!
Having it saved on your phone isn’t enough. What if your phone dies? It’s such a small thing, but if you can’t show it, you won’t be allowed to pass! Don’t risk it!
Hiking Gear For Half Dome
Daypack with Hip Straps – A good daypack is non-negotiable. Look for one with padded hip straps to help distribute the weight—it makes a huge difference over 14+ miles.
Trekking Poles (recommended) – I didn’t use mine the whole time, but they were great for the steep downhill sections and helped save my knees. Definitely worth bringing if my opinion!
Headlamp – If you’re starting before sunrise (which I recommend), a headlamp is a must. Even if you think you’ll finish in daylight, things don’t always go as planned.
Navigation- AllTrails – I downloaded the AllTrails map for offline use ahead of time. Service is spotty in Yosemite, so having this on hand gave me peace of mind.
Emergency Device (recommended) – I carried a Garmin InReach Mini just in case. You probably won’t need it, but knowing I had a way to call for help if something went wrong made me feel a lot safer.
Battery Pack (recommended) – Between using AllTrails, taking photos, and tracking time, my phone battery drained faster than usual. Bring a small portable charger—you’ll need it.
First Aid Kit – Nothing fancy, just the basics: blister care, band-aids, ibuprofen, and athletic tape. Even a small kit can come in handy fast.
Neck Fan (optional) – Okay, this one is a little extra, but hiking up the granite switchbacks in full sun was brutal. I brought a small rechargeable neck fan, and it felt like luxury on the exposed sections. I always hike with one!
Water/Hydration
Bring more water than you think you’ll need! There’s a lot of elevation gain and exposed sun, and once you pass the last water source near Little Yosemite Valley, that’s it—no refills.
Recommended 4 L Water – I brought just over 4 liters and drank almost all of it. It might sound like overkill, but trust me, you’ll need it—especially on hot days.
Water Storage— Bottles or a Hydration Bladder – I used a 3-liter hydration bladder and carried an extra 1-liter bottle. The bladder was super convenient for sipping on the move without having to stop and dig around in my pack.
Water Filter (recommended) – If you don’t want to carry all your water from the start, bring a lightweight filter so you can refill at Merced River or near Little Yosemite Valley. Just know that beyond that, there’s nowhere to filter.
Electrolyte Packets – These were a game-changer. I added a packet to one of my water bottles and sipped it during the steepest parts of the hike. It helped keep my energy up and warded off that drained, dehydrated feeling.
Hiking Clothes
Layers are everything on Half Dome. The temps can swing wildly from chilly mornings to blazing hot afternoons.
Hiking Pants or Shorts – I wore lightweight leggings with pockets for sun protection and mobility, but shorts work, too, if you prefer less material. Just make sure whatever you choose is breathable and quick-drying.
Hiking Sun Shirt or T-shirt – I went with a long-sleeve sun shirt for added UV protection, but a moisture-wicking t-shirt works if you’re layering with sunscreen. Avoid cotton—it holds moisture and takes forever to dry.
Sports Bra Tank Top – I love this supportive sports bra tank top and layered it from there, depending on the weather.
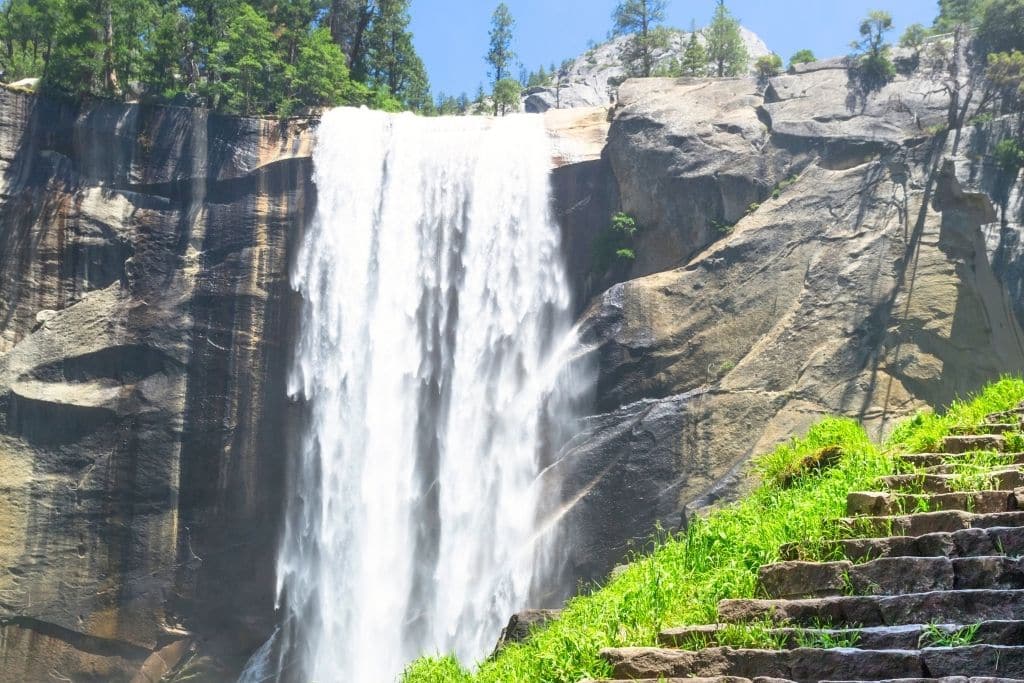
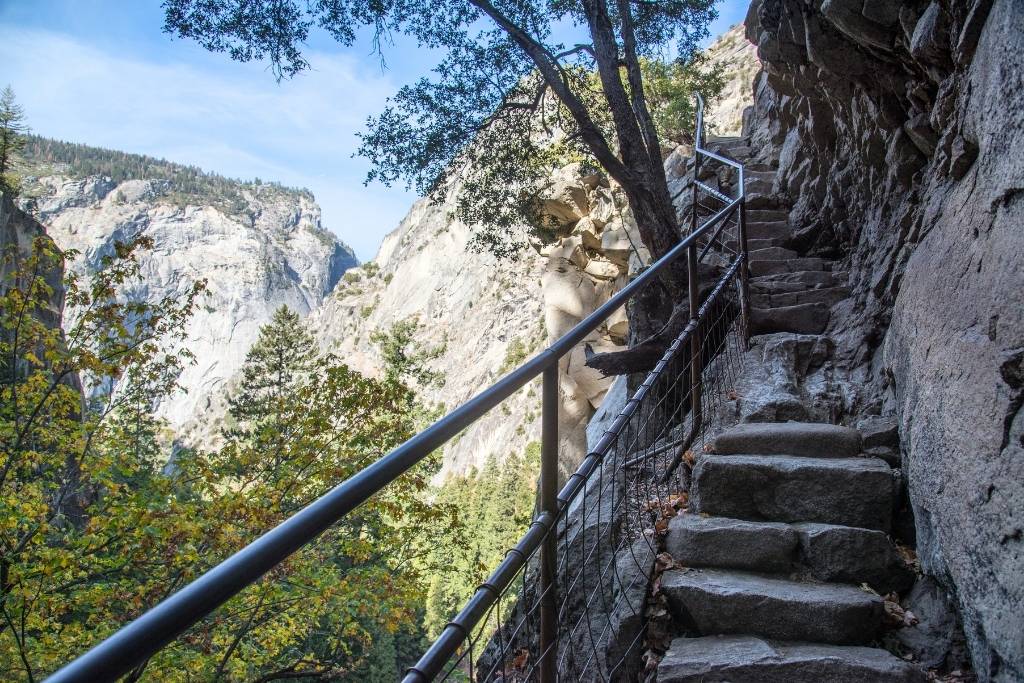
Rain Jacket/ Poncho – The Mist Trail lives up to its name, especially during the spring, and you’ll get absolutely soaked from Vernal Falls. I saw people without ponchos drenched to the bone and shivering—don’t be that person.
Light Jacket – I threw on a light fleece jacket for the early morning start, and at the summit—it was chilly up there. A lightweight, compressible jacket is perfect for quick warmth without bulk or weight.
Sunglasses – You’ll want good sun protection, especially on the granite where the sun reflects like crazy.
Hat – A wide-brimmed or baseball hat will go a long way in keeping the sun off your face and neck during those exposed stretches.
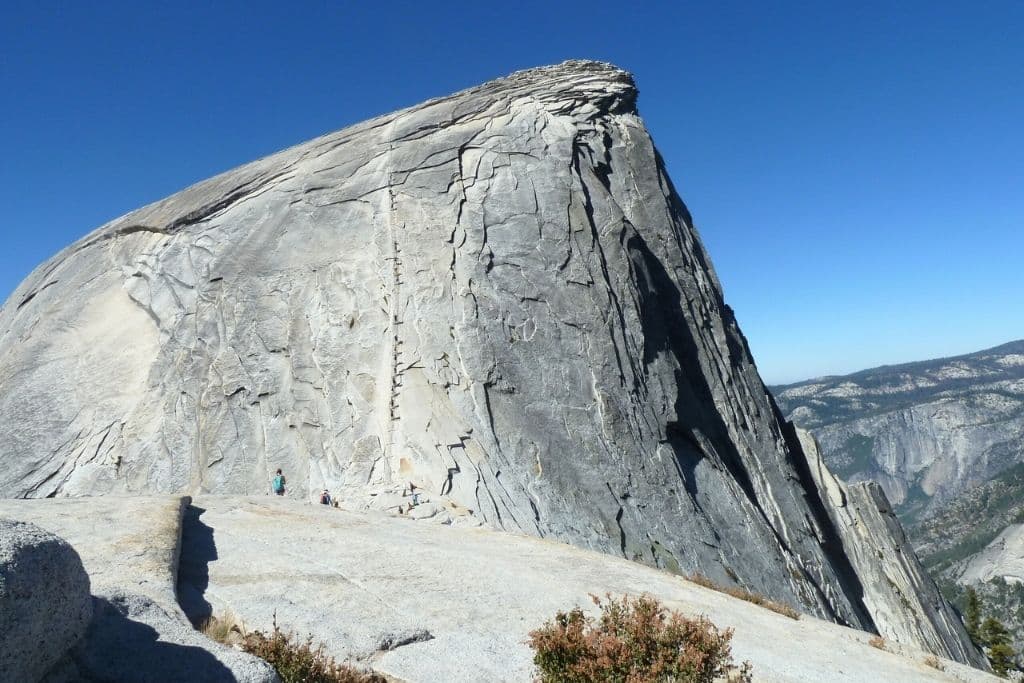
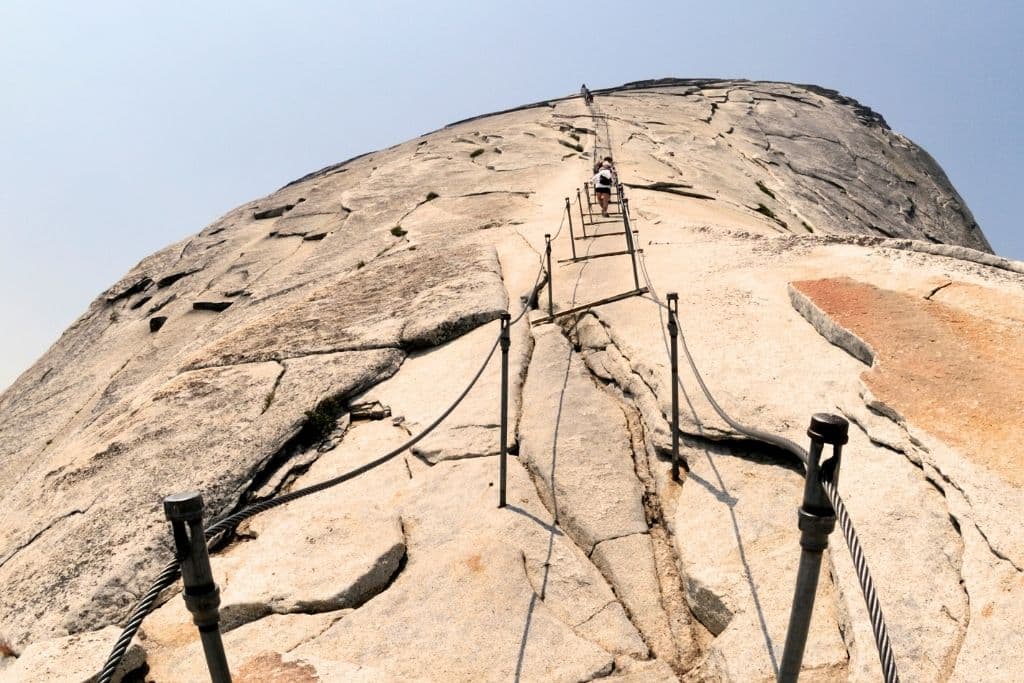
Gloves for the cables – These are a must! I used grippy biking gloves with good palm padding, and they made a huge difference on the climb. Don’t skip them!
Hiking Boots/Shoes with good traction – You need solid traction for the granite—no exceptions. I wore my Solomon hiking boots with sticky soles, but lightweight hiking shoes work, too if you don’t need ankle support.
Merino Wool Hiking Socks – These are my favorite hiking socks, which keep my feet dry and blister-free.
Hygiene Items
You won’t find any bathrooms after the first mile into the trail, so staying fresh (or at least not miserable) takes a little planning. These small items made a big difference in how I felt during and after the hike.
Sunscreen – Absolute must. You’ll be exposed to direct sunlight for hours—especially on the cables and subdome. The sun is brutal on this hike!
Baby Wipes – A quick wipe-down at the end of the hike is a game-changer. They’re also handy if you get dusty, sweaty, or have a mid-trail mishap.
Hand Sanitizer – A small bottle of hand sanitizer is nice to have before you eat your lunch on the trail.
Pee Rag – If you’re not familiar, it’s basically a reusable cloth for when you need to pee in the woods. It cuts down on toilet paper waste and is surprisingly convenient once you get used to it. Don’t worry it’s not gross!
Sweat Towel – I packed a small microfiber towel to wipe off sweat—it doubled as a clean place to sit during breaks and didn’t take up much space.
Ziplock Bag – Necessary for packing out any of your waste tissue or keeping your pee rag in. Please leave no trace!
Food & Snacks
Half Dome is an all-day adventure, and you’ll be burning a ton of calories—like, a lot. Bringing the right food keeps your energy up and your mood in check (hanger is real on the switchbacks!).
Main Hiking Meal – Think something that won’t get squished or spoil—PB&J, salami wraps, or even a cold burrito can hit the spot around lunchtime.
Lots of High-energy Snacks – I grazed all day on trail mix, protein bars, dried fruit, jerky, and peanut butter pretzels. Aim for a mix of quick sugar and sustained energy—your body will thank you around mile 10.
Trash Bag Ziplock – Bring a large ziplock to stash all your food wrappers and any other trash. The squirrels in Yosemite are aggressive, so seal it up tight and keep it packed away.
Things Not to Pack on The Half Dome Hike
When you’re hiking 14+ miles with serious elevation gain, every ounce matters.
Here are a few things I recommend leaving behind. You either won’t need them, or they’ll just weigh you down.
Cotton Clothing – Cotton holds onto sweat and takes forever to dry, which can leave you cold, clammy, and uncomfortable. Opt for moisture-wicking fabrics that dry quickly and breathe better.
Anything you haven’t tested before – Your Half Dome hike is not the time to try out brand-new boots or untested gear. If you haven’t worn it or used it on a hike before, leave it out—you don’t want surprises halfway up the cables.
Unnecessary gadgets – You don’t need big cameras, extra lenses, or fancy gear you’ll barely use. Keep it simple—focus on the experience, not the tech.
Large backpacks – A bulky, heavy pack will slow you down and tire you out way faster, and you’ll have a harder time passing others on the steep cables. It’s already tight, so don’t make it worse for you and everyone else.
Slippery Shoes -This one’s a safety issue. Smooth-soled sneakers or worn-out trail runners are a bad idea—especially on the granite dome. Make sure your shoes have solid grip and good tread.
Tips For Hiking Half Dome
- Start early—like, really early! Hitting the trail before sunrise helps you beat the heat, the crowds, and gives you plenty of time to summit and return safely.
- Check the weather and avoid attempting the cables in rain or thunderstorms—granite and metal do not mix well with moisture or lightning.
- Pace yourself! It’s tempting to push hard early to get to the top before the crowds, but this is a marathon, not a sprint. Keep a steady pace and take short breaks when you need to.
- Bring plenty of water and snacks! You’ll be out there for 10–12+ hours, burning serious calories. Staying fueled and hydrated makes a huge difference in your energy and mood.
That’s a Wrap on The Half Dome Packing List
I hope this Half Dome Packing List takes the guesswork out of what to bring and helps you feel fully prepared for the adventure ahead. After hiking it myself, I can tell you—it’s tough, but totally worth it with the right gear.
Catch ya on the next adventure!